DIY Christmas Drink Stirrers

ok, I know I'm a little ahead of the game here, but I'm just too dang excited. IT'S ALMOST CHRISTMASSSSSSSS. I've been waiting all year for the holiday season to roll around again, partly because I have all these great Christmas DIY projects I've been wanting to show you. I figured we'd start it off easy with these Christmas drink stirrers so that we can start swizzling those Christmas cocktails and get in the holiday spirit, amiright? 

These Christmas stirrers are super easy and super affordable. You can make them in your choice of colors, but I'm always a fan of pink so I chose a more modern color palette. I had actually made these last year for the blog, but the photos came out SO BAD that I couldn't bring myself to post them (see them here). So, I knew they had to be my first project this year. I gave them a slight makeover and a new color scheme, and voila! Ready to go.

Want to get into the Ho-Ho-Holiday spirit? Grab these drink stirrers for your Christmas spirits (hah, see what I did there?!) They’re really easy to make for your Christmas party or cookie exchange. Click to make your own right now! #drinkstirrers #…

You will need:

Want to get into the Ho-Ho-Holiday spirit? Grab these drink stirrers for your Christmas spirits (hah, see what I did there?!) They’re really easy to make for your Christmas party or cookie exchange. Click to make your own right now! #drinkstirrers #…

Wooden stirrers (here)
Assorted rhinestones (similar here and here)
Assorted sparkly pom poms (from Michaels, similar here)
Glue gun (similar here)
Toothpick


Rhinestone Stirrers:

Want to get into the Ho-Ho-Holiday spirit? Grab these drink stirrers for your Christmas spirits (hah, see what I did there?!) They’re really easy to make for your Christmas party or cookie exchange. Click to make your own right now! #drinkstirrers #…

Directions: Take your wooden stirrer and put a dab of glue on the end. If your glue gun puts out a thick dollop, use a toothpick to put a small amount of glue on the back of the rhinestone or onto the stirrer. Place your large rhinestone at the top. Then, put 2 more of the small rhinestones underneath it. If you want it to look less home made, flip it over and repeat for the other side.

Want to get into the Ho-Ho-Holiday spirit? Grab these drink stirrers for your Christmas spirits (hah, see what I did there?!) They’re really easy to make for your Christmas party or cookie exchange. Click to make your own right now! #drinkstirrers #…
 

Mini PomPom Stirrers:

Want to get into the Ho-Ho-Holiday spirit? Grab these drink stirrers for your Christmas spirits (hah, see what I did there?!) They’re really easy to make for your Christmas party or cookie exchange. Click to make your own right now! #drinkstirrers #…

Directions: Put a dab of glue on one end of the stirrer, and pop on your pompom. Hold in place until it dries, then repeat for the other 2 pom poms. Easy peasy!

Want to get into the Ho-Ho-Holiday spirit? Grab these drink stirrers for your Christmas spirits (hah, see what I did there?!) They’re really easy to make for your Christmas party or cookie exchange. Click to make your own right now! #drinkstirrers #…
 

Snowman Stirrers:

Want to get into the Ho-Ho-Holiday spirit? Grab these drink stirrers for your Christmas spirits (hah, see what I did there?!) They’re really easy to make for your Christmas party or cookie exchange. Click to make your own right now! #drinkstirrers #…

Directions: Glue the pompoms onto the stirrer in size order from smallest to largest. You can also glue your pompoms in the other direction if you want it to be festive instead of snowman.

Want to get into the Ho-Ho-Holiday spirit? Grab these drink stirrers for your Christmas spirits (hah, see what I did there?!) They’re really easy to make for your Christmas party or cookie exchange. Click to make your own right now! #drinkstirrers #…

And there you have it! 3 easy ways to get festive with your drink stirrers for coffee, hot cocoa, and cocktails. These are perfect for any age, and they're disposable! You could even use them as drink markers, depending on how many people you have since each one can be different. And, since you can mix and match the colors, you can make these to match any holiday or event.

Want to get into the Ho-Ho-Holiday spirit? Grab these drink stirrers for your Christmas spirits (hah, see what I did there?!) They’re really easy to make for your Christmas party or cookie exchange. Click to make your own right now! #drinkstirrers #…

I'm SO excited for all the posts coming to the blog in the next few weeks. There are some really good ones headed your way!!

So, which drink stirrer would you grab for your drink? And what drink would it be? Let me know in the comments below!

DIY Brightest Crayon Costume

Back in high school, my sister, my friend and me had matching screen names on AOL Instant Messenger. Remember AIM? RIP.... Anyway, we used to always get BFF necklaces and stuff, which always came with 3 colors- blue, pink and purple. We all had our colors that we usually wore, so we matched them on our screen names. Unfortunately, PURPLECRAYONS182 was too long, so I had to switch it up. I was going through a punk rock phase (insert laughing emoji here) so I went with black crayons. After that, we were known in our high school as The Crayons by pretty much everyone. If someone didn't know who we were they would say "she's one of the crayons" and then people would know. I realize this makes us sound popular or something, but I guarantee you, we were not. People actually hated us, for no good reason, but that's a story for another day....

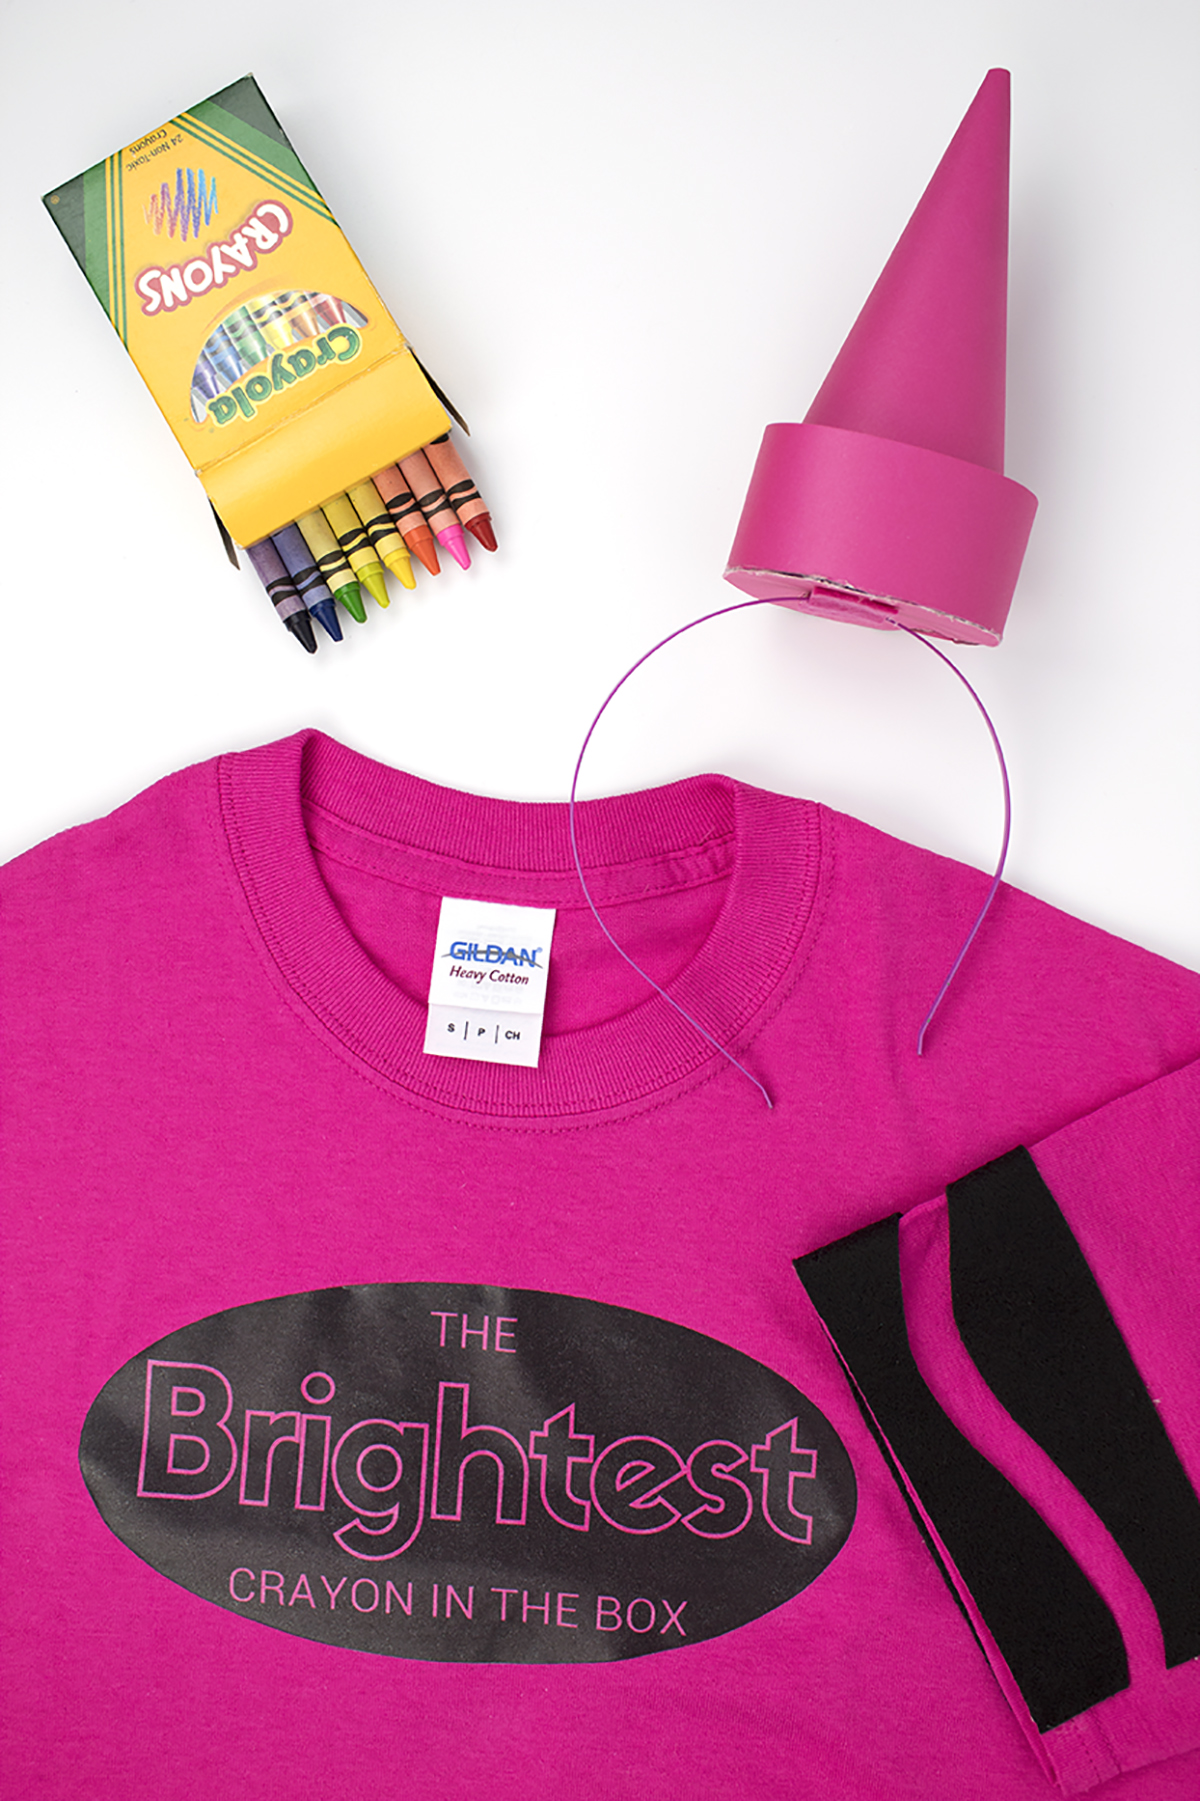
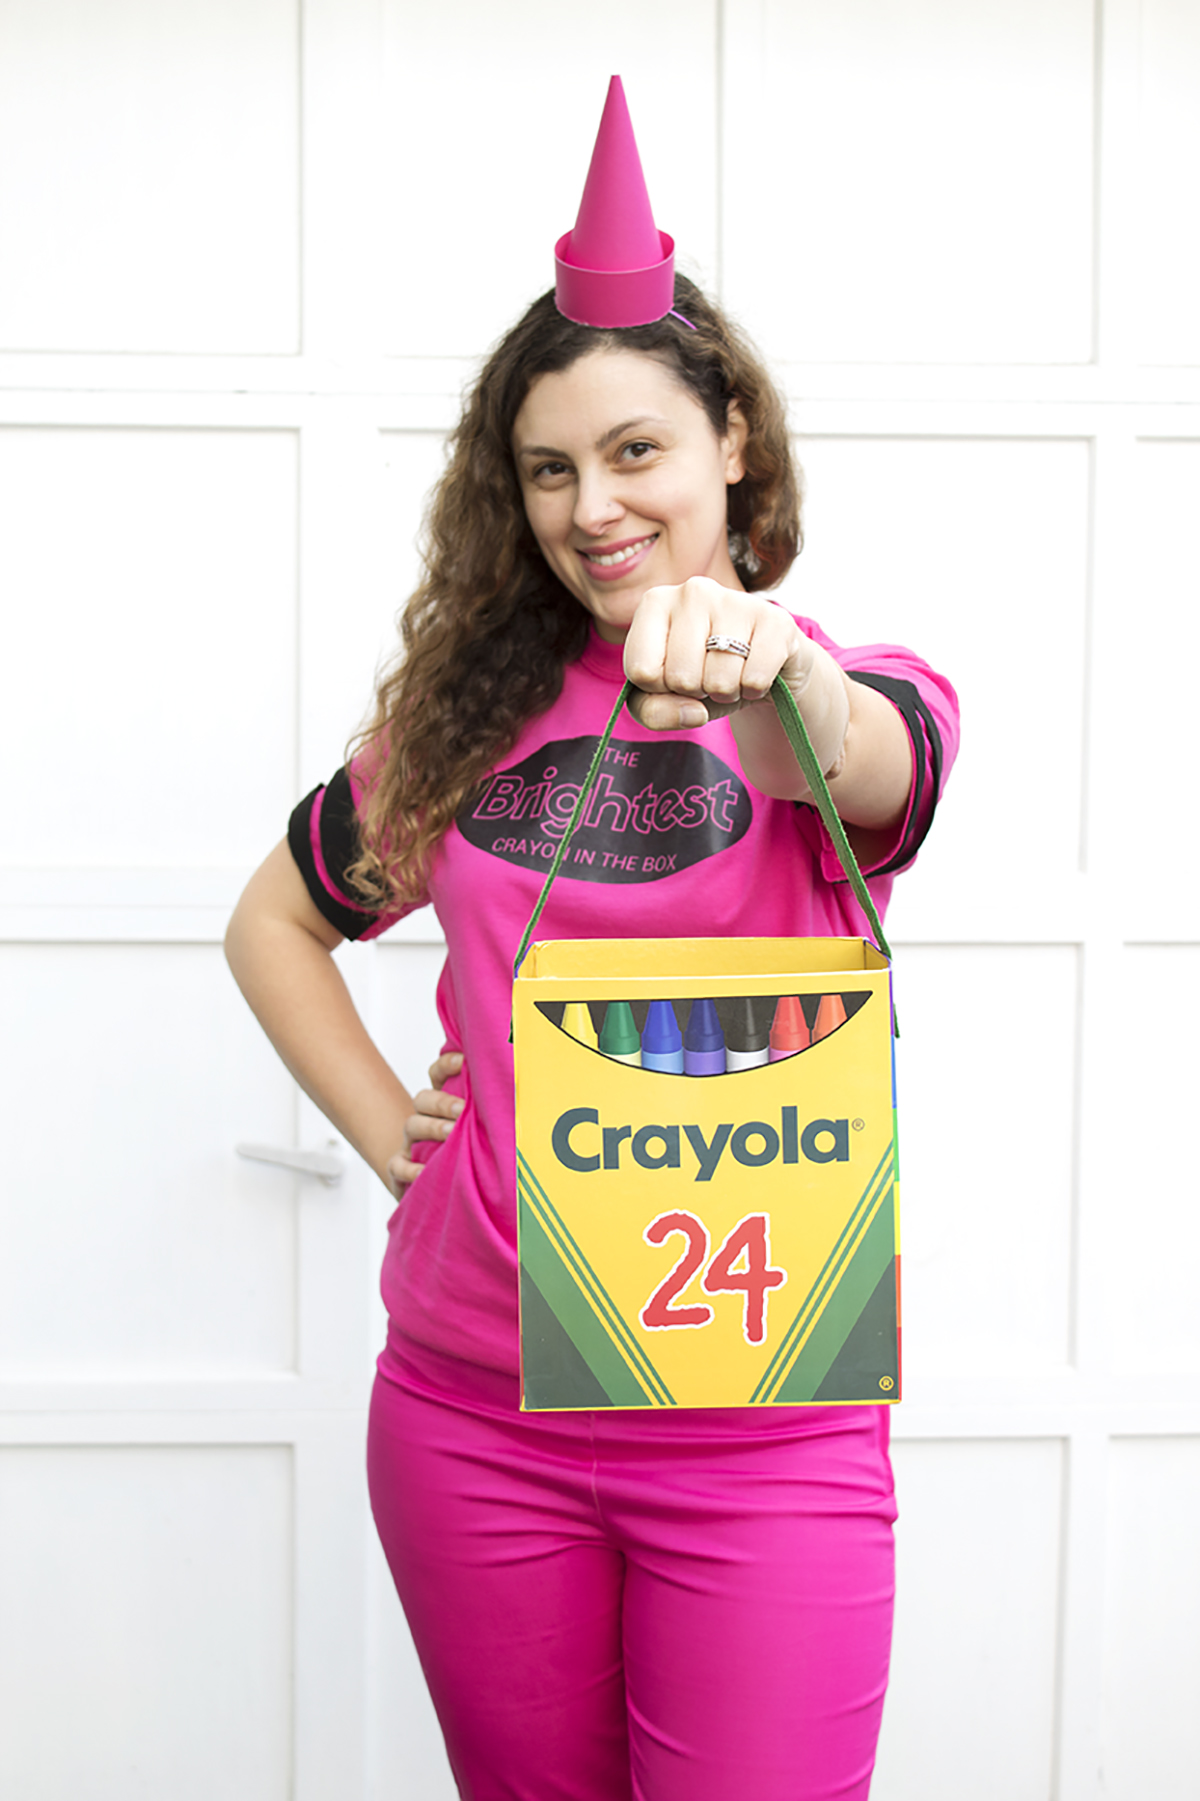
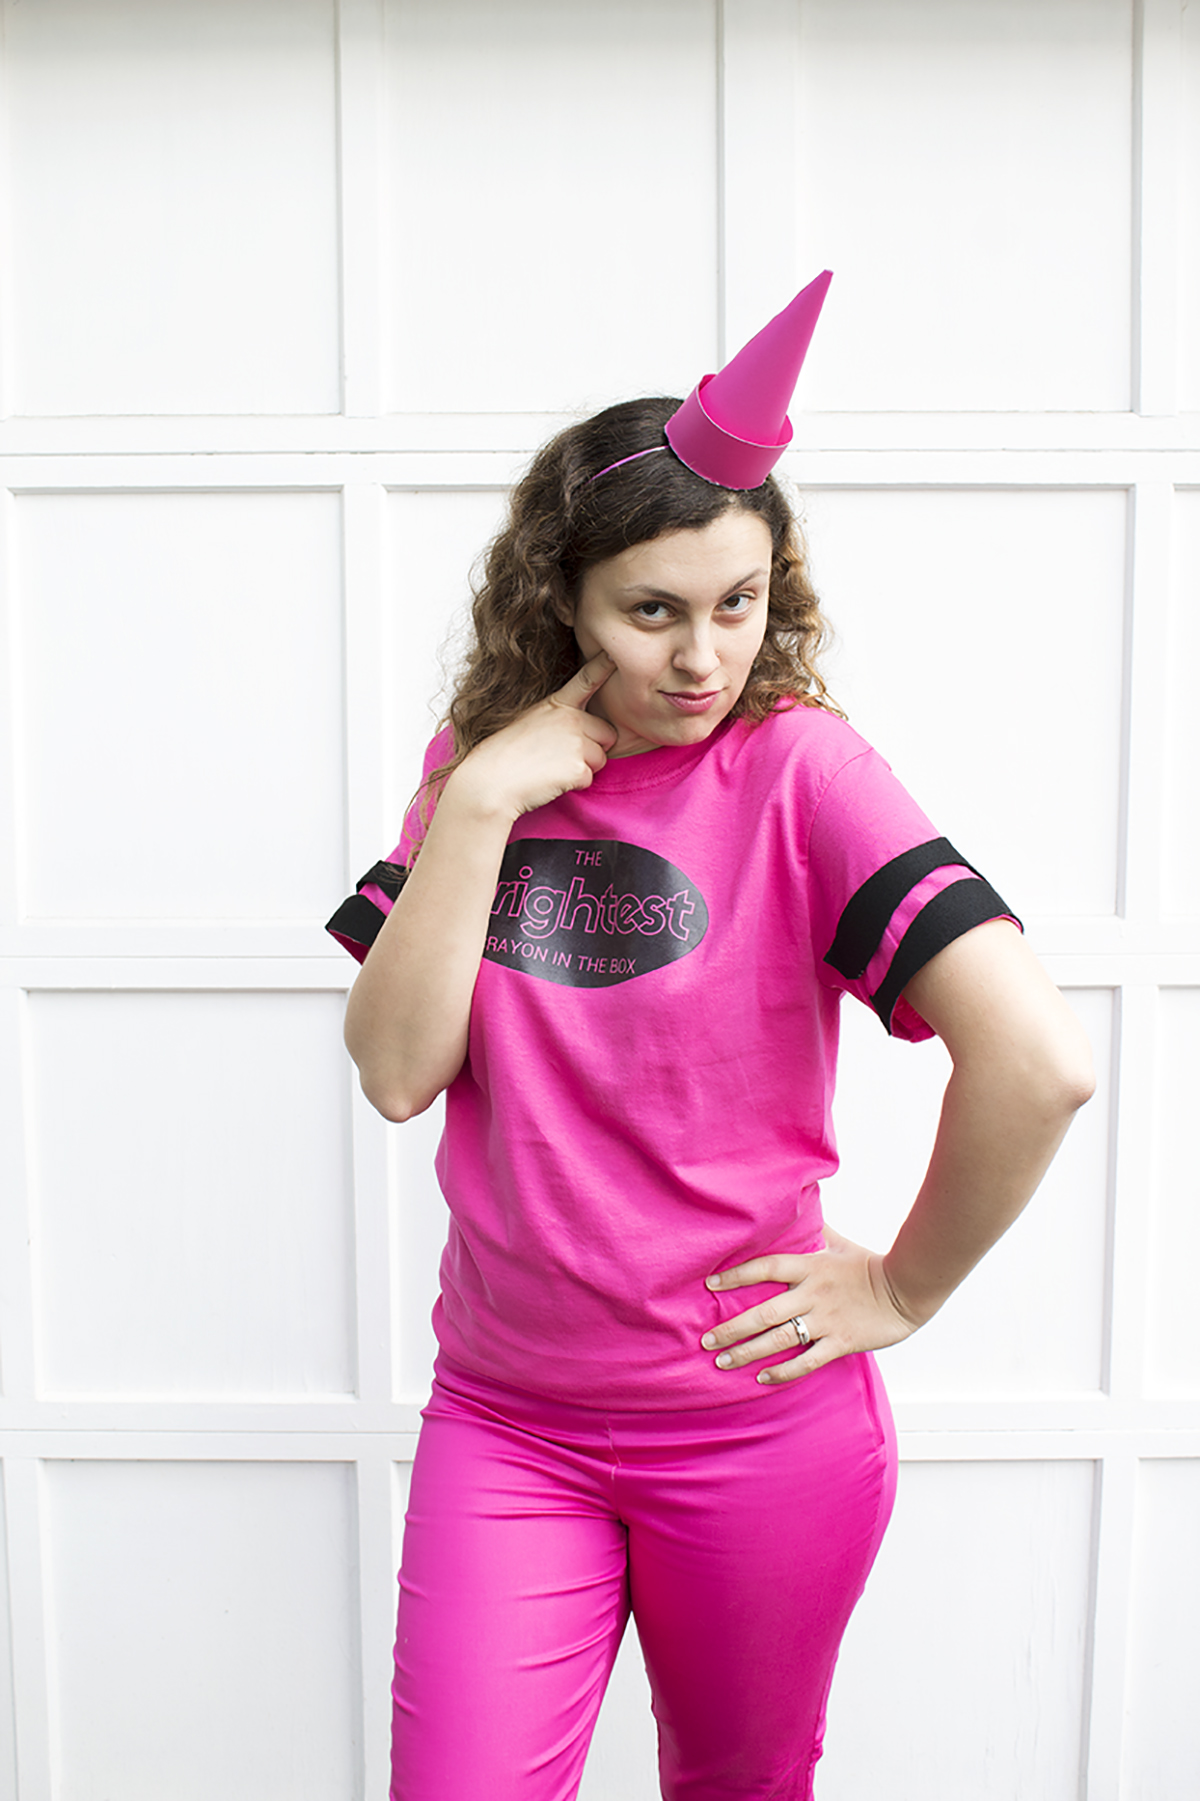
To commemorate my time as a crayon in high school, I knew I had to make a crayon costume for the blog. And, since I was a black crayon in high school, I knew I now had to change my look and be the BRIGHTEST crayon in the box. Because let's face it, I'm usually wearing the brightest colors of everyone I know, a la Kimmy Schmidt. This is sadly my last T-shirt costume of the year, but I'm so excited to show it to you! Plus, unlike most costumes, this is not "one size fits most". I've got the printable in a whole BUNCH of sizes, so you can make one for each member of the family!

Why be an ordinary crayon when you can be the BRIGHTEST crayon in the box?! Check out this DIY crayon costume project, and download the free printable so that you can be the brightest crayon too! Click for the full DIY. #crayoncostume #lastminutecos…
Why be an ordinary crayon when you can be the BRIGHTEST crayon in the box?! Check out this DIY costume project, and download the free printable so that you can be the brightest crayon too! Click for the full DIY. #crayoncostume #lastminutecostume #g…

You will need:

Why be an ordinary crayon when you can be the BRIGHTEST crayon in the box?! Check out this DIY costume project, and download the free printable so that you can be the brightest crayon too! Click for the full DIY.

For the outfit:

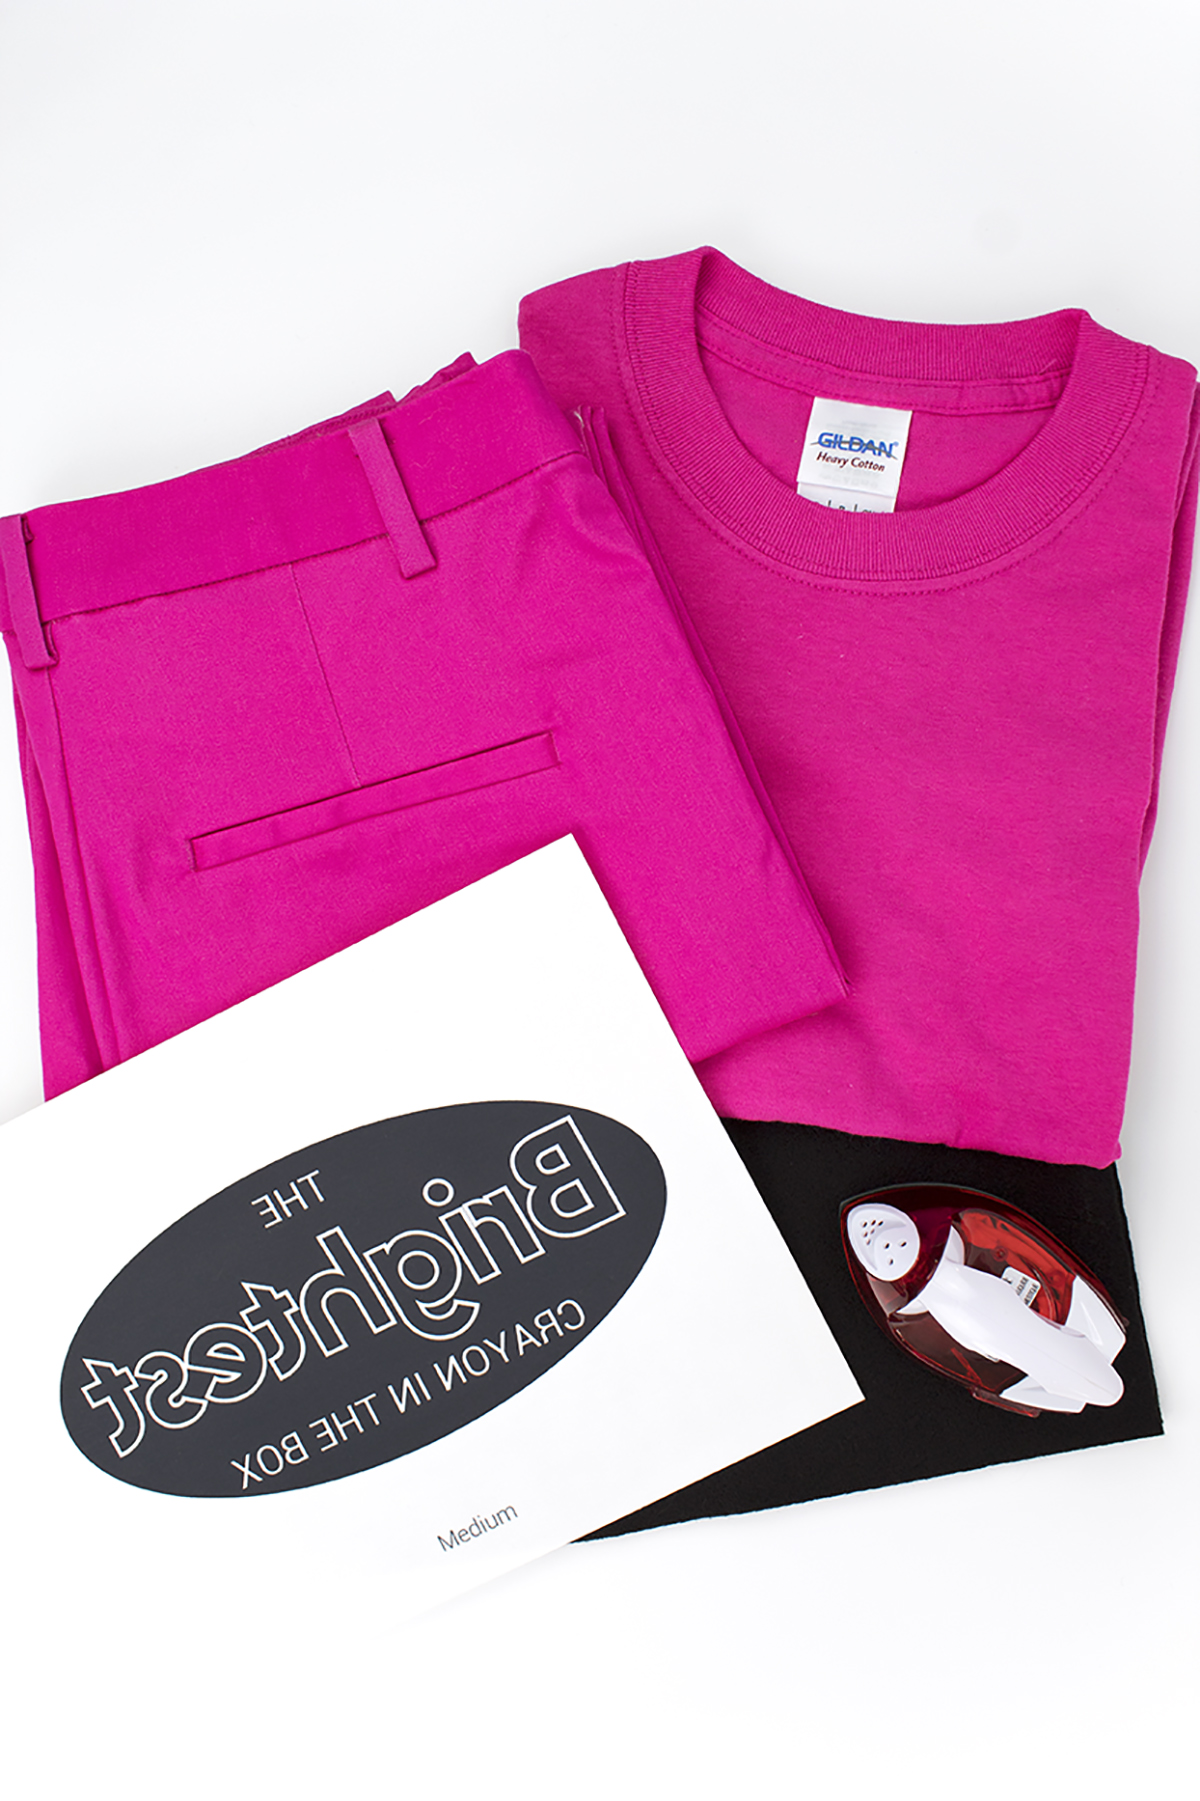
Cotton t-shirt (Gildan recommended)
Matching pants (mine are from H&M)
Iron-on transfer paper (here)
Black felt (1 sheet)
Chalk (here)
Printable (FREE! See below for more info)
Printer (I have this one and love it!)
Needle & thread
Iron
Glue gun
Scissors (here)

For the hat:

Matching cardstock (mine was double sided pink & light pink)
Glue gun
Pencil
Ruler
Scissors (here)
Large bowl (optional)

The printable is available in my resource library, which you can get totally FREE access to, just by signing up. What exactly do you get? Access to all my printables, including party planning guides, checklists, and my projects. By signing up, you'll have access to all projects- past, present and future! 


For the Shirt & Pants:

Why be an ordinary crayon when you can be the BRIGHTEST crayon in the box?! Check out this DIY costume project, and download the free printable so that you can be the brightest crayon too! Click for the full DIY.
  1. It's recommended to prewash your fabric. Run a lint roller over the part where the logo will go. I learned from last time any stray hairs or lint will get permanently embedded under your iron-on transfer.

  2. Print out your iron on transfer in the appropriate size (it comes in 5 sizes!) and cut it out as close to the edge as you can. This iron-on paper is intended for light fabrics, but I wanted one that was clear so that the shirt color would peek through on the font.

  3. Plan out where on your shirt you want to place the logo. Following the instructions, iron it on and let fully cool before peeling.

  4. Take your felt and fold in half the long way, then half again the long way. If your shirt is on the larger side or it's for a man, it might work better to fold it in thirds instead.

  5. With chalk, draw a squiggle pattern & cut it out.

  6. Using your glue gun, secure your felt onto your shirt. I advise putting the seam of the felt (where the 2 ends meet) along the seam of your shirt sleeve. If it's a little short, it'll be covered under your armpit.

  7. For the pants, you can also glue it on but I stitched mine with a needle and thread. I used large, simple stitches so that I can remove the felt and wear the pants again :)


For the Hat

Why be an ordinary crayon when you can be the BRIGHTEST crayon in the box?! Check out this DIY costume project, and download the free printable so that you can be the brightest crayon too! Click for the full DIY.
  1. Create a template for your hat onto white paper. As a hack, you can use a large bowl or round object and trace it onto the white paper, but I found that drawing a sweeping line did the trick for me.

  2. Trace your template onto the back side of your colored paper. Mine was double sided pink and light pink, which was helpful for the crayon base.

  3. Trace a small round object to be the bottom of your hat. I used the top from my fruit container, which was a great size. You want an item that is slightly larger than your cone.

  4. Draw a long rectangle, about 2-3 inches wide for your crayon hat base. I made mine as wide as the space that was left after drawing my cone.

  5. Cut out your parts, then cut the small tip off your flattened cone. You want it to have a flat pointed edge, like a crayon.

  6. Roll your hat into a cone and glue it shut. Trim off any excess paper that prevents it from being flat at the bottom.

  7. Glue the cone onto your base, and trim off the excess.

  8. Glue your rectangle ends together to make a "bracelet", then slip it onto your hat. Glue in place.

  9. Add a clip or headband to secure the hat onto your head. Be sure to add a piece of felt to hold it together, since the paper won't glue onto the headband well. (Check out the crown in this DIY for more info)

Why be an ordinary crayon when you can be the BRIGHTEST crayon in the box?! Check out this DIY costume project, and download the free printable so that you can be the brightest crayon too! Click for the full DIY. #crayoncostume #lastminutecostume #g…
Why be an ordinary crayon when you can be the BRIGHTEST crayon in the box?! Check out this DIY costume project, and download the free printable so that you can be the brightest crayon too! Click for the full DIY.  #crayoncostume #lastminutecostume #…

T-shirt: $4
Headband/Hair Clip: $1
Felt: $1
Caardstock Paper: $2
Iron-ons: $9

Total cost: $17

I'd say that's a pretty good cost for a Halloween costume! If you already have a pair of colored jeans, I recommend starting there so that you can save some moolah overall. I actually had these pants already, and the shirt was the exact perfect color to match! I borrowed the crayon box bucket from my neighbor, who was super sweet and let me take some pics in front of her nice white garage door. She got it at a Halloween store, but I bet you could even make a similar one with a picture from online! Overall I'm pretty darn happy with this crayon costume, and I hope you guys are too!

DIY Tooth Fairy Costume

Do you ever have a weird accident that turns into something pretty awesome? Well, I did. I was writing out my schedule for the day, and I wrote how long each task would take. For one task, I wrote 2 plus hours- "2+H". When I read the list back over, I thought I wrote 2th. And that's when I realized 2th=tooth!! This really silly idea came after, and I kinda love how cheesy it is. You can be either a tooth with a crown, or a tooth fairy. The choice is yours!

Do you ever have a weird accident that turns into something pretty awesome? Well, I did. This really silly idea came after, and I kinda love how cheesy it is. You can be either a tooth with a crown, or a tooth fairy. The choice is yours! Click for t…

This costume is the second one in my easy t-shirt costume series. For this one, I went with a tried and trusted t-shirt made for customizing- Gildan! They're the ones you find at craft stores in pretty much any color you want. They're 100% cotton and really comfy. No, this post wasn't sponsored by them. I genuinely think they're awesome! Plus this t-shirt cost like $4. Can't beat that! It's a great last-minute costume for that Halloween party you've got coming up!

Do you ever have a weird accident that turns into something pretty awesome? Well, I did. This really silly idea came after, and I kinda love how cheesy it is. You can be either a tooth with a crown, or a tooth fairy. The choice is yours! Click for t…

You will need:

Do you ever have a weird accident that turns into something pretty awesome? Well, I did. This really silly idea came after, and I kinda love how cheesy it is. You can be either a tooth with a crown, or a tooth fairy. The choice is yours! Click for t…

White T-shirt (Gildan recommended)
Gold paper (you can use glitter paper or metallic, the choice is yours!)
Small piece of felt
Hair clip or headband
Scissors
Ruler
Printer (I have this one and love it)
Tape
Pencil

Directions:

Shirt:

Do you ever have a weird accident that turns into something pretty awesome? Well, I did. This really silly idea came after, and I kinda love how cheesy it is. You can be either a tooth with a crown, or a tooth fairy. The choice is yours! Click for t…
  1. Print out 2th as a template. I used the font Abadi MT condensed super bold, size 200.

  2. Place your template printed side down on your gold paper and tape it in place. You'll want to use a few small pieces of tape in different places so it doesn't fly off while you're cutting.

  3. Cut out your 2th, being careful to stay within the lines. You can also use an x-acto knife if that's easier, but I found the scissors worked just fine.

  4. Try on your shirt and mark lightly with a pencil where you want the letters to go.

  5. Using a gluegun, glue the letters onto your shirt. For a more temporary option, use double stick tape, but it might not adhere as well.


Crown:

Do you ever have a weird accident that turns into something pretty awesome? Well, I did. This really silly idea came after, and I kinda love how cheesy it is. You can be either a tooth with a crown, or a tooth fairy. The choice is yours! Click for t…
  1. Cut a rectangle measuring 3 inches by 6 inches

  2. Draw small lines going 1.5 inches from the top, and make dashes every 1 inch.

  3. Connect the lines to the top in a triangle shape.

  4. Cut out the triangles

  5. Roll the crown into a circle and glue the seam shut. Trim any excess from where the two ends meet

  6. Glue your crown onto a piece of felt. Trim the excess.

  7. Cut a small piece of felt and glue it onto your hair clip or headband, then glue the felt to your crown.

Do you ever have a weird accident that turns into something pretty awesome? Well, I did. This really silly idea came after, and I kinda love how cheesy it is. You can be either a tooth with a crown, or a tooth fairy. The choice is yours! Click for t…

Fun fact: I am the queen of making weird and unattractive faces in photos. My sister and friends have a folder labeled "ugly Cathy photos", where I try to be silly but end up looking plain hideous. My sister, on the other hand, is great at looking silly but AMAZING. So... there's that haha. 

You can wear this costume with a pair of white jeans, or a tutu. The choice is yours! Add a pair of wings if you want, and you're ready to go!

T-shirt: $4
Gold Paper: $2
Headband/Hair Clip: $1
Felt: $1

Total cost: $8

Now you're ready for Halloween! It's in just a few days!!!

DIY Cloud Costume

Ok guys.... if you don't have a costume yet, you better get cracking! Lucky for you, I have some really easy last minute costumes coming your way. And, they feature something we all have in our closets- a T-shirt!! Let's start off with that spare baby blue tee way in the back of your drawers.

First, a backstory. When I was a kid, I had this blue cloud dress (with a matching sheer shrug thing like all the dresses had) and I loved it. Well, imagine my delight when I found a matching pair of sandals with a cloud print on them too! You can bet that I wore those two together, because clearly it matched so well. In case you're new around here, I clearly love a theme... Anyway, this cloud costume is just a touch classier than that, topped off with a ridiculously bright and bouncy sun balloon. 

Looking for a quick and easy Halloween costume? Look no further! This last-minute cloud costume is made from a staple everyone has in their closet- a t-shirt! Click for the easy DIY. #halloweencostume #diycostume #lastminutecostume

You will need:

Shirt:

Blue t-shirt (similar here)
White fabric paint (here)
Cotton balls (here)
Cardboard
 

Earrings: 

Earring hooks (or an old pair of dangly earrings) (here)
Thin cardstock (like a manilla folder or notebook cover)
Cotton balls (here)
Small pliers (here)
Glue gun (similar here)
Heart punch (similar here)
 

Headband:

Yellow balloon (similar here)
Balloon pump (similar here)
Yellow glitter cardstock (similar here)
Headband (similar here)
Scissors (here)
Glue gun (similar here)


Looking for a quick and easy Halloween costume? Look no further! This last-minute cloud costume is made from a staple everyone has in their closet- a t-shirt! Click for the easy DIY. #halloweencostume #diycostume #lastminutecostume


Directions:

T-Shirt

Looking for a quick and easy Halloween costume? Look no further! This last-minute cloud costume is made from a staple everyone has in their closet- a t-shirt! Click for the easy DIY.
  1. Place a piece of cardboard inside the shirt to prevent the paint from leaking through. Try to find a smooth piece, otherwise you'll end up with some weird textured stripes like mine had.

  2. Paint clouds onto your shirt using a dotter or a cotton ball. I found that the cotton ball made it more "pillowy". I used a dotter for the pocket cloud and a cotton ball for pretty much all the rest.

  3. Let dry, according to directions, then set the paint if the instructions calls for it. Mine advised ironing your shirt, but yours may be different.

Earrings

Looking for a quick and easy Halloween costume? Look no further! This last-minute cloud costume is made from a staple everyone has in their closet- a t-shirt! Click for the easy DIY.
  1. Draw or punch a heart shape onto your cardstock or thin cardboard. You can probably use any shape, but that was the punch I had handy. A simple circle would probably work too.

  2. Using your pushpin, make a tiny hole at the tip of your heart shape. (Love these Barbie shoe pushpins? Get the DIY here)

  3. Attach your earring hook onto the cardstock. If you're using an old pair or earrings, remove the hook and the first jump ring. Slide it through the hole, then be sure to clamp it closed so it's securely fastened.

  4. Break up your cotton ball into tiny pieces. Try to keep them round and billowy.

  5. Glue your mini cotton balls onto both sides of the cloud. The cotton balls are super light, so don't worry- they won't be too heavy!

Looking for a quick and easy Halloween costume? Look no further! This last-minute cloud costume is made from a staple everyone has in their closet- a t-shirt! Click for the easy DIY. #halloweencostume #diycostume #lastminutecostume

Headband:

*note: make this headband just before you're going to wear it. Mine started deflating within a day. You can always open it up and re-inflate it though! 

Looking for a quick and easy Halloween costume? Look no further! This last-minute cloud costume is made from a staple everyone has in their closet- a t-shirt! Click for the easy DIY.
  1. Blow up your mini balloon so that it's not overinflated. You want it to be nice and round.

  2. Cut triangles of various sizes out of your cardstock. I made a template with a large triangle and cut out 3 of those. Then, I made 2 smaller sizes by moving the template slightly off the page to make the triangles smaller.

  3. Glue your cardstock to your balloon. You'll want to place the glue on the cardstock, not the balloon itself. We don't want it to pop!

  4. Put some glue on the part where you blew it up, and fold the knot inside to keep it as flat as possible.

  5. Place some glue on your headband and attach the sun. Hold it in place until it cools.

Looking for a quick and easy Halloween costume? Look no further! This last-minute cloud costume is made from a staple everyone has in their closet- a t-shirt! Click for the easy DIY. #halloweencostume #diycostume #lastminutecostume

Then, all you have to do is put on all these pieces with a pair of white or light blue jeans, and your costume is complete! I also think a pair of bright & sunny yellow shoes would be the perfect additional, along with this rainbow tassel necklace. Lastly, pop on a pair of sunglasses and you're all ready to go!

Looking for a quick and easy Halloween costume? Look no further! This last-minute cloud costume is made from a staple everyone has in their closet- a t-shirt! Click for the easy DIY. #halloweencostume #diycostume #lastminutecostume

T-shirt: $12
White Fabric Paint: $8
Cotton Balls: $2
Balloons: $3
Yellow Glitter Paper: $2
Headband: $1

Total cost: $28

And that's all folks! An easy DIY costume that you can whip up in time for Halloween :)

Striped Happy Halloween Sign

There's less than 2 weeks until Halloween, guys! This is not a drill!!

For some people, Halloween is a dark, spooky time of year where you get to proudly display your goriest items and scare the daylights out of people. For me, it's a time to be "spooky" by decorating with black, orange, green, purple and pink, with a touch of teal, because why not?  That's right, I'm that group that enjoys the cutesy side of Halloween- eating candy, dressing up in cute (and slightly sexy) costumes, and carving pumpkins. If you fall into that second group with me, you're going to LOVE this one!

Looking for a slightly creepy, slightly cute way to decorate for Halloween? You've got to see this striped sign! Click for the full DIY. #halloweencrafts #halloweenart #diyhalloween

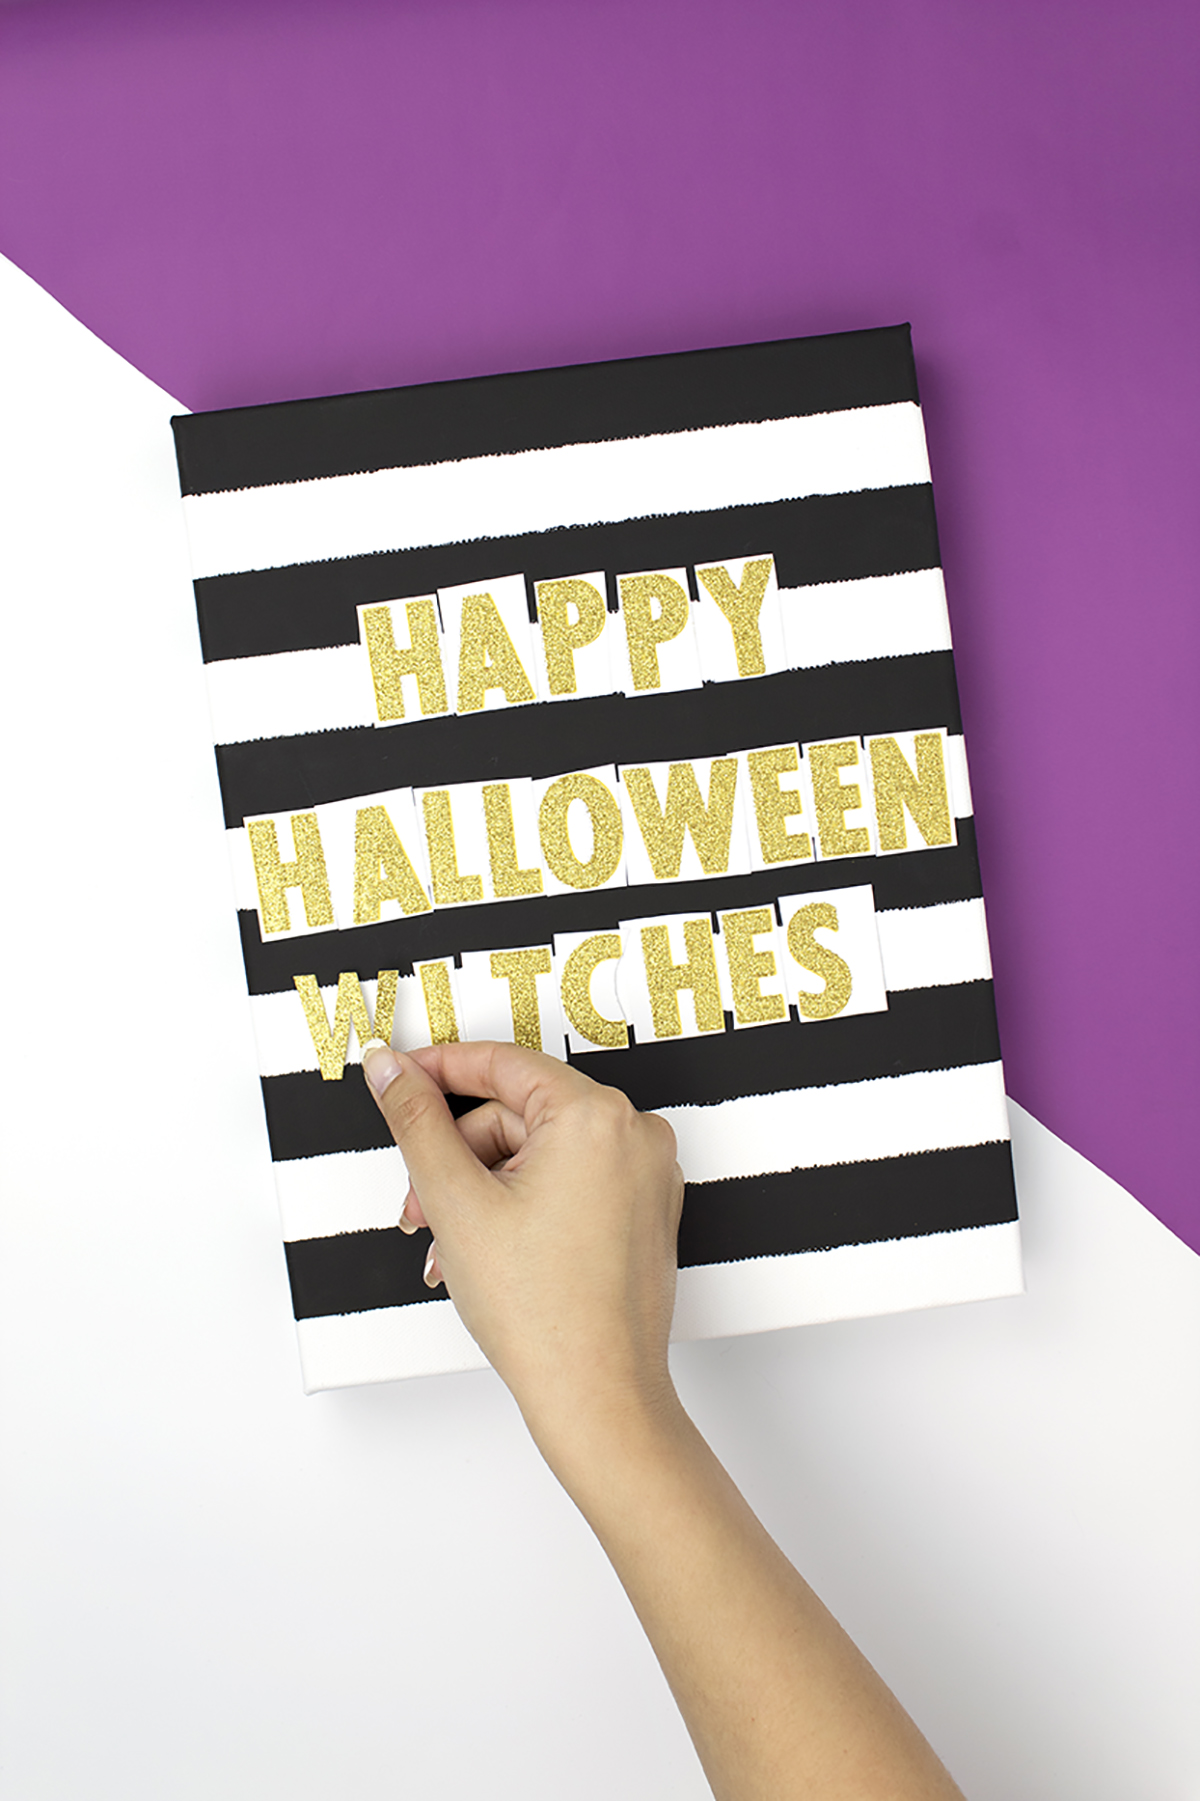
I created this Striped Happy Halloween Sign for Giggles Galore and it's one of the easiest projects so far!  All you need for this DIY is a canvas, blue painter's tape, some black paint, and gold letters. It really pops in an entryway, and brings some fun, light-hearted humor to your home!

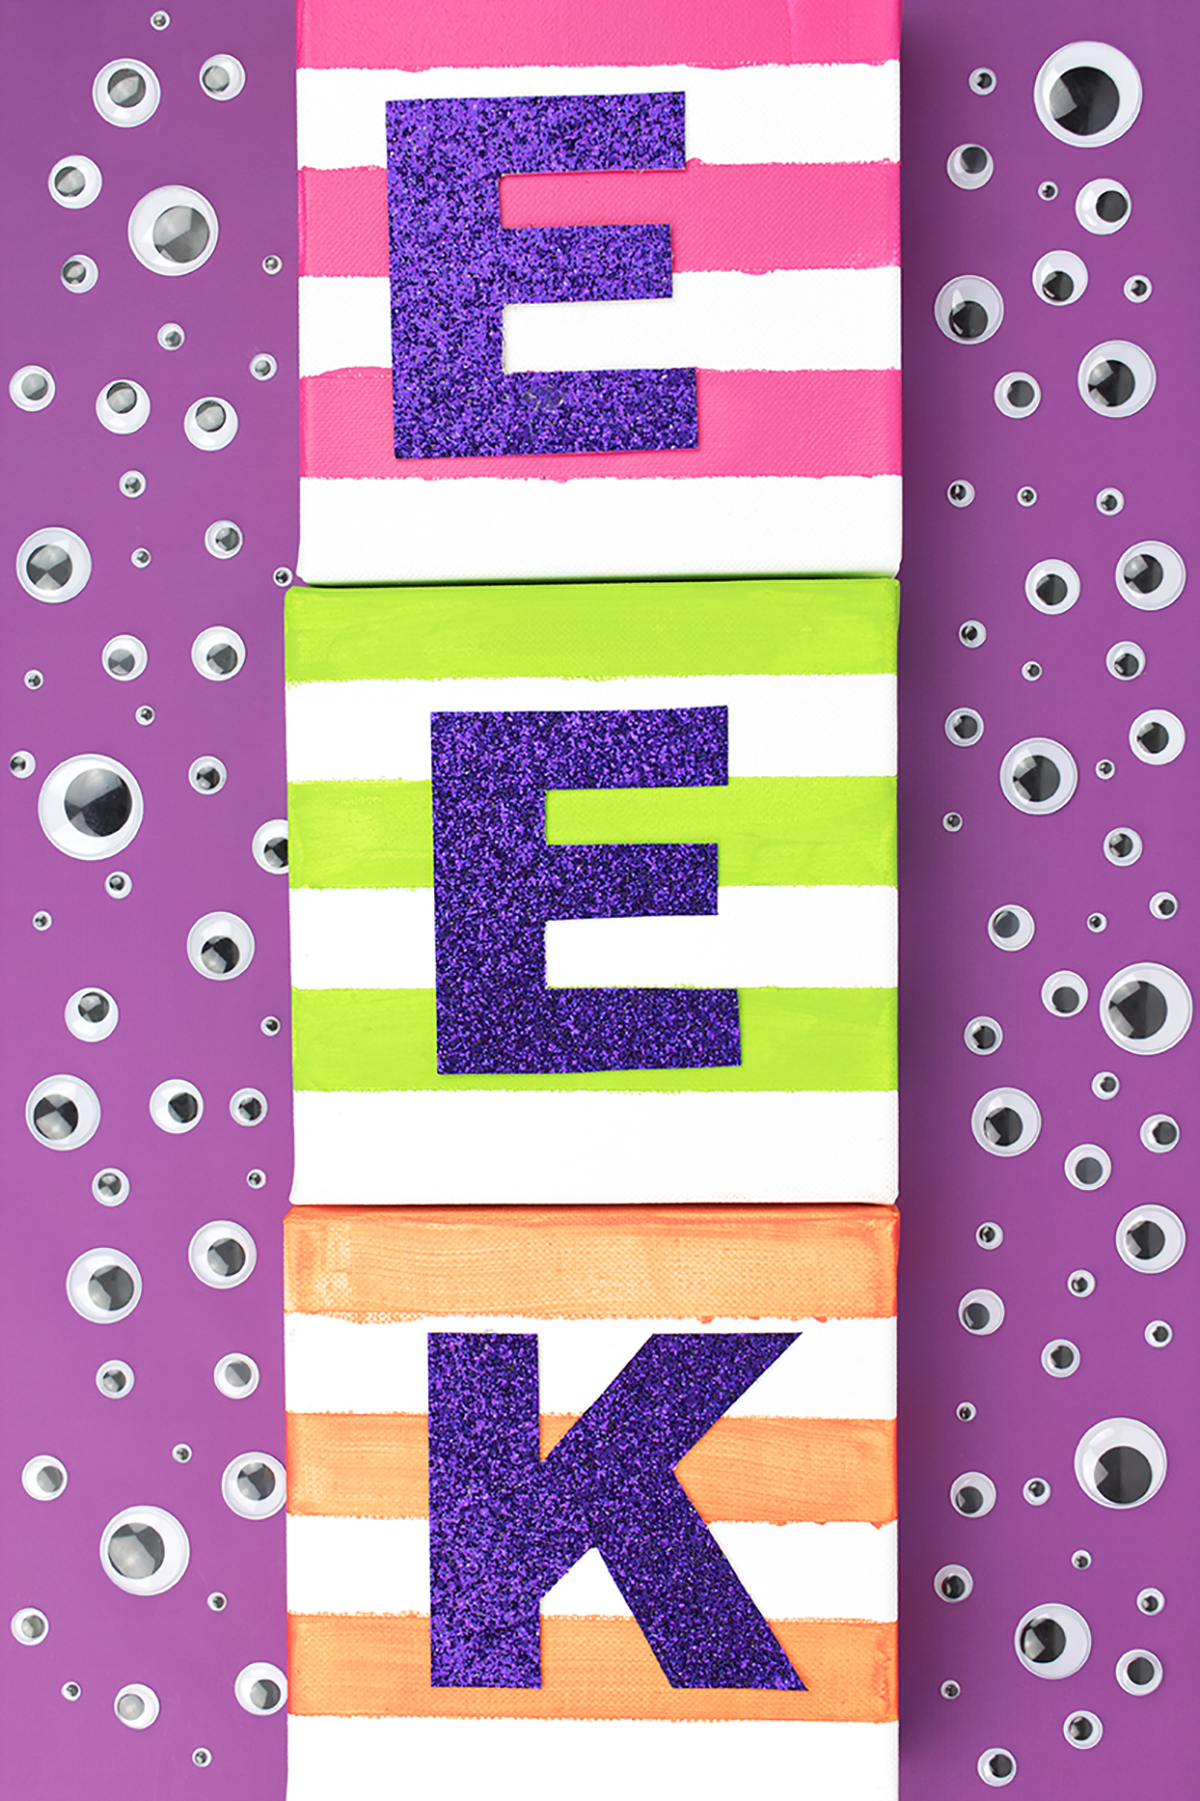
Head on over to Giggles Galore to see the full post! And, if your canvas needs a friend, try these EEK canvases too!

Looking for a slightly creepy, slightly cute way to decorate for Halloween? You've got to see this striped sign! Click for the full DIY. #halloweencrafts #halloweenart #diyhalloween

I hope you enjoyed this easy canvas DIY! Now, time for my question of the day that no one answers- what's your favorite part about Halloween? Is it dressing up, eating candy, scaring people, or staying home and hiding from everyone? Don't be shy! Let me know in the comments below.