My Party Essentials

I’ve thrown a lot of parties over the years, so I’ve got all the essentials. Here are some of my favorite items for parties.

Click the images to Shop!

Cake Stands- I personally like white cake stands since they match any holiday, but these come in so many cute colors! The pink and mint green ones are calling my name.

Sequin Tablecloths- I have these in rose gold and silver, and I can’t tell you how many times they have elevated my event. They wash pretty well, although lots of sequins end up in the wash. But, they still look great after 8 years.

Sequin Runners- These are perfect for placing on party tables, on a craft table, or even on a console. I’ve also draped them on my fireplace! I also recently used a cheesecloth runner for Thanksgiving, which looked so nice.

Serving Platters- While my husband is the chef of the family, I can recommend a nice set of white porcelain serving platters. I love having different sizes but within a single set so that they can stack in my cabinets and drawers.

Balloon Stands- These are perfect for balloon decor and centerpieces without the helium.

Balloon Inflator- I borrowed this from a friend and it saved me! In the past I have used a handheld pump as well as a mattress inflator, neither of which I recommend when this is an option!

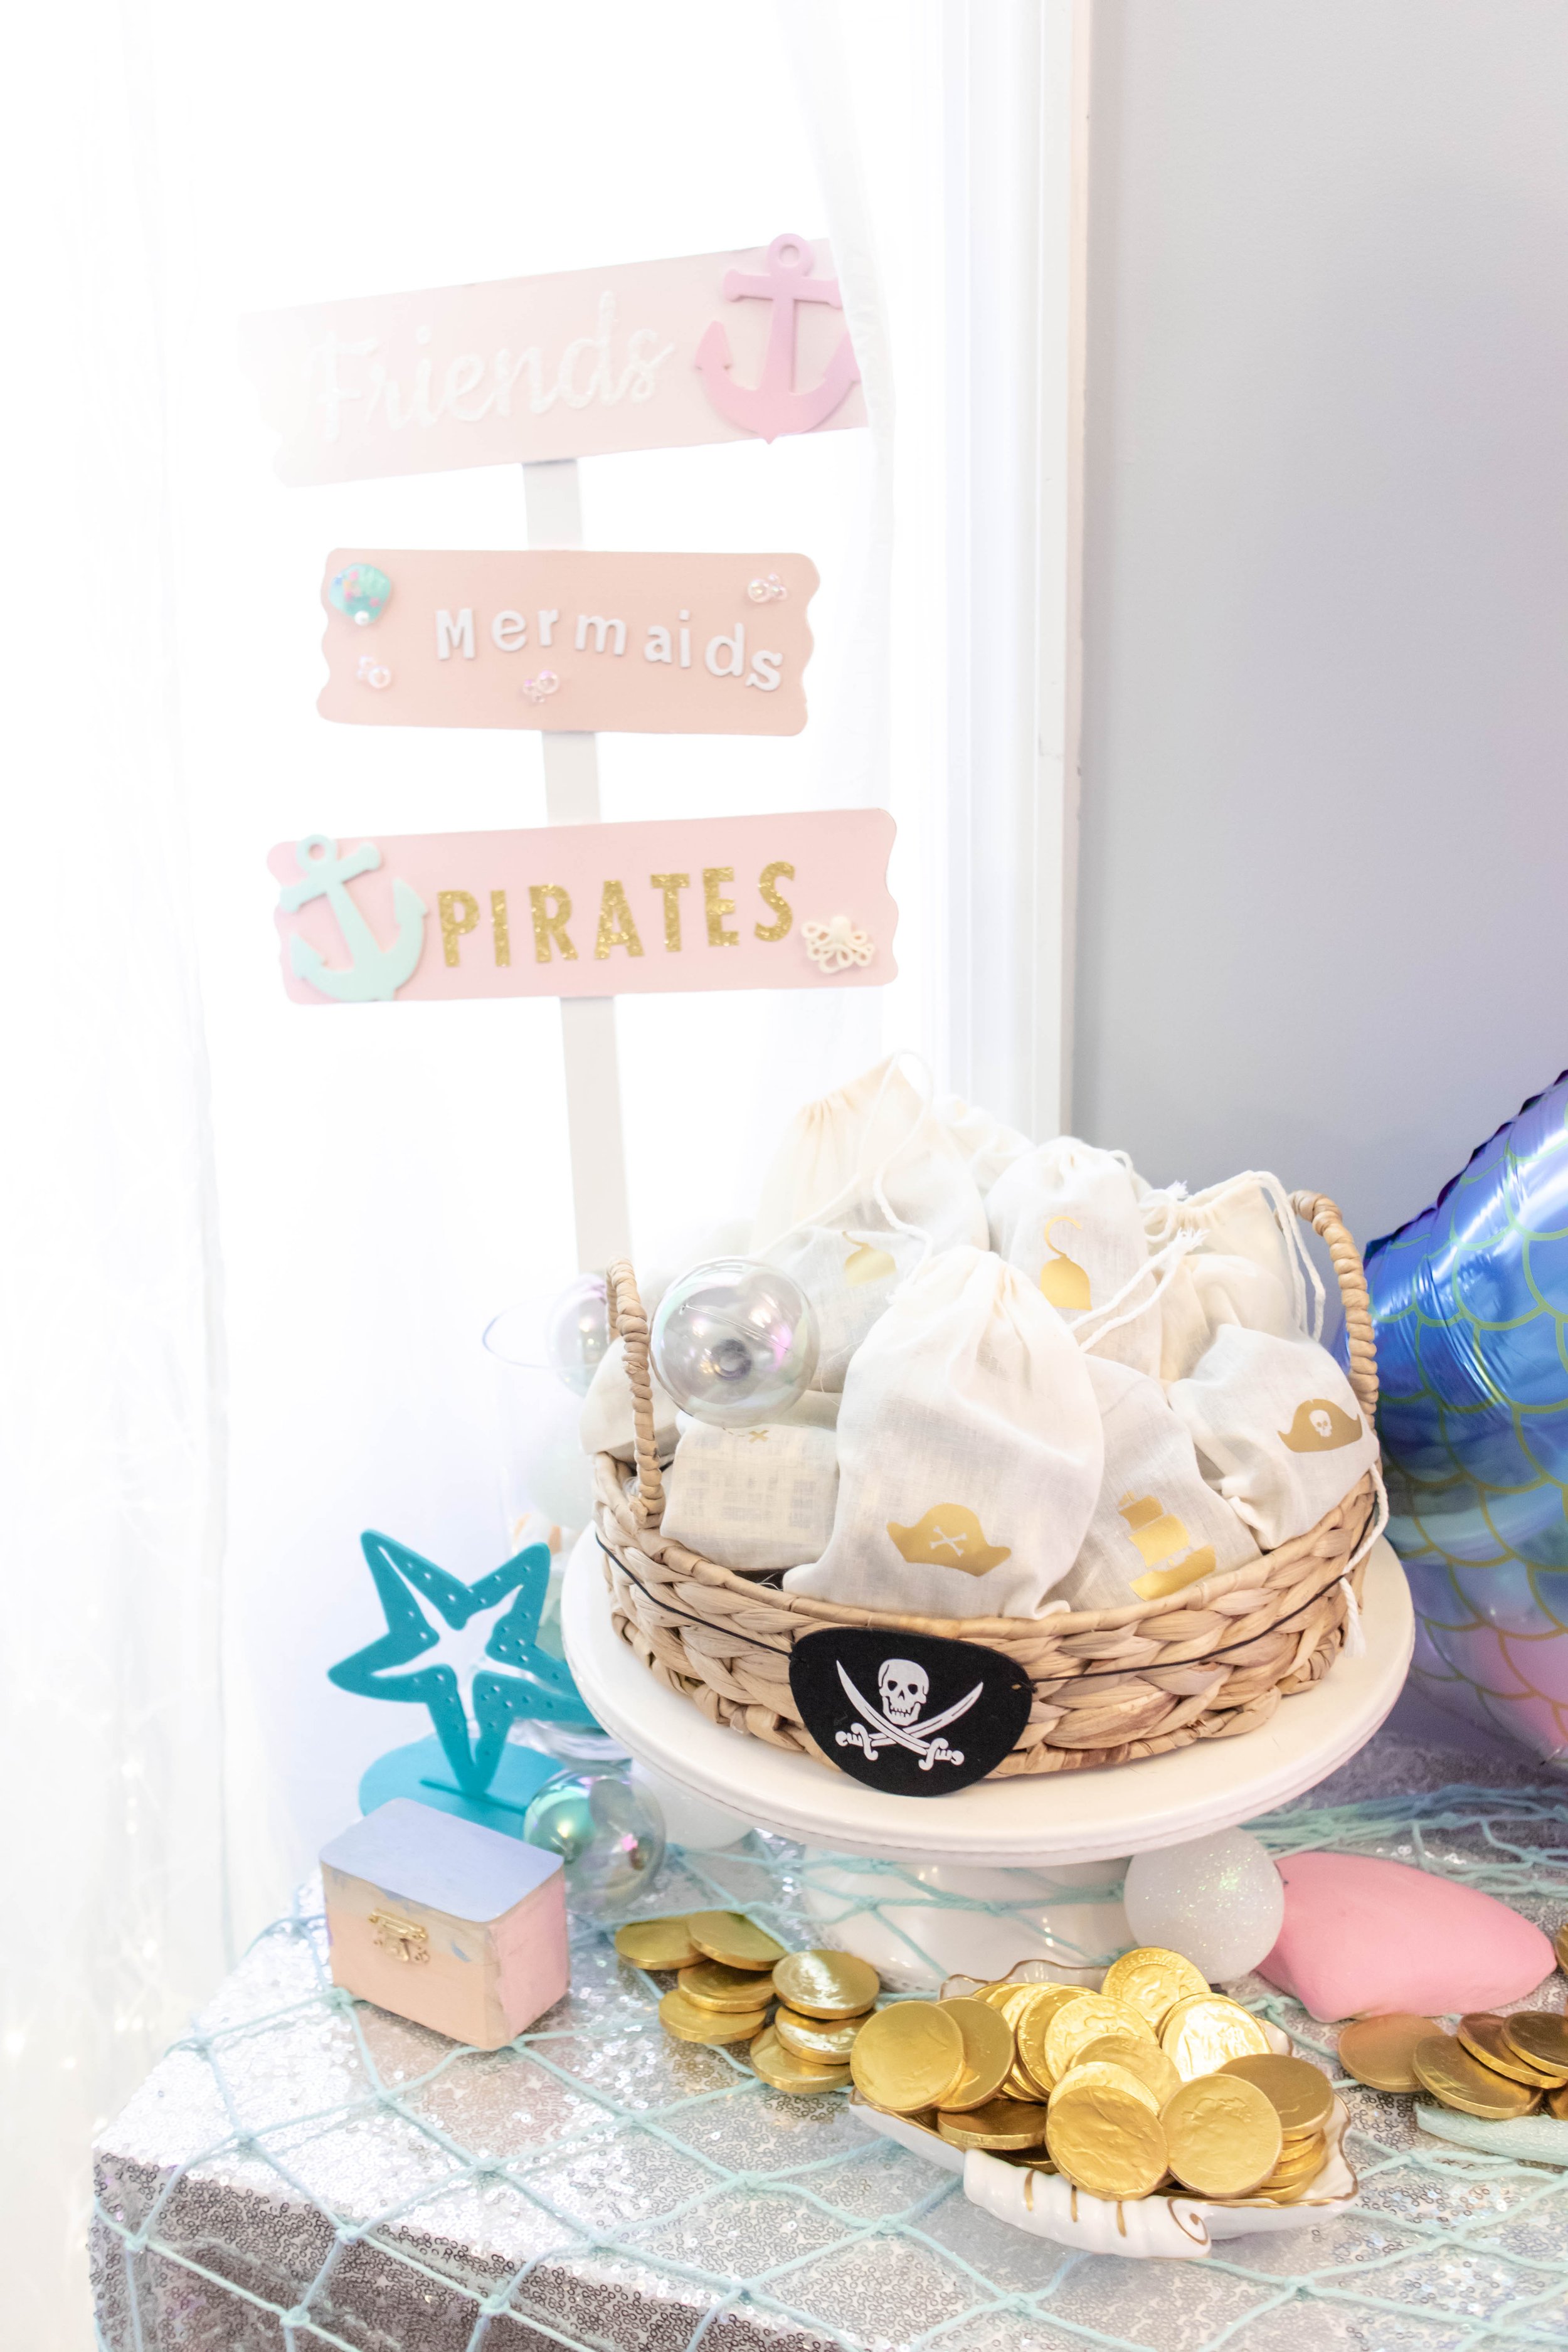
Baskets- I use these for all kinds of things, including holding favors, corralling cards, and displaying some party decor.

Garlands- I personally love a fringe tassel garland! These are so easy to make and can be used over and over.

Sequin Backdrops- These are great for placing behind a party table to make it fancier. I also love a nice tablecloth fringe garland, which can be super colorful!

Backdrop Stand- I use this style for my photography backdrops, but it works perfectly for parties. You can also go with a gold arch style, which would be pretty with a cover.

Painting Supplies- I often do an activity at my parties, and I love using these white aprons for kids along with a simple painting set and acrylic paints. Helpful hint- if you wipe off the extra paint with a napkin, it makes it way easier to wash the palettes!

Paper Fans- I also use these over and over again! I use a paperclip to hold them together, then fold them up after the party so it’s ready for the next use.

Cake Topper- I have a Happy Birthday cake topper that I use for all my parties. It’s economical and eco-friendly. A win-win!

Storage Boxes- I store all these supplies in clear plastic bins or clear bags. I can see what I need, and my supplies stay safe from the elements.

Disco Ball- No party is complete without a disco ball. I have mine permanently hanging in my living room. I just love disco balls!

Cricut- Cricuts are perfect for personalizing elements. I’ve used them to create banners with felt and glitter paper; Cut iron-ons for favor bags; Cut vinyl for making signs; Cutting glitter paper for cake toppers; and soooo much more. The smallest one, The Joy, is great for vinyl, making cards, and stores away easily.

Circle Cutters- I just got one of these, but I’m so excited to use them when cutting my circle cupcake toppers from my shop!

Beginner Photography Essentials

Photography is one of the best ways to capture and preserve moments. As a photographer myself, I know that a few of the right tools can make all the difference. These are some of my favorite basics that will help take your party photos to the next level.

*This post contains affiliate links.

A Great Camera- You can definitely use your phone for your pictures, but I would highly recommend getting a camera if you’ve been on the fence! I personally have the older version of this Canon EOS Rebel (mine is the T6) but this newer one has such great features! Touchscreen is a newer feature, which is great for selecting your focus!

Lightroom/Photoshop - these are my go-to apps for photo editing! You can do so much with these apps for only $10/month. If you want a more budget friendly option, try the Lightroom phone app! It has tons of free features.

Lightroom Presets- These party presets from my shop are perfect for editing all kinds of indoor photos.

Tripod-  If you want to take your own photos, I would highly recommend this tripod! You can tilt the head so that you can take landscapes or portraits. It's light, compact and folds up small. It's perfect for taking on the go and storing in a closet when it's not in use. This is the exact one I use for my photos!
Phone Tripod Mount- If you want to attach your phone on the tripod, you'll need a special adapter. I use this one, which does the trick! You just swap out the head it comes with and then expand it for your phone. The great part is that it's adjustable, so you can use anyone's phone. I'd recommend checking the measurements if you have a newer iPhone though. Those things just keep getting bigger and bigger.

Mini Tripod- If you want a tiny tripod for a tabletop or even easier portability, try this one! I haven't used this one personally, but it had great reviews on Amazon. I'm considering getting one myself. If you want something more affordable, try this one instead.

Box Light for Flash- These are a bit of an investment, but I honestly can't recommend them enough! I use them for practically all my blog photos and occasionally whip them out when the lighting isn't ideal for portraits. Another option is these umbrella lights, which aren't quite as bright. Both of them fold up super tiny and can take up just a corner of a closet! It's actually pretty remarkable how mighty yet tiny they are. Just a note that these won't make a dark room bright, but they will assist in compensating when the room just isn't bright enough for a good picture.

Screen Wipes- If your phone photos are not great, I have news for you- CLEAN YOUR CAMERA LENS! I can’t tell you how many times I’ve been handed someone’s phone to take a photo and the very first thing I notice is the blur of an oily fingerprint on the lens. These wipes are lint free, and I love using them for my camera and phone.

SD Card to Phone Adapter- If you’re using a camera for better pics but want to post to your phone immediately, invest in a simple adapter. There’s lots of options for both iPhone and Android. Using them is simple- plug them into your phone, pop in your SD card, and view/save your images to your device. Easy peasy, and great for on the go!

Selfie Light- Many party venues are poorly lit, and a lot of parties happen at night. By using a selfie light, you’ll get better photos without having to use your on-camera flash. This one attaches to both a phone and a camera. You can also adjust the warmth of the light, which is helpful for achieving the perfect white balance (color) for your images. If your images look yellow, use a bluer tint to counteract it, and vice versa. I’ve never used this one personally, but it seems like a perfect device for a beginner photographer.

Instax Camera- Make sure you have lots of film on hand. You can also invest in a variety of cute cases, but I think this one would be perfect.

Hailey's Disney World Themed First Birthday Party

Last month, we celebrated sweet Hailey’s first birthday! It seems like just yesterday she was born and my greatest adventure began. But now she’s already a person with a tiny personality and my very best friend. I wanted her first birthday party to be something simple but memorable, and hopefully something where she would have fun! As I had shared last month, we did a Disney World themed party, mostly because I LOVE Disney! This theme was a little bit challenging but I relied on the color scheme to keep it all cohesive- as usual! 

Here are some more details about the party plus some planning tips if you’re interested in throwing a Disney World party of your own! I’ll provide sources for everything I had as well, so you can copy and paste this party for yourself!

*This post contains affiliate links

Looking for a unique first birthday party theme? How about Disney World?! Here are some more details about the party plus some planning tips if you’re interested in throwing a Disney World party of your own! I’ve provided sources for everything I ha…

This party was different than most others because I had help! My SIL and sister stayed over the night before to help me set up. We mostly cleaned, prepared a few decorations and chatted over a glass of wine. However, that was a nice change over the usual pre-party prep where I’m running around the house setting up, baking, or trying to finish a project. Sometimes simultaneously! It was also super helpful to discuss the plan the night before so that the next day, I didn’t have to explain things as I was hurriedly trying to set up. I’ve realized my brain gets overloaded during times of pressure, and trying to explain what I need help with takes twice as long as doing it myself. Mostly because I can’t find the words! I’m not perfect, even though I may appear to be sometimes. Anyone who’s come to a party I’ve thrown can attest to that, hah! 

For more info about planning a party, I’ve got a whole series! You can learn more about how to plan a party in 10 steps, my favorite places for supplies, and 5 easy steps for party setup.

Looking for a unique first birthday party theme? How about Disney World?! Here are some more details about the party plus some planning tips if you’re interested in throwing a Disney World party of your own! I’ve provided sources for everything I ha…

We bought a tent! Since this was the third large party we threw in our yard, I figured we should probably have the supplies we need. In the past, John’s amazing cousin has lent us tents, tables and chairs. He’d pack up his pickup truck and come early to help us set up, driving hours each way and staying until the end of the event to clean up too. We’ve appreciated it SO much but it seemed like a good time to get some supplies of our own. So, we got this great pop-up event tent on amazon plus 2 sets of these white folding chairs. We already had several of these folding tables that we got from family, bar height tables and a folding indoor/outdoor serving cart so now we are ready for any party that comes our way! 

Looking for a unique first birthday party theme? How about Disney World?! Here are some more details about the party plus some planning tips if you’re interested in throwing a Disney World party of your own! I’ve provided sources for everything I ha…

For the food, we kept it simple with pizza. I orginally planned to print out a Pizza Planet logo for it, but that went out the window. I totally forgot, and pre-kids Cathy would probably have done it during the party, scrambling to find the right size logo and print out 3 copies until it was just right. After-kids Cathy said oh well. The little things in life add up and I’m trying to be less of a perfectionist these days!

Looking for a unique first birthday party theme? How about Disney World?! Here are some more details about the party plus some planning tips if you’re interested in throwing a Disney World party of your own! I’ve provided sources for everything I ha…

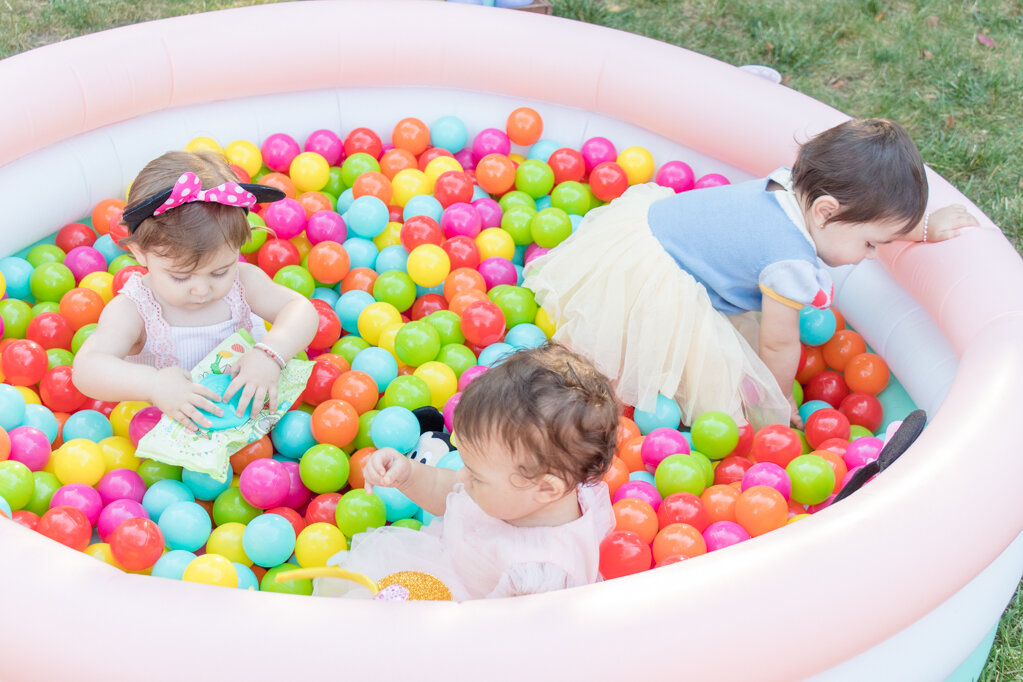
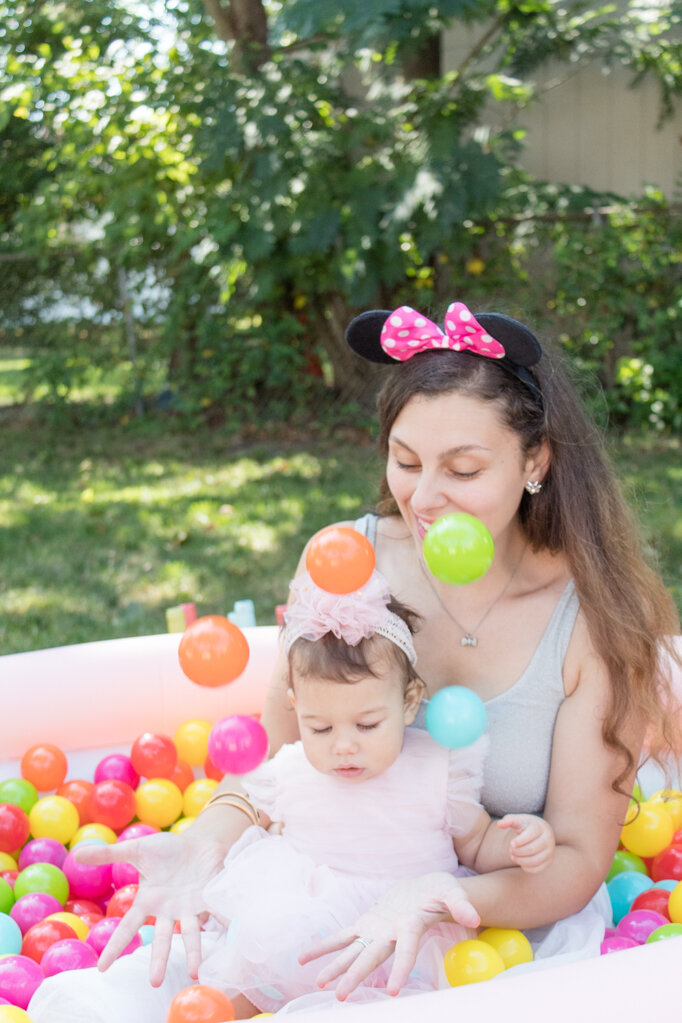
The hit of the party was the inflatable pool filled with balls! I knew I wanted to do a ball pit, but I kinda went back and forth on whether it was worth the money or not. We already had the pool and used it all summer long, but I knew I’d need a lot of balls to fill it. In the end, I’m SO glad I got it! The kids loved them and it was so cute to see everyone playing together. Hailey especially loved it! I originally wanted to get pink balls but picked this set for future kids that may end up being boys! It just seemed better for long term, plus I thought these colors were still pretty cute- a slight change from the regular rainbow! For reference, I purchased 1200 balls for a 3-person pool. 

Looking for a unique first birthday party theme? How about Disney World?! Here are some more details about the party plus some planning tips if you’re interested in throwing a Disney World party of your own! I’ve provided sources for everything I ha…

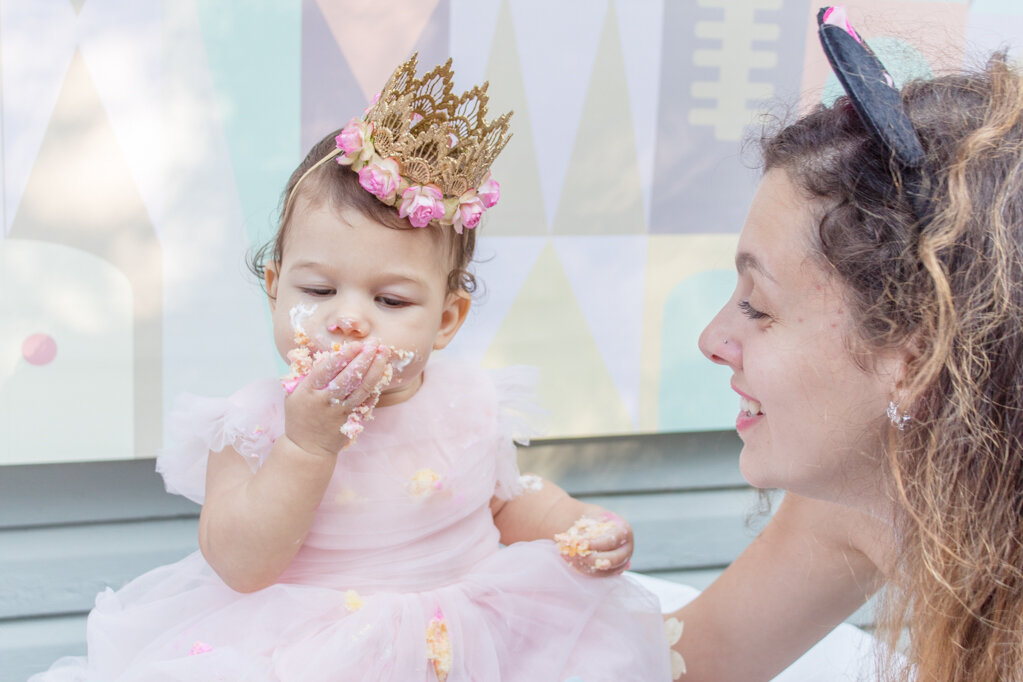
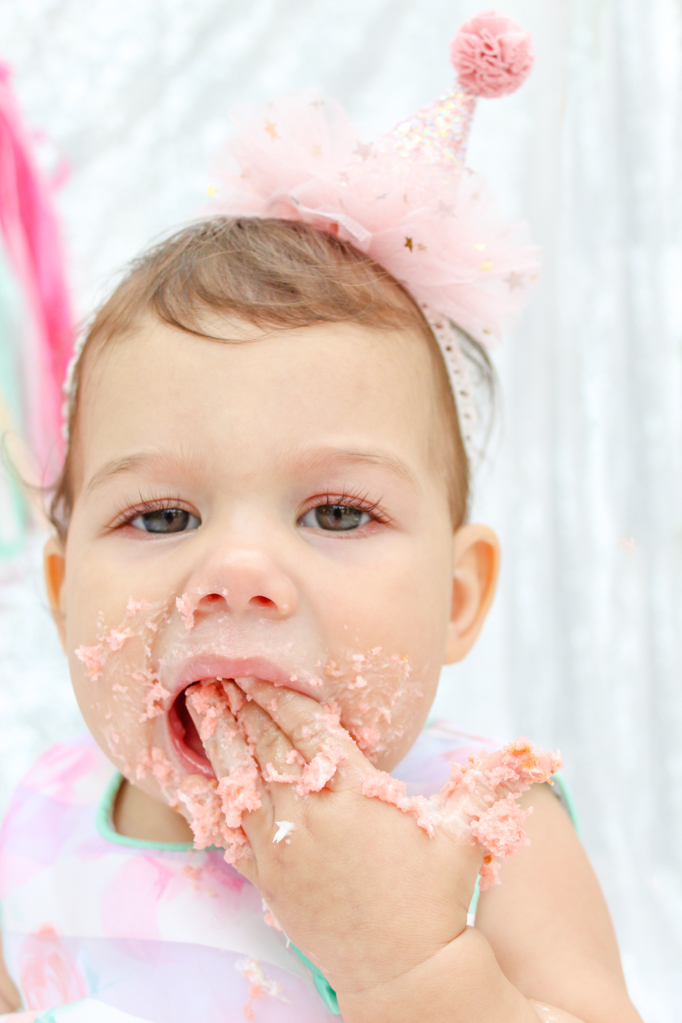
I loved the dress we got for Hailey for her party! I orginally wanted a Disney themed dress (for both of us) but they were too big. So, I went back to the drawing board and ordered a few options including a Cinderella dress, a Minnie dress, and this sweet pink tulle dress. I loved the layers, so I picked this one! It also came with the cutest hat that we used for her cake smash session and for wearing during the party!

Looking for a unique first birthday party theme? How about Disney World?! Here are some more details about the party plus some planning tips if you’re interested in throwing a Disney World party of your own! I’ve provided sources for everything I ha…

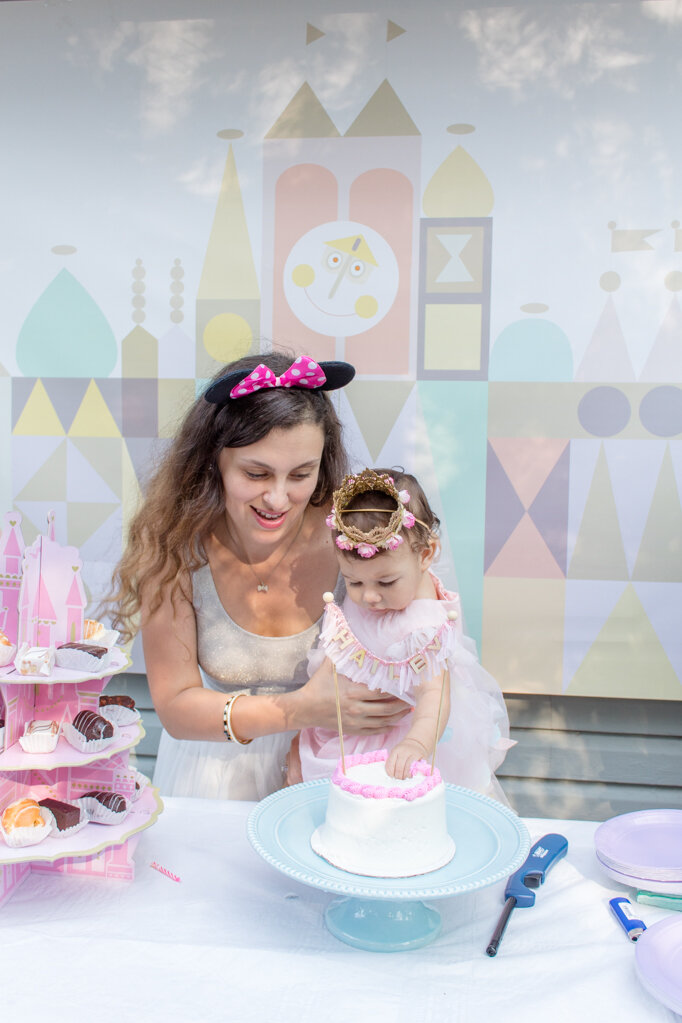
Speaking of cake smash, we ended up doing an impromptu cake smash during the party! I went to BJs to get some cakes for the party and saw a small one. I figured I’d get it because Hailey went wild during her cake smash photoshoot and I was a little nervous she’d do it again during the party. I don’t mind eating her smashed up cake, but others might! She turned out to be very well behaved with her cake but her cake smash session was so cute that I ended up letting her have another. After all, you only turn one once! She went wild and everyone loved it. We got some great photos and videos, including her feeding John some cake. When I asked for some, she gave me side eye. 

Looking for a unique first birthday party theme? How about Disney World?! Here are some more details about the party plus some planning tips if you’re interested in throwing a Disney World party of your own! I’ve provided sources for everything I ha…

We did the cake smash in front of this awesome It’s A Small World backdrop that I rush ordered from Etsy. I was originally planning to get it printed myself but then decided against it. The seller was SO nice and responsive, and I ended up getting the background just in time for the party! I plan to put it up in either Hailey’s room or a future playroom someday. It’s also got a great memory attached to it now!

On the invitation (which I made myself on Canva), I told people to feel free to Disneybound. Since I love dressing for a theme, I went with a Minnie Mouse vibe unintentionally! I usually wear Minnie ears at Disney World, so that was a given. I had bought a T-shirt for the party but I ended up disliking the way it looked with my tutu skirt. I headed back up to my closet for an alternative and decided on a sparkly tank. As I was turning to leave the closet, I saw my pink bow boots and knew I HAD to wear them! And thus, a golden princess Minnie Disneybound was born. PS- This is my husband “being happy”

Looking for a unique first birthday party theme? How about Disney World?! Here are some more details about the party plus some planning tips if you’re interested in throwing a Disney World party of your own! I’ve provided sources for everything I ha…

Other people were just as creative in the outfit dept. We had a lot of Snow Whites, Minnie Mouses, and even 2 dwarves! A friend of mine dressed up as the white rabbit from Alice In Wonderland which was pretty awesome! She had ears, a vest and everything. I love when people dress up with me. I’m always looking for an excuse!

Looking for a unique first birthday party theme? How about Disney World?! Here are some more details about the party plus some planning tips if you’re interested in throwing a Disney World party of your own! I’ve provided sources for everything I ha…

Overall, the party was super fun and casual which is exactly what I wanted. Gone are the days where I can’t enjoy the party because I am so concerned with everything being perfect, and fretting over the things that didn’t get done. Nowadays, I’m happy if the decor is cute and the bathroom is clean! 

Sources:

Setup: event tent. white folding chairs. these folding tables. bar height tables. folding indoor/outdoor serving cart. Ball Pit Balls.

Decor: It’s a Small World Backdrop. Carousel. Pastel Fans and Paper Poms. Striped Fans. Once Upon A Time Banner. Tablecloth. Princess Kit. Gold Minnie Ears. Black Ears.

Tableware: Napkins. Napkins. Castle Cupcake Stand. Pink and Gold Cups.

Hailey’s outfit: pink tulle dress.

My outfit: tutu skirt. Gold Minnie Ears. Pink Boots (similar). Sparkly Tank Top.

I hope you enjoyed seeing the pictures from Hailey’s birthday party! What do you think of a Disney World theme for a party? I can definitely see SO many more ways to make it big if you wanted to! Let me know in the comments below.

Hailey's First Birthday Mood Board: Disney World Party

I’m so excited to share my mood board for Hailey‘s first birthday party! I honestly can’t believe she’s already going to be a year old. Everyone kept telling me to enjoy my time with her while she was a baby, and I always heard my parents say how time flew by so fast and it’s so totally true. No matter what, I can’t make time slow down so I guess I might as well just accept how fast it’s going! And, that means accepting that my tiny little newborn baby is now going to be a year old. Pardon me while I go cry.

*This post contains affiliate links

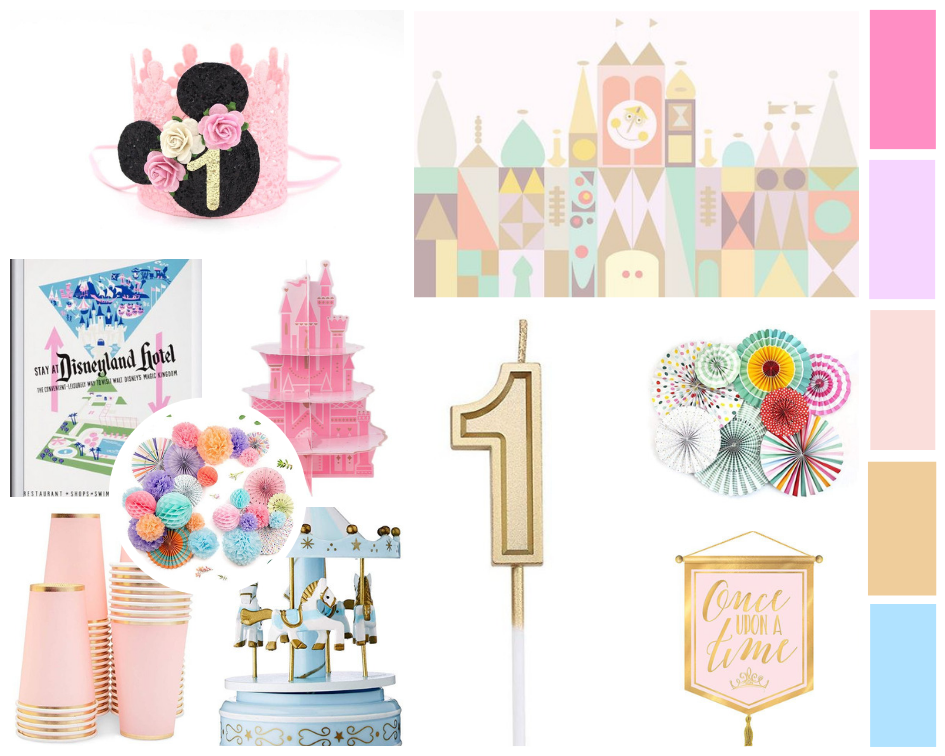
Looking for a fun birthday party theme? How about a vintage Disney World or Disneyland theme party?! Everyone loves Disney and with this party, you get to bring the magical parks to you. Click for the party plan, plus links to these items! #disneyla…

I had a difficult time deciding what theme I wanted to do for Hailey‘s birthday party. Some ideas that crossed my mind were a horse themed party, since she loves Spirit on Netflix or a Day of the Dead/Mexican Fiesta themed party, since she loves Coco! In the end, I decided to go with something I always love to do: Disney!

You see, way back when I was still pregnant, I told John that would be really fun to do her first birthday at Disney World. He pretty much thought I was insane. So, I decided that I would just bring Disney World to her! For the theme, since it’s so vague, I decided to pick a color scheme/palette that will keep the whole event looking cohesive. I know that Disney World has a whole lot of different colors and even varies based on the part of Disney that you’re in, but we all know that I’m not an Imagineer and therefore I need to keep my stuff cohesive.

Looking for a fun birthday party theme? How about a vintage Disney World or Disneyland theme party?! Everyone loves Disney and with this party, you get to bring the magical parks to you. Click for the party plan, plus links to these items! #disneyla…

Sources: Minnie Crown. It’s a Small World Backdrop. Disneyland Hotel Print. Castle Cupcake Stand. Pink and Gold Cups. Carousel. Pastel Fans and Paper Poms. 1 Candle. Striped Fans. Once Upon A Time Banner.

I wanted to have a sort of nostalgic/vintage vibe for the party while also being super modern and fresh. I started my search (as I always do) on Pinterest and pinned some parties for inspiration. I don’t want the party to be overly character-based, so I’m avoiding tons of Disney princesses or Mickey Mouse everywhere. I also didn’t want it to look too cluttered so I’m avoid polkadots for the most part.

After pinning my inspiration pics, I went on Etsy to look for vintage posters for the party. I focused on Disneyland or Disney World rides/attractions and made sure that the pictures fit in the general color scheme. I also originally wanted to create an It’s a Small World photo backdrop wall, but instead decided that I would just order one that was pre-made to avoid the extra effort of making it myself. In the past I definitely would have made it to save a few bucks, but the new mom version of me knows that there’s limited hours in a day and that was not worth spending time on! However, just know it would’ve been amazing ;)

Then I went on my favorite site ever, Amazon, to look up some additional party details like decorations, plates, and outfit choices for Hailey. Since there’s a Party City near me as well, and I’m able to more closely match the theme colors by being able to see them in person, I decided to look on there too. Overall I’m happy with the way that the event is shaping up and I’m excited to place my orders this week so that everything can arrive for the party!

Side note: I’m also considering creating a planning course so that you can see exactly how I plan my parties and can show you, step-by-step, how to plan a party of your own. If you’d like to be notified when the course is ready and get the free planning guide, enter your email here and I’ll send you some updates along the way plus some tips and tricks for planning the party of your dreams. 

In the meantime, If you have a party that you need help planning and want a special Cathy touch, visit my virtual party planning page so that you can book me to virtually plan your event! We’ll do a video call to discuss what you had in mind, I’ll come up with a theme and color scheme for you based off of what we discussed, and I’ll pin all the inspiration photos as well as let you know exactly what order to make your event a big success! Click the image below for more info on that.

Well, there you go! Hailey’s party is in less than two weeks so I’m off to go finish planning! It’s going to be really amazing, and I hope it’s something she can look back on some day (in photos, of course) and see how much fun we had together! I want to know- what was the theme you did for your baby’s first birthday? It’s such a special event to plan!

DIY Glitter First Birthday Crown

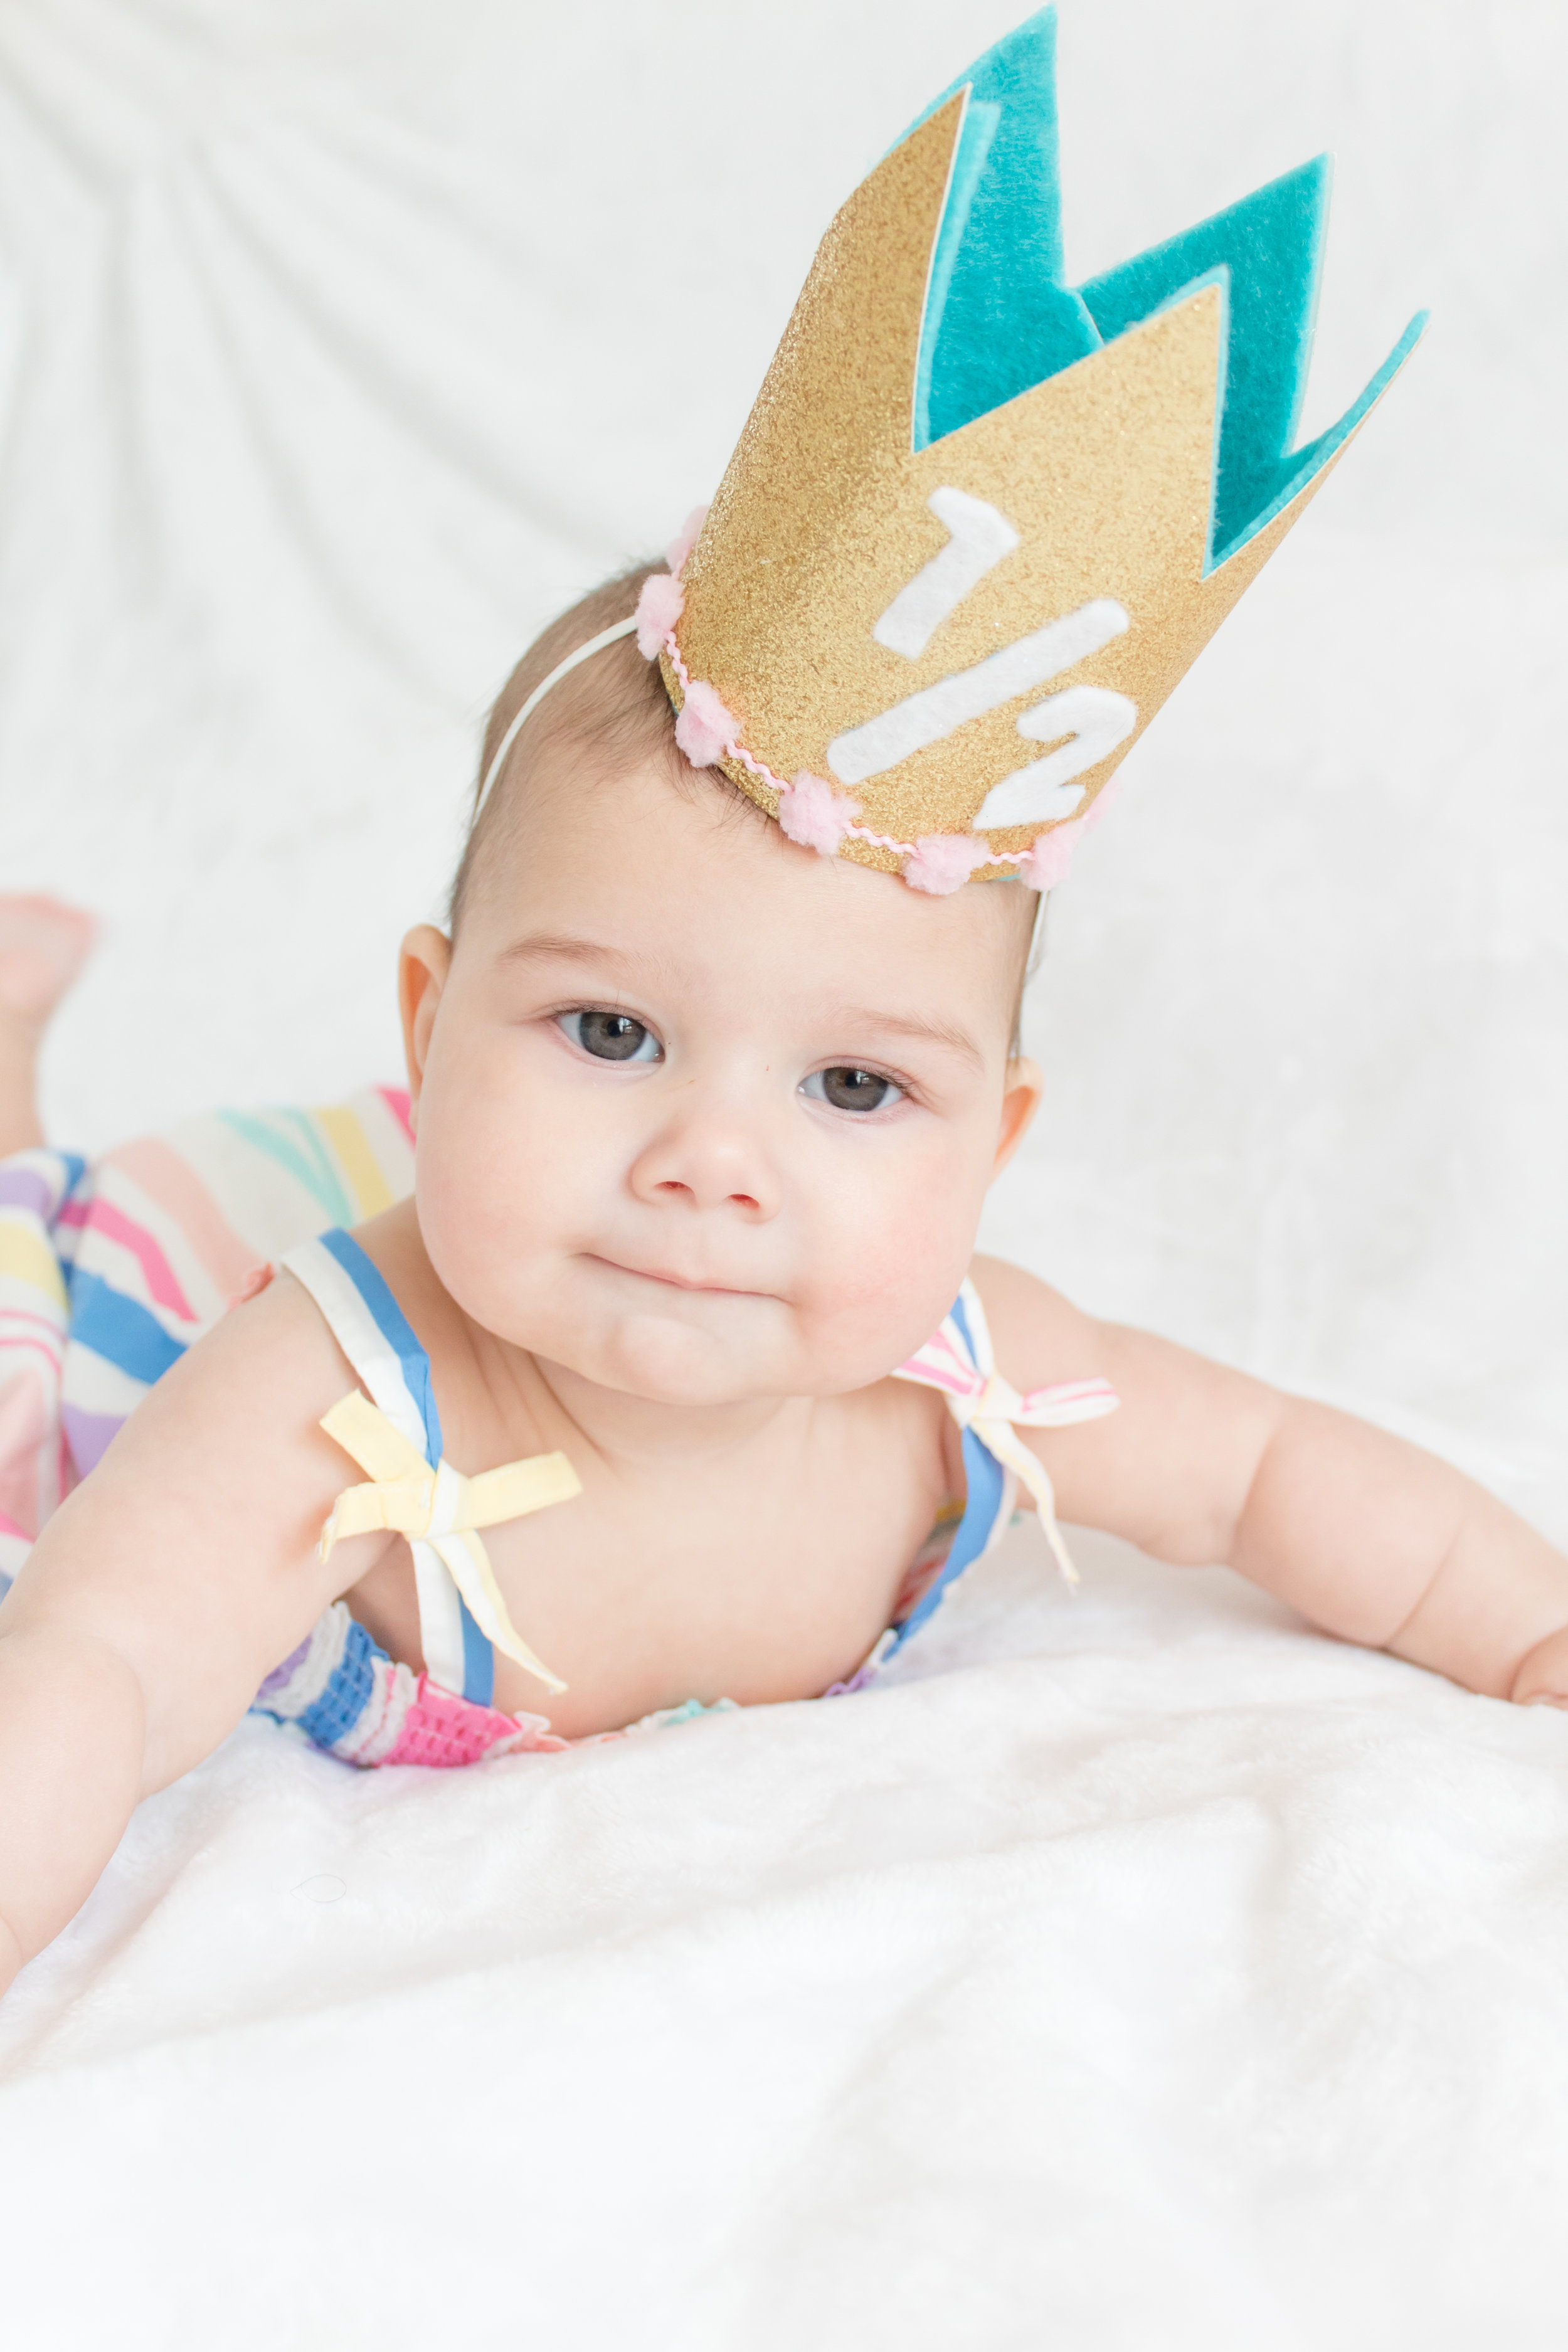
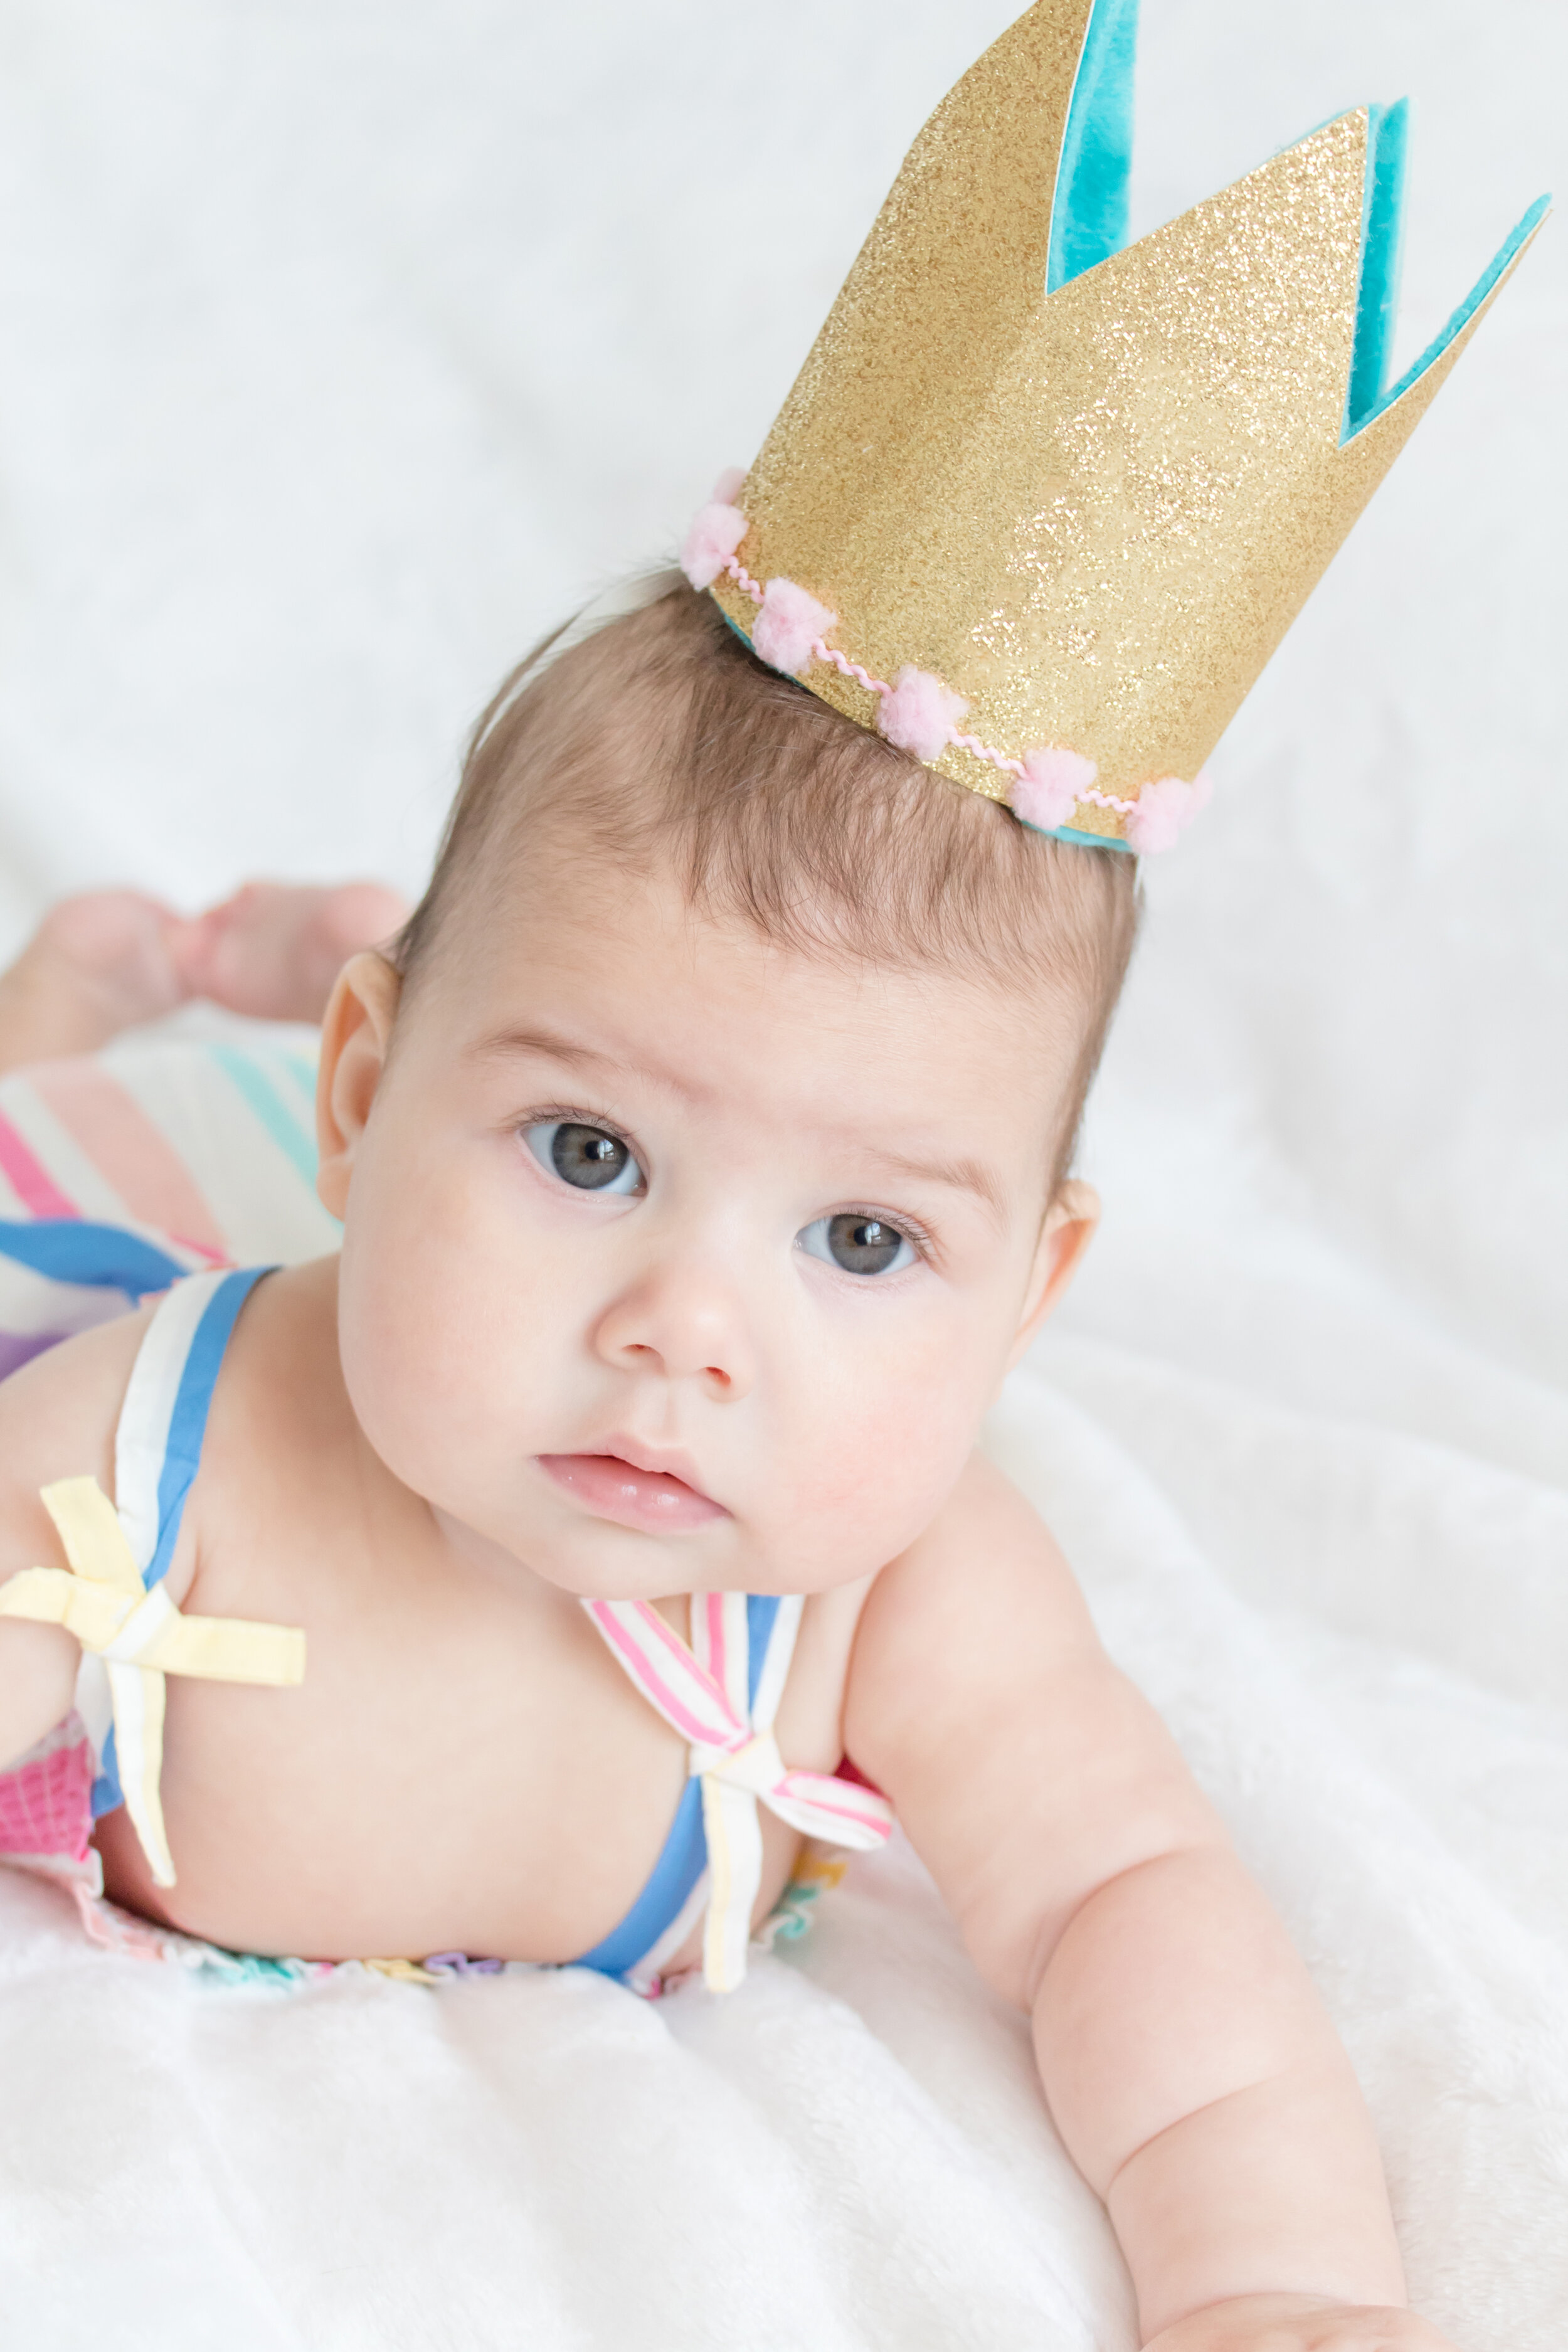
On the morning of Hailey's half birthday, I suddenly decided I needed to do an impromptu photoshoot. I had to post about her being 6 months old on social media, because I was pretty amazed at how fast the time had gone. And, since I had plans to do her half birthday party, I knew I wanted to make her a crown. Unfortunately, I didn't think to do it sooner, so I found myself on the morning of her half-birthday scrambling around the attic to find the supplies I needed. Luckily, it wasn't hard to do and I was able to make the template and the crown within just an hour! Imagine how quick it'll be for you since the template is already made. What can I say except “you're welcome"! (Anyone else get that Moana reference?)

The template contains all the numbers and two different sizes, so you can decide what’s best for your baby/toddler/child/yourself. It also contains directions and a bonus cake topper template! Oh, and it’s totally free. By making it yourself, you’ll save money. It's really easy and you can get everything you need on Amazon (lifesaver!) or save even more money with a trip to your local craft store.

*This post contains affiliate links

Everyone’s birthday is better with a crown! This DIY glitter birthday crown is super easy to make and even includes a free template. Whip one up, then get your camera ready – your baby it’s gonna look amazing! Click for the full DIY and the free pri…

These tutorial pictures were taken on my kitchen table as I worked so that I could give you guys a nice step-by-step tutorial without having to go up to the attic and try to cram in a blog post PLUS a craft project while Hailey napped, so it's not quite as detailed as I usually am. However, I figured done is better than perfect! I knew that if I put this project onto my never-ending to do list, you'd probably get this post when Hailey's going off to college.

You will need:

Template (see below)
Printer (I use this one and love it!)
Glitter paper (similar here)
Felt (similar here)
Scissors (similar here)
Trim (similar here)
Glue gun (similar here)
Elastic (similar here)

The printable is available in my resource library, which you can get totally FREE access to, just by signing up. What exactly do you get? Access to all my printables, including party planning guides, checklists, and my projects. By signing up, you'll have access to all projects- past, present and future! 

Directions:

1. Download and print your template. It consists of 3 pieces- a crown template with the space for the numbers, the template for the numbers, and a bonus cake topper.

2. Before cutting anything out, test your trim on the template and make sure it's wide enough that you can glue it on without covering the numbers. If not, add a bit of height by placing the template a few cm's above the edge of your glitter paper.

Everyone’s birthday is better with a crown! This DIY glitter birthday crown is super easy to make and even includes a free template. Whip one up, then get your camera ready – your baby it’s gonna look amazing! Click for the full DIY and the free pri…

3. Cut your crown template out of glitter paper and felt liner. When cutting your glitter paper, I recommend leaving a little bit extra on the sides so you have some width to play around with. This will make it easier to glue your crown shut.

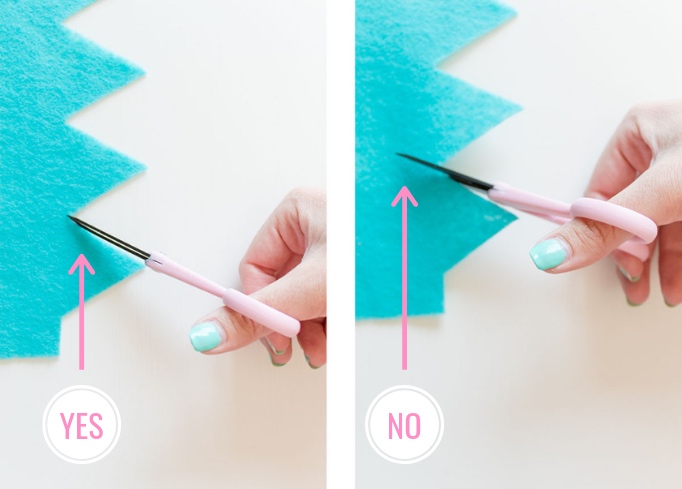
4. Now some cutting tips! First, place your template against the bottom edge of your glitter paper so you'll get a nice, straight edge and one less thing to cut. Second, when cutting out your triangle points, or any small area like in the cake topper, I recommend only putting your scissor tip as far as you need to cut. Meaning.... don't intend to end your precise point in the middle of your scissor blade, because most likely when you cut it, you'll end up going a bit too far and your inside points won't be neat. I hope this makes sense- it’s hard to explain!

Everyone’s birthday is better with a crown! This DIY glitter birthday crown is super easy to make and even includes a free template. Whip one up, then get your camera ready – your baby it’s gonna look amazing! Click for the full DIY and the free pri…

5. Once you have your glitter paper crown and felt liner cut out, it's time to add the numbers! Cut them out of felt, using a colored pencil or washable ink marker to draw the template onto the felt. If you're thinking, “ok Cathy there is no way in freakin HECK I can cut numbers out of felt that small, ya looney”, never fear. I have 2 alternatives! Either purchase felt numbers and glue those onto your crown instead or in the scrapbook paper section, they have a flocked paper that looks like felt, but the backside has a cardstock backing. This will be much easier to trace your numbers onto and cut out. Just remember, ESPECIALLY with the flocked paper but the felt too, you should be tracing your numbers backwards so that the front is the correct direction and looks nice and neat with no ink or pencil marks.

Everyone’s birthday is better with a crown! This DIY glitter birthday crown is super easy to make and even includes a free template. Whip one up, then get your camera ready – your baby it’s gonna look amazing! Click for the full DIY and the free pri…

6. Glue your numbers onto the glitter paper, following the template. Add your trim to the bottom and glue that on too.

Everyone’s birthday is better with a crown! This DIY glitter birthday crown is super easy to make and even includes a free template. Whip one up, then get your camera ready – your baby it’s gonna look amazing! Click for the full DIY and the free pri…

7. Cut a piece of elastic large enough for your baby's head. I used 1/8 inch wide. You'll want to glue the elastic between the glitter paper and the felt liner, placing it by their ears so that it fits neatly and isn’t an eyesore. Then, glue your felt to the glitter paper.

Everyone’s birthday is better with a crown! This DIY glitter birthday crown is super easy to make and even includes a free template. Whip one up, then get your camera ready – your baby it’s gonna look amazing! Click for the full DIY and the free pri…

TA-DA! You're done mama! Now place that crown on your baby's head and snap some photos. They're gonna look SO CUTE!

Everyone’s birthday is better with a crown! This DIY glitter birthday crown is super easy to make and even includes a free template. Whip one up, then get your camera ready – your baby it’s gonna look amazing! Click for the full DIY and the free pri…

When you make this project for your babe, you have to tag me so I can see! I love baby photos.

Total Cost:

Template FREE!
Glitter paper $2
Felt $1
Trim $3
Elastic $2

Total: $8

Such a bargain! I've seen similar crowns on Etsy for $20 plus shipping, so you'd save a lot by making your own! Plus, you can customize the colors and you don't need to wait for it to ship or even worse, have to spend extra for rush shipping prices! Because us mommas are always doing everything at the last minute, amiright?