Disney Themed Backyard Engagement Party

Ok guys. Let's take it WAY back to last June and talk about my amazing engagement party. I honestly can't believe I haven't posted it sooner, but I really wanted to get this post just right. It was GORGEOUS, but also a lot of work. Just showing pretty pictures isn't my thing, so I really wanted to talk about how to use my engagement party as inspiration for your own. I want to talk about how I got it done, where stuff came from, and how to replicate the look for yourselves. This post will showcase the photos, and the next post will be chock full of tips, links, and DIY projects!

It was truly a magical day, with perfect weather. Since it was an outdoor party, and we had about 50 people coming, we were REALLY counting on a warm and sunny day. Luckily, we got that! We used a combination of our own tables/chairs, borrowed ones, and "rented" ones that a family member borrowed from his job. We also had a few small tents set up to block out the sun. We hired a photographer friend to capture the event, Ken Camara. He did an AMAZING job with our photos. I highly recommend having a photographer at your event if you can swing it. If you find an up-and-coming photographer or photo student, you can have gorgeous and affordable photos that you'll always cherish. It's worth the investment!

If you're thinking of throwing a Disney themed wedding or engagement party, look no further! There are tons of ideas, as well as tips to make your party unique and cohesive. Click to see the full post, with lots of other photos!

Fun fact about me- I LOVE DISNEY. No really... I'm pretty obsessed. I watch the movies over and over, I'm listening to a Disney Spotify playlist as I type this, and I'm probably going to Disney World for my honeymoon... Truly a Disney-loving girl over here. Anyway, I love so many of the movies that I don't think I could ever pick just one to focus on for the party, so I decided to have as many Disney-inspired elements as I could. To keep the party cohesive, I decided to have designated zones for each movie. This prevented a yard sale effect and helped people recognize all the elements, especially since some were obscure. I also had my sister make graphics with romantic quotes from Disney movies for each table. The day before the party, I went to the supermarket and purchased a bunch of flowers and created my own arrangements on the day of the party.  This helped me save a lot of money!

Welcome Table

For my welcome table, I used a Snow White and Fairy Tale theme. The Wishing Well was made from some sort of hanging letter holder I found at the thrift store. Using scrap wood and paint stirrers, I had my fiance create posts and a roof, and I painted it all white to match. A few vines and flowers from my craft hoard completed the look. Next to the Wishing Well, I placed some Best Day Ever tags (a Rapunzel reference!) so that people could give us some advice for our wedding, marriage, or life in general. I added some inexpensive accessories to enhance the look, like a spray painted dollar store toy horse, a dollar store mirror, and some moss from Michaels. 

If you're thinking of throwing a Disney themed wedding or engagement party, look no further! There are tons of ideas, as well as tips to make your party unique and cohesive. Click to see the full post, with lots of other photos!

I made these cute Up-themed pins for our parents and siblings. Since not everyone had met, it was a nice way to distinguish our immediate families so that everyone could meet them. If there's any interest in how to craft these, I can definitely make a blog post about it!

If you're thinking of throwing a Disney themed wedding or engagement party, look no further! There are tons of ideas, as well as tips to make your party unique and cohesive. Click to see the full post, with lots of other photos!

Up

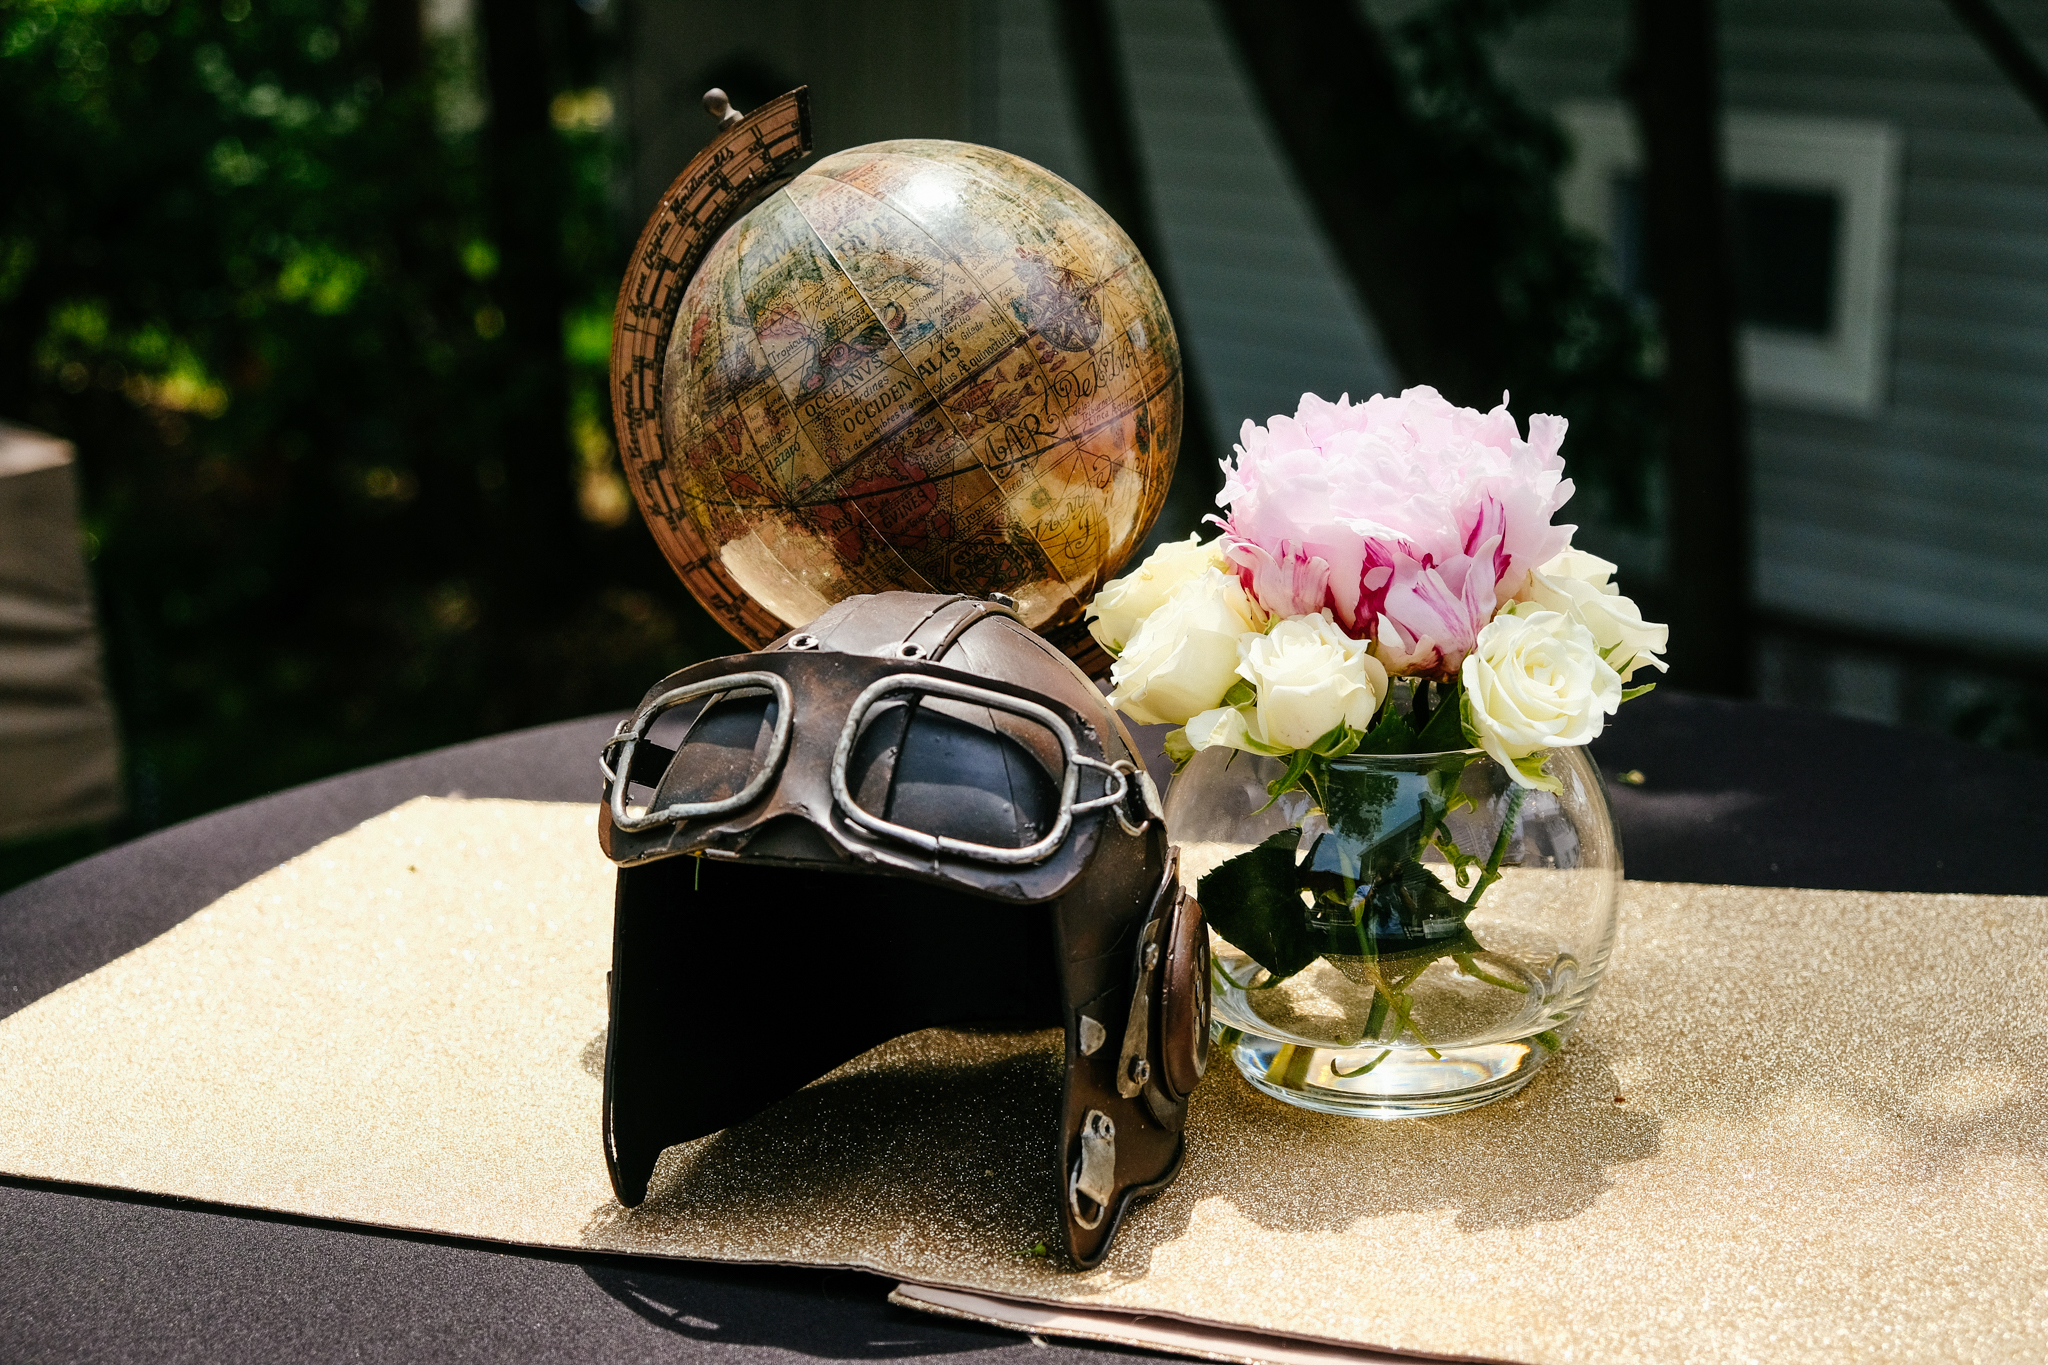
Since I figured some people would want to stand, I purchased a folding bar-height table for our deck. I wanted to keep the decor on this table simple since it's pretty small, so I put a globe and a helmet with goggles for UP. I also created a really cute picture frame that was house shaped with balloons for this table, but sadly forgot to put it out! It's hard to remember every little thing when it comes to a party this big, but you've just gotta accept that things get forgotten sometimes.

If you're thinking of throwing a Disney themed wedding or engagement party, look no further! There are tons of ideas, as well as tips to make your party unique and cohesive. Click to see the full post, with lots of other photos!

Peter Pan

When I went thrift store shopping, I added "gold pirate ship" to my list, fairly certain that I wouldn't be able to find anything. Lo and behold, I found this amazing gold ship at the first store I went to! I hung it up on my front door using clear fishing line, and it was such a statement piece. I loved it so much that I left it out for nearly the whole summer!

If you're thinking of throwing a Disney themed wedding or engagement party, look no further! There are tons of ideas, as well as tips to make your party unique and cohesive. Click to see the full post, with lots of other photos!

Tangled

For Rapunzel's table, I decided to go with lots of lanterns and flowers. The gold sequin runner was symbolic of her long golden hair, and the tallest lantern was symbolic of her tower, complete with the "magic golden flower" on top! The small paper lanterns were a pattern from Designs by Miss Mandee. As soon as I saw these lanterns, I knew I had to make them for my party! I went out and purchased a Cricut specifically for this, even though I had put off buying one for years. The smaller lanterns are inexpensive ones from Ikea, filled with dollar store flowers.

If you're thinking of throwing a Disney themed wedding or engagement party, look no further! There are tons of ideas, as well as tips to make your party unique and cohesive. Click to see the full post, with lots of other photos!

Cinderella

Since I ended up ordering a lot of Cinderella items, I was able to use it both indoors and out. Most of the pumpkins were borrowed from my Fall decor, since it was really hard to find pumpkin items in the summer. I took about half my cheap pumpkins and spray painted them gold and silver so they would match better. The horse was from the dollar store and was spray painted silver. Nice and cheap!

If you're thinking of throwing a Disney themed wedding or engagement party, look no further! There are tons of ideas, as well as tips to make your party unique and cohesive. Click to see the full post, with lots of other photos!

The Little Mermaid

This was one of my favorite tables. I added lots of seashells and nautical elements to this table, along with a gold sequin table runner to be the "sand" at the bottom of the ocean. I found this funny Flounder cup at the thrift store (score!) and spray painted him rose gold to match, since his usual yellow and blue color was a bit much for the decor. I added a candelabra since it's one of Ariel's items from her collection, which gave the table some nice height.

If you're thinking of throwing a Disney themed wedding or engagement party, look no further! There are tons of ideas, as well as tips to make your party unique and cohesive. Click to see the full post, with lots of other photos!

I added a half fan garland, which looked like seashells to me! It was way smaller than I thought and the fence kinda make it look even smaller, but whatevs. You win some, you lose some.

If you're thinking of throwing a Disney themed wedding or engagement party, look no further! There are tons of ideas, as well as tips to make your party unique and cohesive. Click to see the full post, with lots of other photos!

Cinderella

Here's the outdoor Cinderella table! This one had a similar feel as the one inside, except it had a few more pumpkins and these awesome pumpkin candle holders I spray painted gold. They're one of my favorite decor items for Thanksgiving now! It's amazing what a can of spraypaint can do.

If you're thinking of throwing a Disney themed wedding or engagement party, look no further! There are tons of ideas, as well as tips to make your party unique and cohesive. Click to see the full post, with lots of other photos!

Frozen

Since this table had an umbrella on it, there was less room for centerpieces. I kept it simple by adding a bouquet of flowers, some wintry candle holders and lots of sparkle. The frozen table was probably the hardest, because how do you prevent it from looking like a winter table?! For this reason, I only used sparkly snowflake items. It reminded me of the scene where they first meet Olaf in Elsa's wintry wonderland. The gold sequin runner (instead of silver) also prevented it from looking too much like winter, and kept the whole thing glam.

If you're thinking of throwing a Disney themed wedding or engagement party, look no further! There are tons of ideas, as well as tips to make your party unique and cohesive. Click to see the full post, with lots of other photos!

Beauty and the Beast

This was my other favorite table. Since this table had larger elements than the others, I kept the rest of the decorations minimal. I had an enchanted rose on a stack of books, a candleholder for Lumiere, and a thrifted teapot for Mrs. Potts. Then, all I did was add some fake roses and voila! You can be our guest.

If you're thinking of throwing a Disney themed wedding or engagement party, look no further! There are tons of ideas, as well as tips to make your party unique and cohesive. Click to see the full post, with lots of other photos!

The rose was a fake one from Michael's that actually looked incredibly real. Funny story about the books- I bought them from the Dollar Store! They have tons of books at the Dollar Tree, but most have a book jacket on them. However, when you peel it off, the hardcover book underneath might be a cool color. So I went around peeling off all the jackets to find the prettiest books, and putting back the ones that weren't. 

If you're thinking of throwing a Disney themed wedding or engagement party, look no further! There are tons of ideas, as well as tips to make your party unique and cohesive. Click to see the full post, with lots of other photos!

Bar Cart

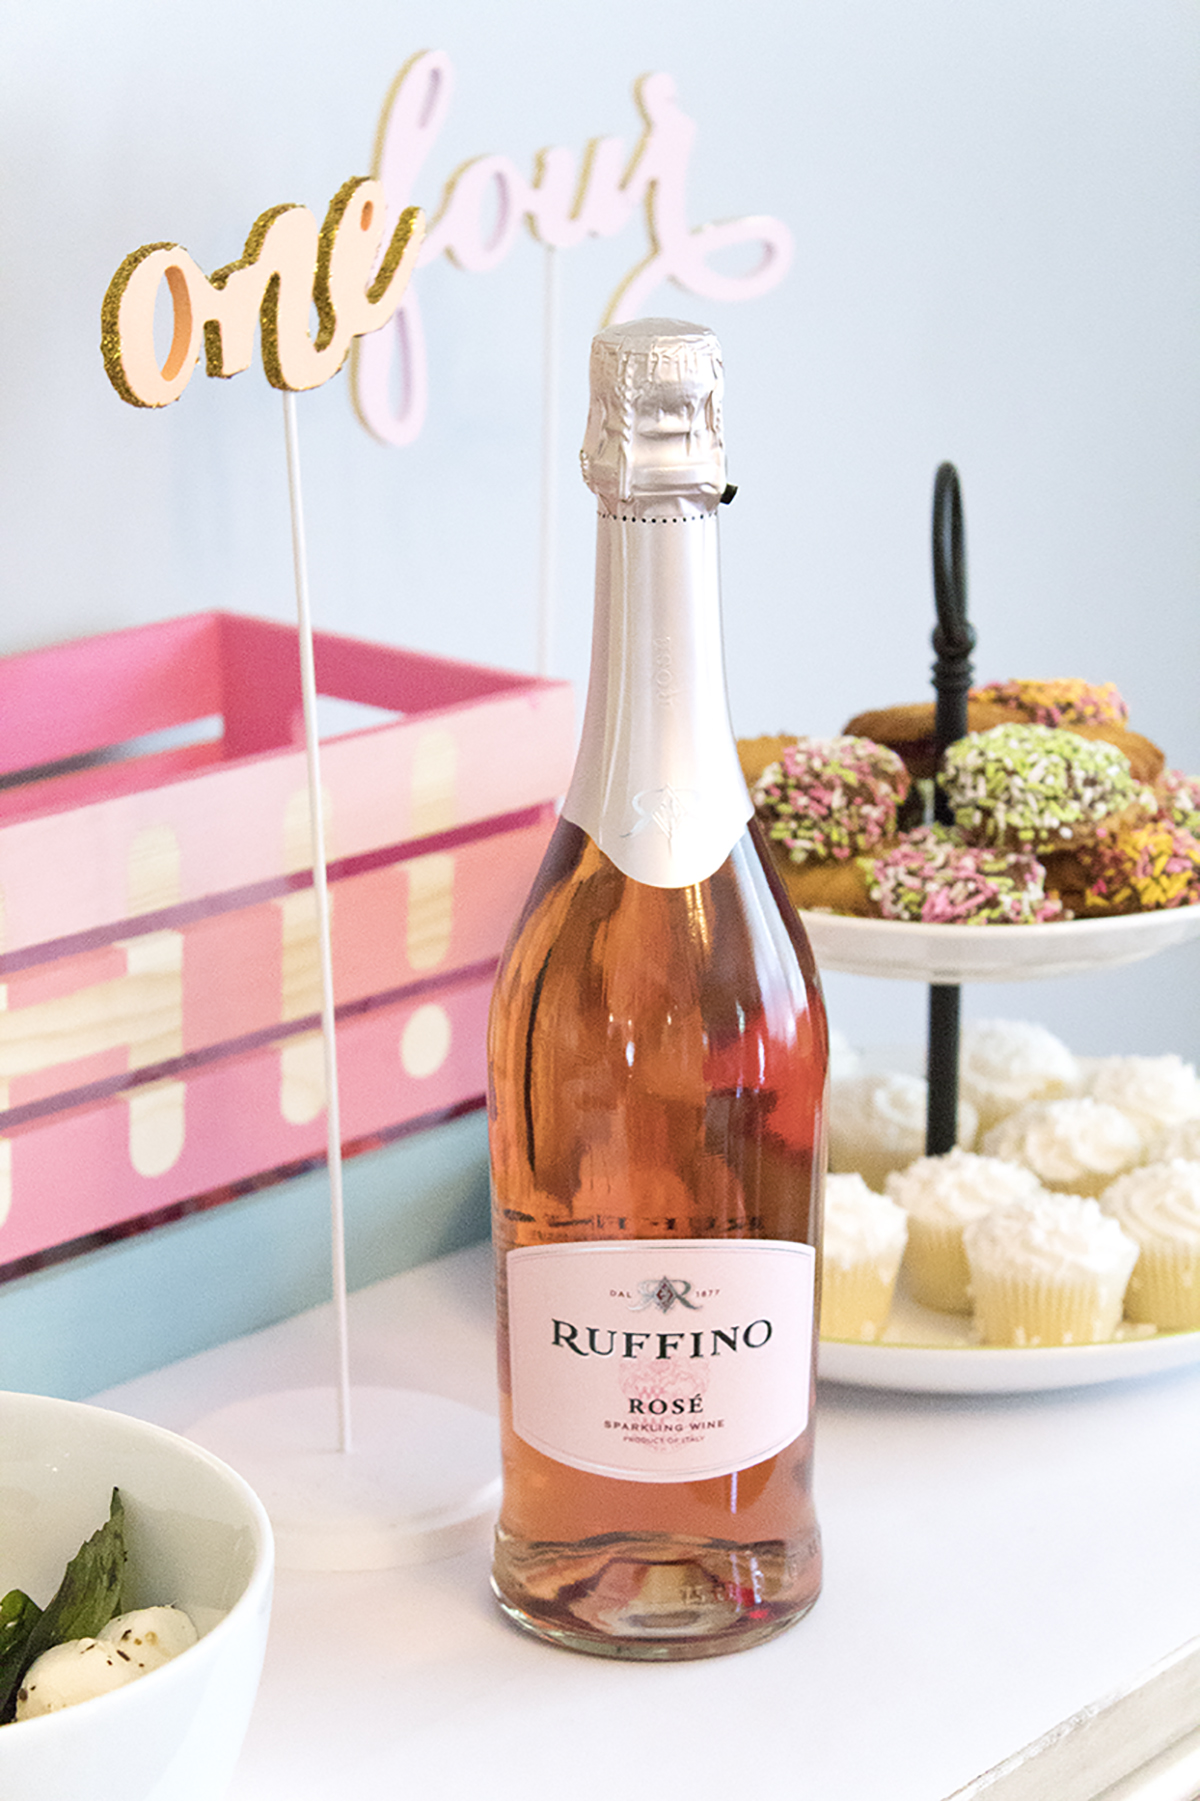
The bar cart didn't have a specific theme, so it was mostly fairytale and engagement/love themed. Since our special sangria ran out before I could find the chalk, our talented photographer, Ken Camara, created this really cute sign using our hashtag. The Pop Fizz Clink sign added some sparkle, and it came from my New Year's Eve decor.

If you're thinking of throwing a Disney themed wedding or engagement party, look no further! There are tons of ideas, as well as tips to make your party unique and cohesive. Click to see the full post, with lots of other photos!

Alice in Wonderland

There's a rabbit hiding in the bushes who's late for a very important date! (Just kidding, there's no rabbits in there!) This was a really easy decoration, since all I had to do was grab our kitchen clock and put it in the bushes.

If you're thinking of throwing a Disney themed wedding or engagement party, look no further! There are tons of ideas, as well as tips to make your party unique and cohesive. Click to see the full post, with lots of other photos!

I also had my fiance make these ADORABLE flamingo croquet mallets as an activity for the guests and kiddos. They were a hit (hah! no pun intended) and made an awesome photo op. The tutorial was by Damask Love, and honestly it was one of my favorite parts!

If you're thinking of throwing a Disney themed wedding or engagement party, look no further! There are tons of ideas, as well as tips to make your party unique and cohesive. Click to see the full post, with lots of other photos!

Oh hey, here I am (on the left) with my super cool sister, posing with our croquet mallets.

If you're thinking of throwing a Disney themed wedding or engagement party, look no further! There are tons of ideas, as well as tips to make your party unique and cohesive. Click to see the full post, with lots of other photos!

Misc

I saved up some wine bottles, which we spray painted to create a ring toss game. I figured this was a cute play on the whole "he put a ring on it" thing. It was really easy and cheap to do! We used an old planter box we had to house the bottles. It was practically free and so much fun!

If you're thinking of throwing a Disney themed wedding or engagement party, look no further! There are tons of ideas, as well as tips to make your party unique and cohesive. Click to see the full post, with lots of other photos!

And, lastly, we had some Disney themed coloring books for the kids! I found the Disney Princess Brides one at the Christmas Tree Shop and there was nothing more perfect! There was a lot of stuff going on so the kids didn't need the coloring books at the party, but they made for a nice favor. It would be cute to scribble a note inside so that maybe the kids could read it one day when they grow up and have an engagement party of their own!

If you're thinking of throwing a Disney themed wedding or engagement party, look no further! There are tons of ideas, as well as tips to make your party unique and cohesive. Click to see the full post, with lots of other photos!

The engagement party was so much fun to plan, and it was an amazing day! I have to thank my family and friends that came and helped out before and after the party. Plus, my fiancƩ was a HUGE help by finishing up some of the projects I couldn't do, like ring toss and the flamingo croquet mallets. It was definitely a stressful few days leading up to it, but the reward was so much greater than the struggle.

If you want to learn more about planning a Pinterest worthy party, be sure to sign up to get your FREE Anatomy of a Pinterest Worthy Party guide! It's full of helpful hints on how to pick a theme, the little details that will make your event unique, and tips to take great photos of your event. And, there's even a checklist so you don't forget anything! So what are you waiting for? Get yours now!

So what do you think about this Disney themed engagement? Would you do anything differently? Let me know in the comments below!

DIY Zebra Party Tray

Did you know that in high school, there was a period of time that I wanted to be an interior decorator? I imagined myself creating gorgeous, perfectly curated homes filled with amazing goodies. I was eventually talked out of it, but I still have a desire to create a unique and beautiful home for my fiancĆ© and myself. Although it's been a learning curve, I'm starting to figure out my style and realizing what works and what doesn't. I love to fill my home with one-of-a-kind, whimsical purchases. The kind of stuff that makes people want to look around and wonder where the heck I found this amazing item. But, my absolute, very FAVORITE thing to put inside my home is anything I made myself. I love telling people I made things. There's no better feeling in the world.

DIY Zebra Party Tray. Click for the full how-to!

The reason I love this zebra tray is because there really isn't anything else like it out there! I think it adds such a fun feel to any room. You can use it on your desk to hold your paperwork, on your coffee table to hold magazines, or in your kitchen to hold flowers and a notepad. It's also a great party tray for holding cocktails! The best part of all is that it's super easy (and cheap!) to make.

*This post contains affiliate links.

DIY Zebra Party Tray. Click for the full how-to!
DIY Zebra Tray. Click for the full how-to!

You will need:

DIY Zebra Tray. Click for the full how-to!

Aluminum baking tray (mine was from the dollar store, similar here)
Spraypaint (similar here)
Primer & gloss top coat (similar here and here)
Zebra figurines (here
E6000 glue (here)

How To:

DIY Zebra Tray. Click for the full how-to!

1. Purchase a tray. You'll want to look for something with a wide handle on either side, so that you can adhere your plastic animal. Also, be sure to avoid any trays with holes for hanging or too much branding. If you want to save a step, purchase a tray that you don't need to spray paint. For me, purchasing a baking tray ended up being the cheapest route.

DIY Zebra Tray. Click for the full how-to!

2. Spraypaint your tray using the color of your choice. I chose a glossy medium pink, but I think this tray would look AH-MAZING in yellow. I just didn't have any yellow spray paint on hand, and it was one of those rare 60 degree days in February, so I had to work with what I had. Be sure to prime it first and use a topcoat. If not, it'll be easy to scratch, and the paint won't adhere as well. Trust me... I speak from experience!

DIY Zebra Tray. Click for the full how-to!

3. Using E6000 glue, put a drop of glue on each hoof/foot, and wait for it to cure for 2 mins. Then place it down on the widest part of your handle. Let dry 24-48 hours before handling.

DIY Zebra Tray. Click for the full how-to!

This tray is the perfect size for holding paperwork on your desk! I have a love/hate relationship with paper, so I love that this cute tray keeps everything organized while making me smile.

Psst- Interested in the printable above? Just fill out this form to get our FREE Anatomy of a Pinterest Party guide!

DIY Zebra Tray. Click for the full how-to!

And, when it's time to party, you can kick those papers out and grab your drinking glasses! Let's take a moment to say RIP to the adorable pink ombre cup. My fiancƩ's brother accidentally broke one yesterday :(

DIY Zebra Tray. Click for the full how-to!

The teal glasses are from Pioneer Woman and are awesome! The cotton candy garland, party hats, and animal drink stirrers are all projects from the blog.

DIY Zebra Tray. Click for the full how-to!
DIY Zebra Party Tray. Click for the full how-to!

So what do you think of this zebra tray? You can create it with any animal. I also bought some schnauzers, and can't waittt to make another tray with them! Do you have any DIY projects in your home decor? Let me know about them in the comments below!

DIY Wood Bead Tassel Necklace

Happy March! Wow, I can't believe it's nearly spring already and St. Patrick's day is next week! St. Patrick's Day was always one of my favorite holidays for some reason. I like almost all of them, but I think it's something about how everyone goes crazy and gets all dresses up that makes me like St. Patrick's Day a lot. Instead of doing a traditional St. Patrick's Day craft, I decided to switch it up a little with a pastel rainbow necklace. My fiancĆ© is a quarter Irish, and he said St. Patrick's Day does not involve rainbows. However, there's no way to find a pot of gold without a rainbow. So, at least in the Hallmark version of the holiday, there's definitely rainbows! If you want to add a little bit of celebration to your St. Patrick's Day outfit this year without looking like you belong in a parade, try wearing this necklace! Honestly, it works well all year round and I think it's perfect for the spring!

Add a little color to your wardrobe with this DIY Wood Bead Tassel Necklace. It features painted beads, DIY tassels, and a customizable palette. Make one for your closet today! #diyjewelry #rainbow #stpatricksday
DIY Wood Bead Tassel Necklace
Add a little color to your wardrobe with this DIY Wood Bead Tassel Necklace. It features painted beads, DIY tassels, and a customizable palette. Make one for your closet today! #diyjewelry #rainbow #stpatricksday

You Will Need:

DIY Wood Bead Tassel Necklace

Embroidery floss (similar here)
Wood beads (similar here)
Nylon cord (here)
Jump rings & clasps (similar here)
Paint (similar here)
Paintbrush (mine are from Michael's, similar here)
Styrofoam (here)
Kebab sticks (here)
Washi tape (similar here)
Jewelry tools (here)
Scissors (here)

DIY Wood Bead Tassel Necklace

1. Take your skewer and wrap it in washi tape. You'll want enough so that the beads won't slide down as you're painting. Put your beads on and paint them. I used bright rainbow colors. Put your skewer into some styrofoam to dry. While you wait...

Add a little color to your wardrobe with this DIY Wood Bead Tassel Necklace. It features painted beads, DIY tassels, and a customizable palette. Make one for your closet today! #diyjewelry #diytassels

2. Cut a piece of cardboard that is the size you want your finished tassels to be. I wanted mine to be around the same size as my beads, so I used that as a template. Wrap the embroidery floss around the cardboard 25 times. You can do less or more, depending on how thick or thin you want your tassels to be. Cut a small piece of floss, thread it through the underside of the top, and tie a few tight knots.

DIY Wood Bead Tassel Necklace

3. Slide the floss off the cardboard and onto a pencil or stir stick. Take a piece of embroidery floss and wrap it around just below the stick. Tie several knots, then cut your embroidery floss. Then, take a jump ring and thread it through the top piece of embroidery floss. Comb your tassel to loosen the weave of the embroidery floss and create and fluffy tassel.

DIY Wood Bead Tassel Necklace

(Psst. if you want to save time and buy your tassels, check out this link).

DIY Wood Bead Tassel Necklace

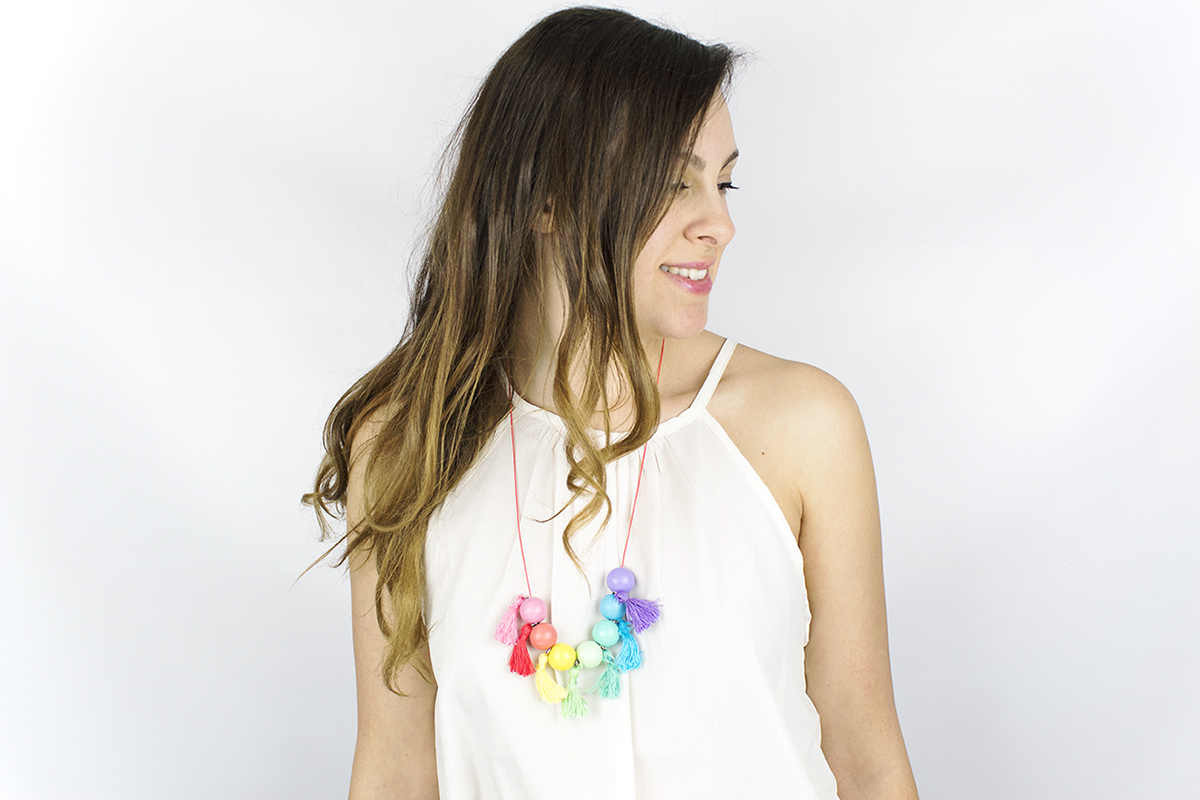
5. Attach your clasp to one crimp, and your jump ring to another crimp, and attach them to your cord. I wanted my necklace to be long, but be warned- I made mine WAY too long. With the clasps on, it came down to about my belly button! Haha. So, I added a few clasps along the way so I could adjust the length if I wanted to.

DIY Wood Bead Tassel Necklace

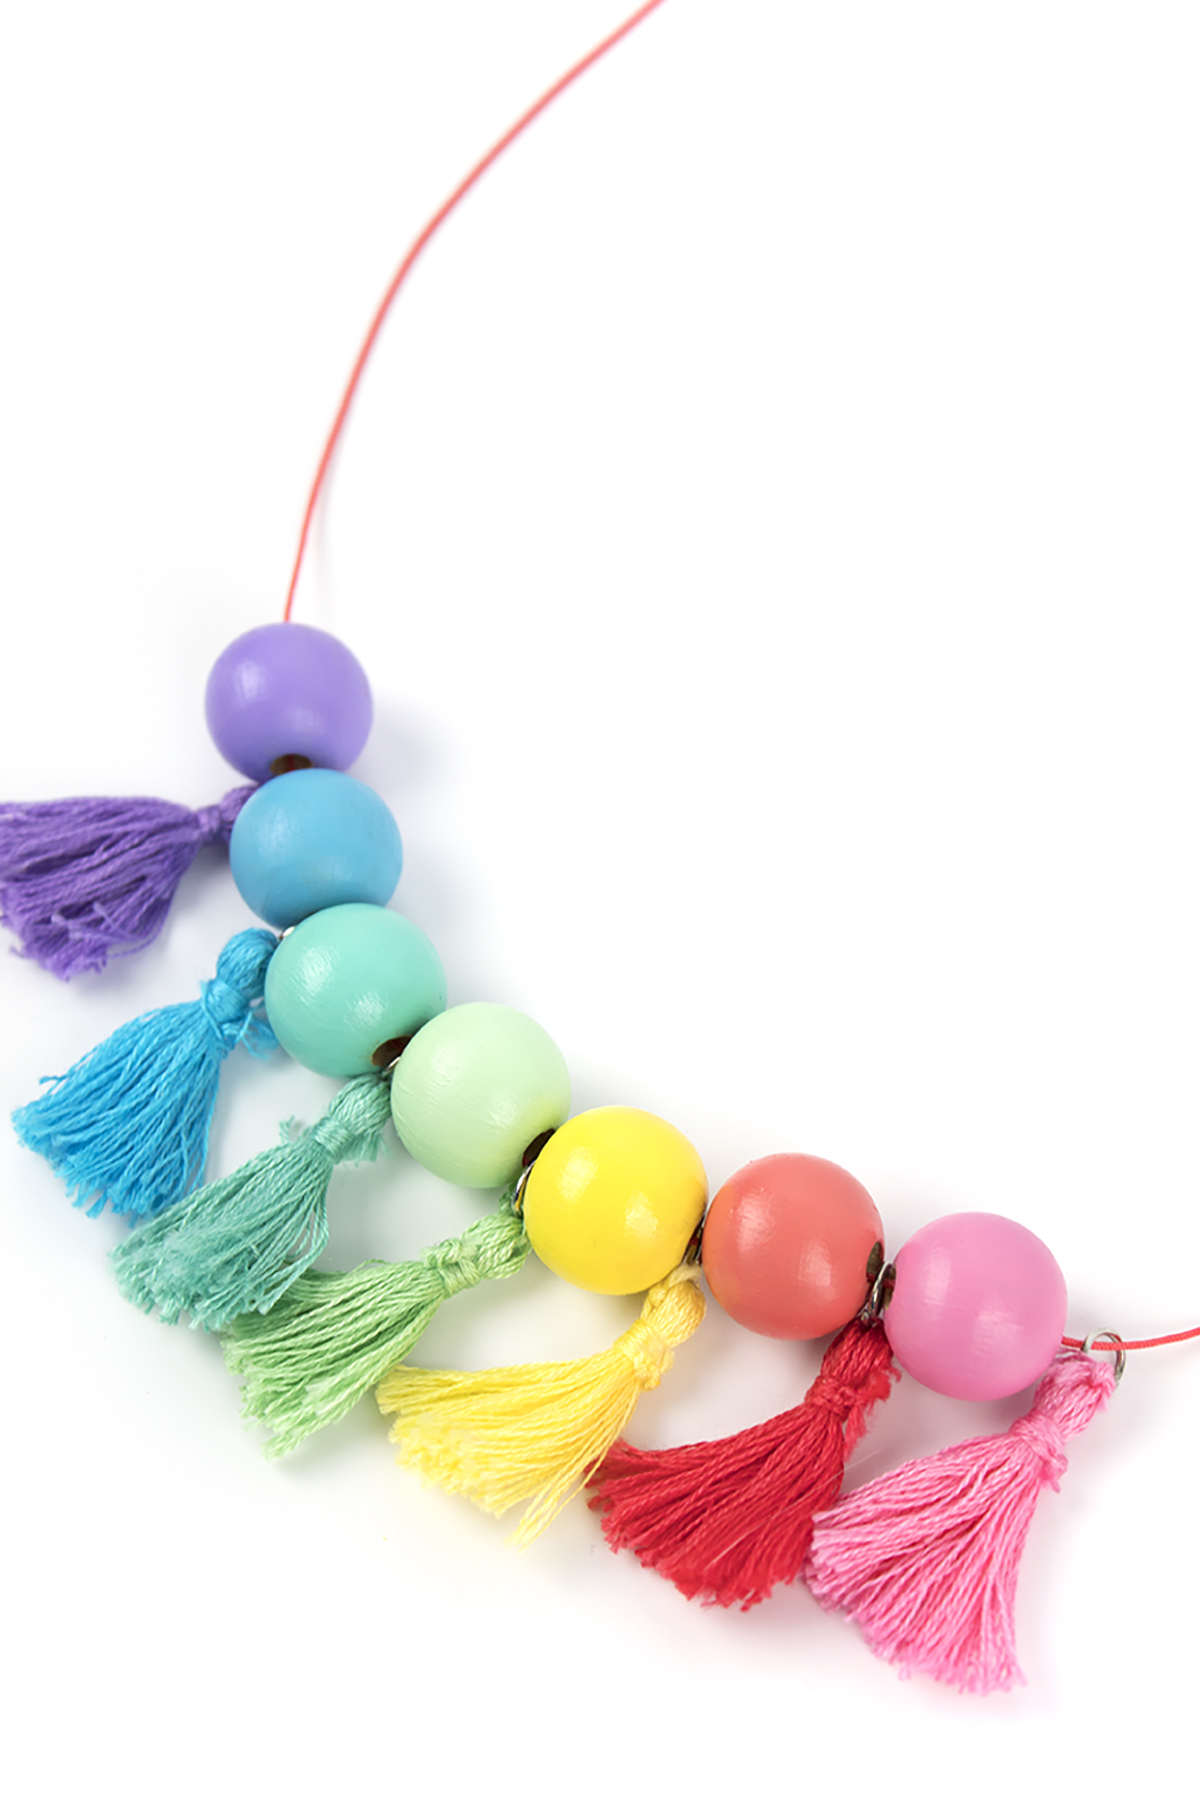
6. Thread your beads and tassels. I decided to use a coordinating bead and tassel combo, but you can also mix it up.

Add a little color to your wardrobe with this DIY Wood Bead Tassel Necklace. It features painted beads, DIY tassels, and a customizable palette. Make one for your closet today! #diyjewelry #rainbow #stpatricksday

7. Wear and enjoy! I've gotten so many compliments on this necklace the few times I've worn it so far. I truly love it! If you want to add a fun pop of color to your outfit, this necklace is essential.

DIY Wood Bead Tassel Necklace

Oh, did you know I have not one, but THREE cats? This is Roger and he's probably the friendliest cat on the planet. I found him in my backyard in Astoria and decided to keep him. He's the coolest, funniest dude.

Add a little color to your wardrobe with this DIY Wood Bead Tassel Necklace. It features painted beads, DIY tassels, and a customizable palette. Make one for your closet today! #diyjewelry #rainbow #stpatricksday

I love love loveeeeee this necklace. The pastel rainbow colors are just magical! Would you wear a necklace like this? What do you think of it? Let me know in the comments below!

Wedding Planning Update: Just 6 More Months!

Ahhh! Somehow my wedding went from "so far away" to "holy cookies, that's close". Time really does fly, and now I feel like I'm going to be scrambling to get things done. Exactly what I didn't want to happen! Oh well, I thrive under pressure so I guess it's meant to be. I'm in my element now haha.  I haven't done an update in almost 6 months, so here's one to fill you in. 

Time flies when youā€™re wedding planning! Check to see my updates and advice for what needs to get done! #weddingplanning

Let's get real- the past few months were rough. It all started with fracturing my toe on my wedding date (ugh #truestory) and wondering if the date is cursed. Then there's the fact that I get easily overwhelmed when faced with decisions. We almost eloped in Disney World, I almost wanted to call everything off, and I almost settled for an ok wedding dress. Somehow everything worked out, so none of that happened. But I was pretty dang close to an emotional breakdown to avoid the stress of things. Wedding planning is hard, you guys! 

Anyway, on a brighter note, here's what went well:

Wedding Dress- Ordered!!

The best news is that I FOUND A DRESS!! Holy crap you guys, this is the biggest deal. I tried on over 80 dresses. I didn't think I was going to be this picky about it, but somehow I was. I started at David's Bridal and really loved a dress, but it didn't go over well with some people. Since I already had my doubts, I took it out of the running. I spent the next year trying to find a replacement. I'd go dress shopping 2-3 weeks in a row, take a few months off, then go shopping again. I went in my walking cast too! That was fun. Gam Gam goes wedding dress shopping. I'm happy to say that I finally found a dress that I love, and I honestly can't wait to wear it and for John to see me in it! 

Photographer- Chosen

One of the first things we did, way back in November, was book our photographer. We looked for someone that knows how to take good photos (duh) but also is able to capture the emotions of the day. When we contacted our photographer, Lora, we had a phone call to discuss our expectations for the day, as well as get to know each other. Lora was super friendly and personable. She was able to keep the conversation flowing, got John to open up, and made him SMILE. That, to me, meant she was the one. John is like a stoic puzzle, so the fact that she was able to get him to open up and be comfortable meant we could avoid an album full of awkwardly posed, stuffy photos. I can't wait to see our photos of the special day! 

DJ/Videographer/Lighting- Done

When we went to our wedding venue for their annual bridal show, we met a married couple that had their own business doing rentals. They were so friendly and I loved their setup, so we decided to go with them for our DJ, uplighting, and videography. Their wedding was held in our venue, so we were able to see the room transformed from a nice hall to a gorgeous wedding venue. Plus we discovered an awesome thing we could add to make the room pop- starlight floors! This girl loves sparkles, so as soon as I saw it, I had to have it. 

From our Disney-themed engagement party. Photos coming soon!

From our Disney-themed engagement party. Photos coming soon!

Florist- Chosen!

We picked our florist! We met her, you guessed it, at the bridal show! For this overwhelmed and procrastinating couple, the bridal show was a great place to meet vendors. We picked almost everyone we are using for our wedding from this bridal show! I met Sue at her table and she was giving out roses to all the brides. Fun fact about me: I hate long stem roses. So when Sue handed me one, I politely said "no thanks, I don't like roses". She asked what kind of flowers I liked and picked one out of her arrangement to give to me! It was a really small but sweet gesture, so I knew she was the right one to help us. 

Chair Rentals- Done!

We are renting Chiavari chairs for our wedding, since the venue has these dark and uninteresting chairs that look less formal. We are also meeting with a rental company about renting vs buying the items for the centerpieces and decor. In case you didn't realize, decorations are my favorite part of any party, so I'm so excited to see what we do for the wedding. I've got some awesome ideas to transform the room and I can't wait to get started on that! 

Can you tell I'm getting excited?! 

Here's a picture from 2012. Look how young we were!

Here's a picture from 2012. Look how young we were!

Needs to get done:

Meeting with vendors- we have a meeting this month with some of our vendors to discuss options and I'm really excited to see what we cook up. 

Tasting- yay! So excited for the tasting. Our venue is making our cake, so I'm super excited to try everything. Cake tasting seems like the best part of wedding planning, besides dress shopping! 

Working on invitations- we really want to send our invites early since our wedding is on a holiday weekend. 

Getting people to book their rooms- pretty much no one has booked their rooms and no one knows you can book them yet, so we need to get on that. 

Accessories- now that I have the dress, I need some accessories to compliment it. 

Wow guys, it's crunch time. Really feeling the pressure right about now! Let's talk about wedding planning. What's the most important part of planning? Let me know in the comments.

Be sure to follow my colorful wedding ideas Pinterest board for gorgeous bouquets, amazing centerpieces, and more!

Lisa Frank Tie-Dye Waffle Sundae

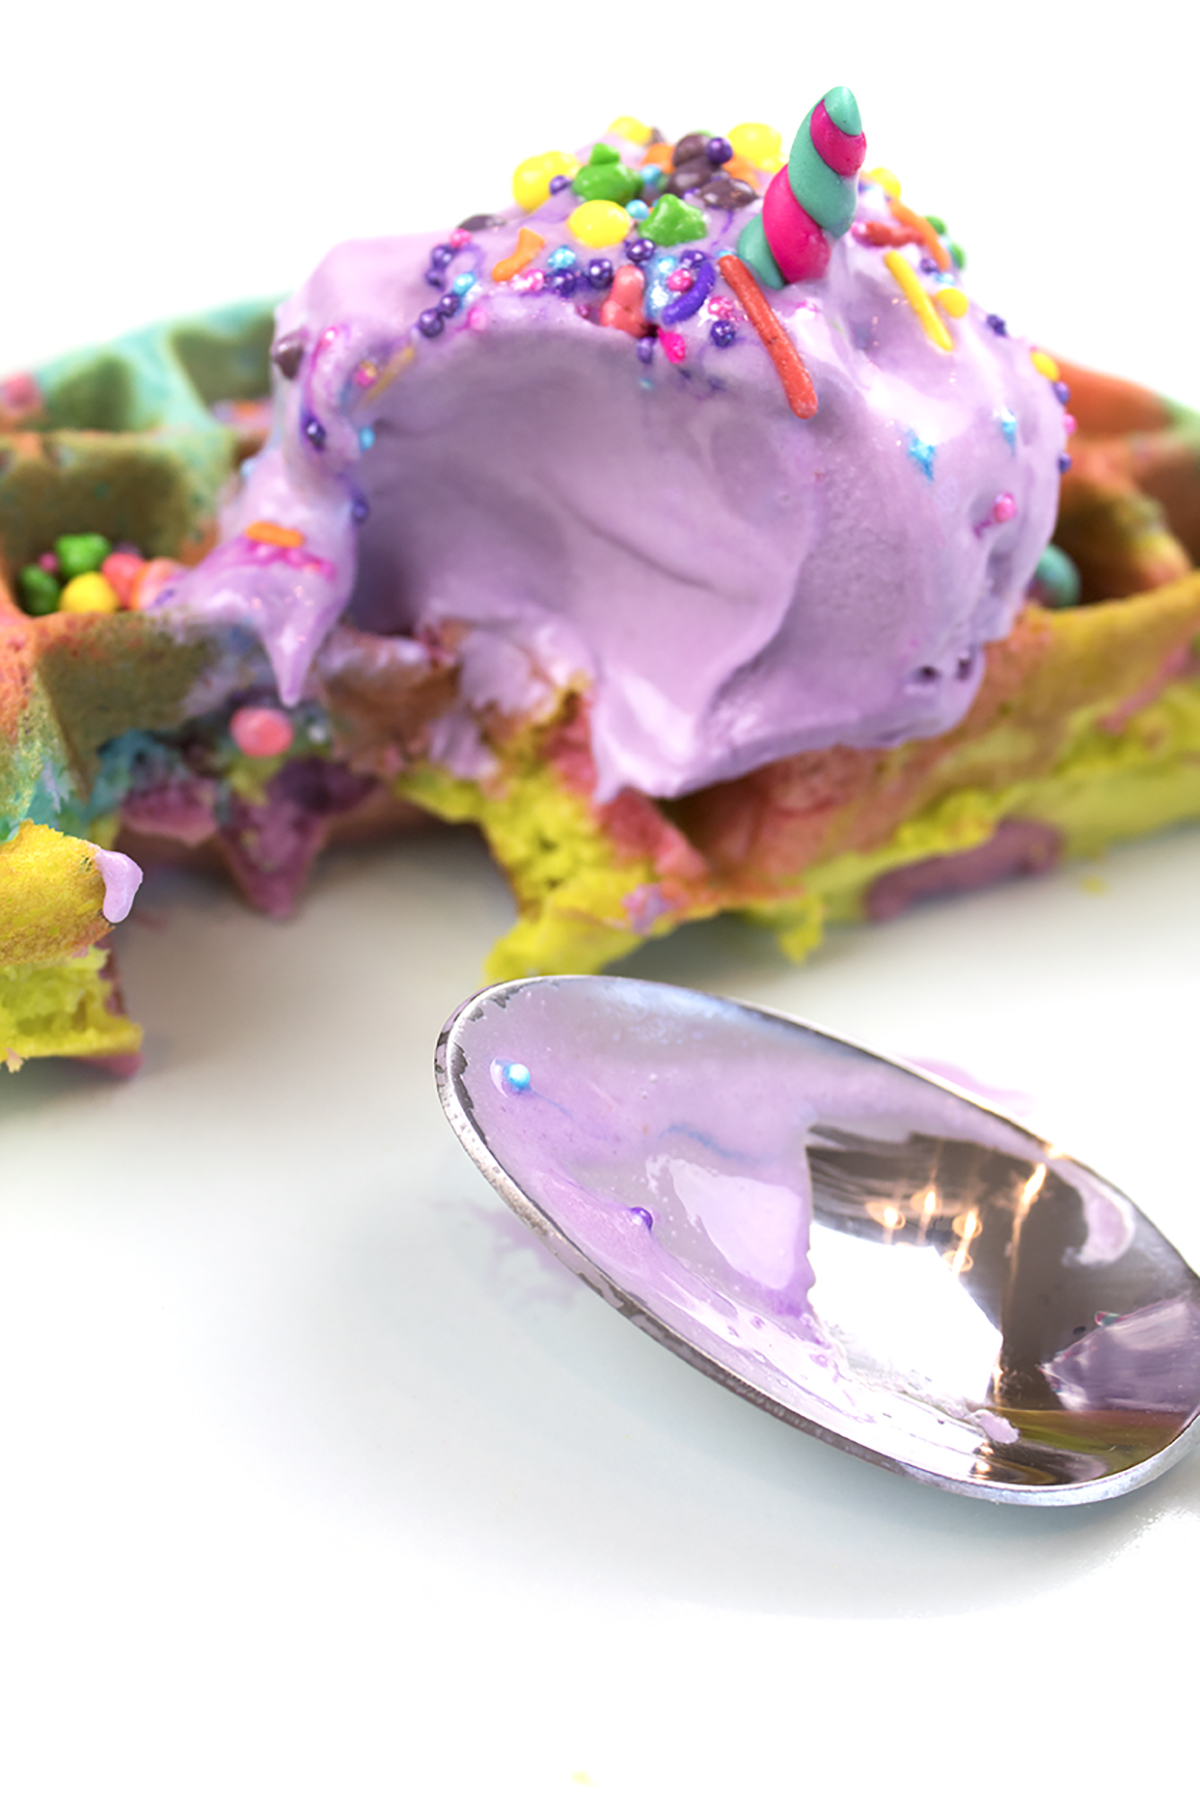
Lisa Frank is making a comeback, and it's everything our cutesy technicolor dreams were made of. I can still remember being a kid/pre-teen and going to Eckerd (remember that store?!) and browsing their back to school section, hunting for the absolute perfect Lisa Frank school supplies.  Folder with two kissing fish? Check. Lisa Frank stickers to cover absolutely everything I own? For sure. Binder with cool teenage aliens? DUH. Lisa Frank was such an important part of my childhood. I loved the creativity and the color of her products. So, when it came time to collaborate with Holly from ClubCrafted on a 90's inspired ice cream post, I just had to do something Lisa Frank! It's got tie-dye, ice cream, sprinkles, unicorns and candy. What more could you ask for?!

You've got to try this recipe for a Lisa Frank Tie-Dye Waffle Sundae! Itā€™s perfect for a 90ā€™s theme slumber party or a fun breakfast for the kiddos! #tiedye #lisafrank #icecreamsundae

You will need:

Waffle Maker (I have this one)
Neon food coloring (here)
4 spoons and bowls (here)
Waffle batter (I used the Classic Waffle Recipe on page 9)
Whisk and Spatula (similar here and here)
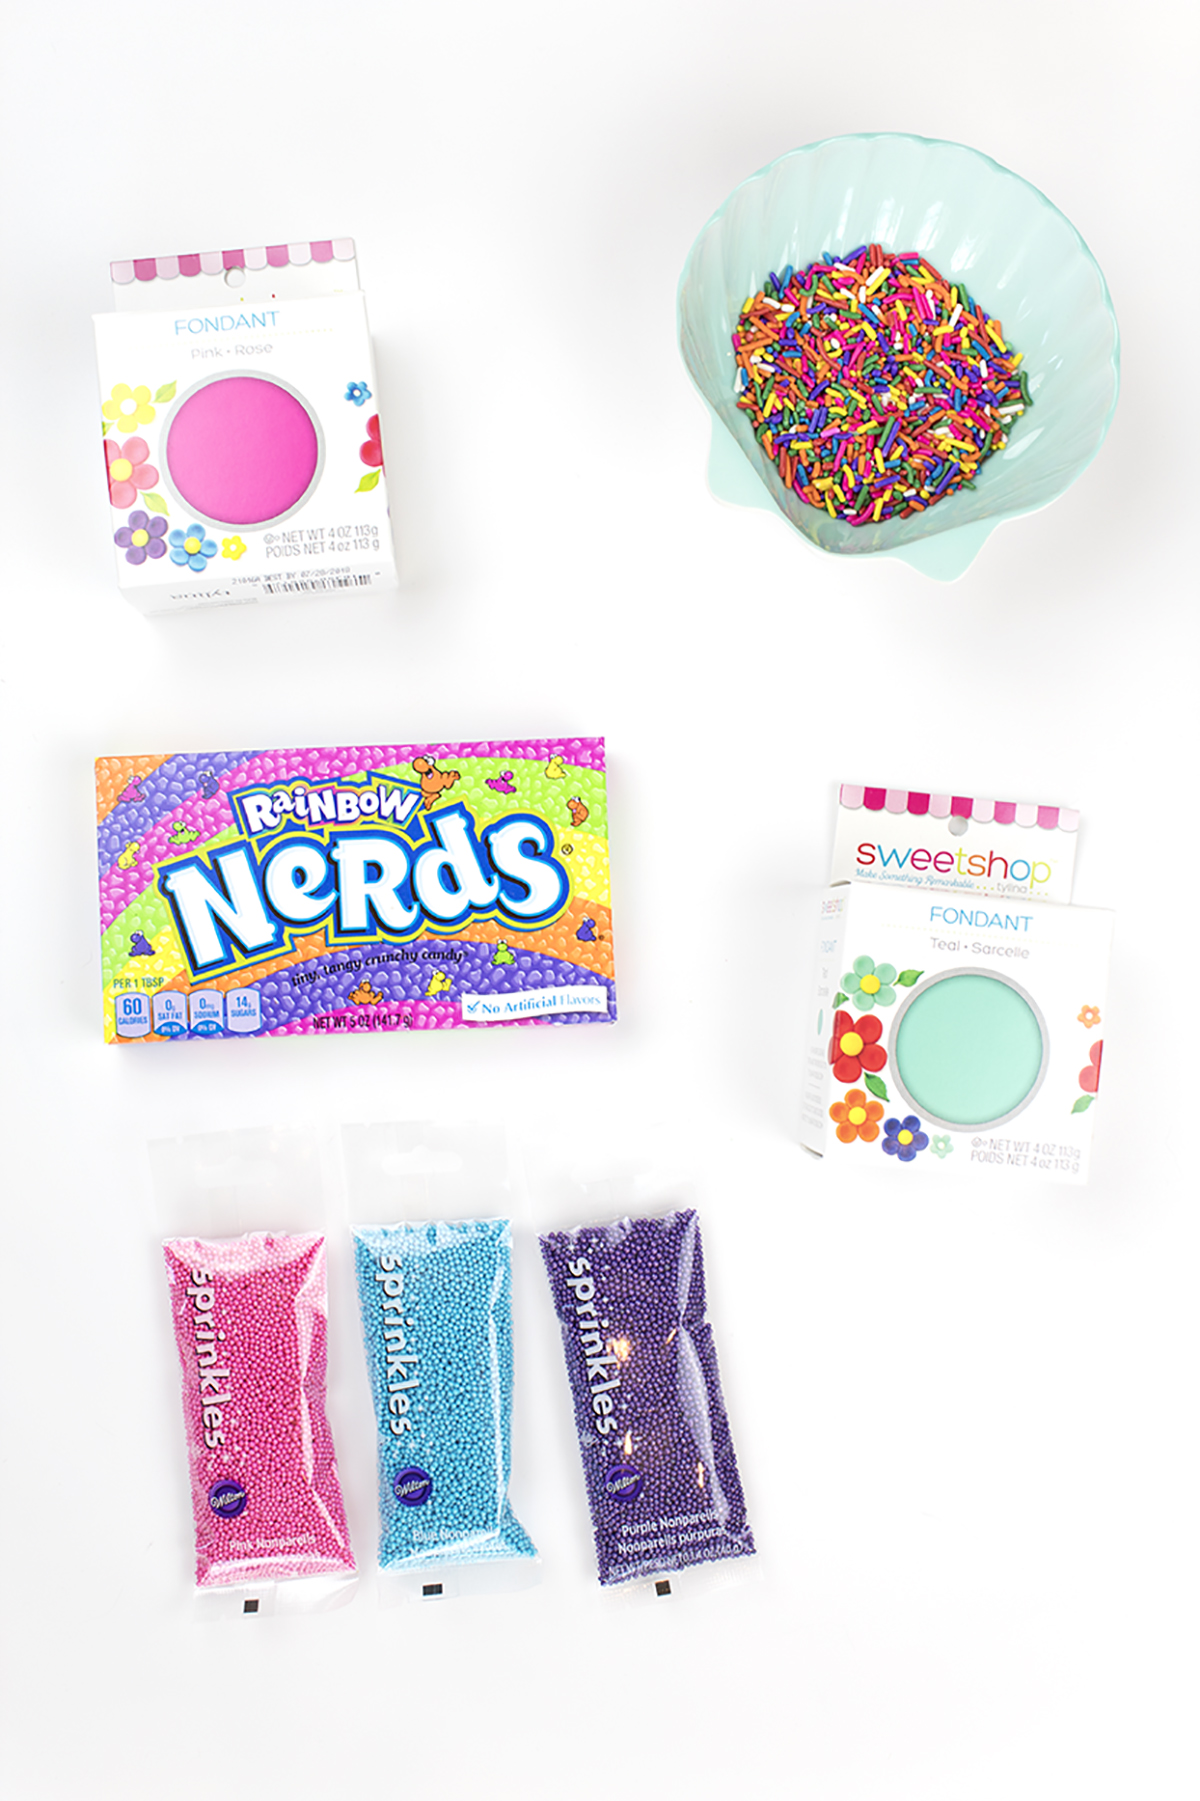
Ice cream (I used Friendly's black raspberry)
Fondant (I purchased Sweet Shop brand from Michael's)
Sprinkles and toppings

Directions:

How to make a tie-dye waffle:

1. Create your favorite waffle batter. Separate the waffle mix evenly into 4 bowls. Mix in your food coloring until it hits the right shade. I kept mine bright!

You've got to try this recipe for a Lisa Frank Tie-Dye Waffle Sundae!

2. Once your waffle iron has heated up, drop small globs of batter onto your waffle iron. Mix up the order of colors, but work quickly so that you don't burn half the waffle while the other half is raw.

You've got to try this recipe for a Lisa Frank Tie-Dye Waffle Sundae!

Just look at those colors! Seriously gorgeous.

You've got to try this recipe for a Lisa Frank Tie-Dye Waffle Sundae!

Making the fondant unicorn

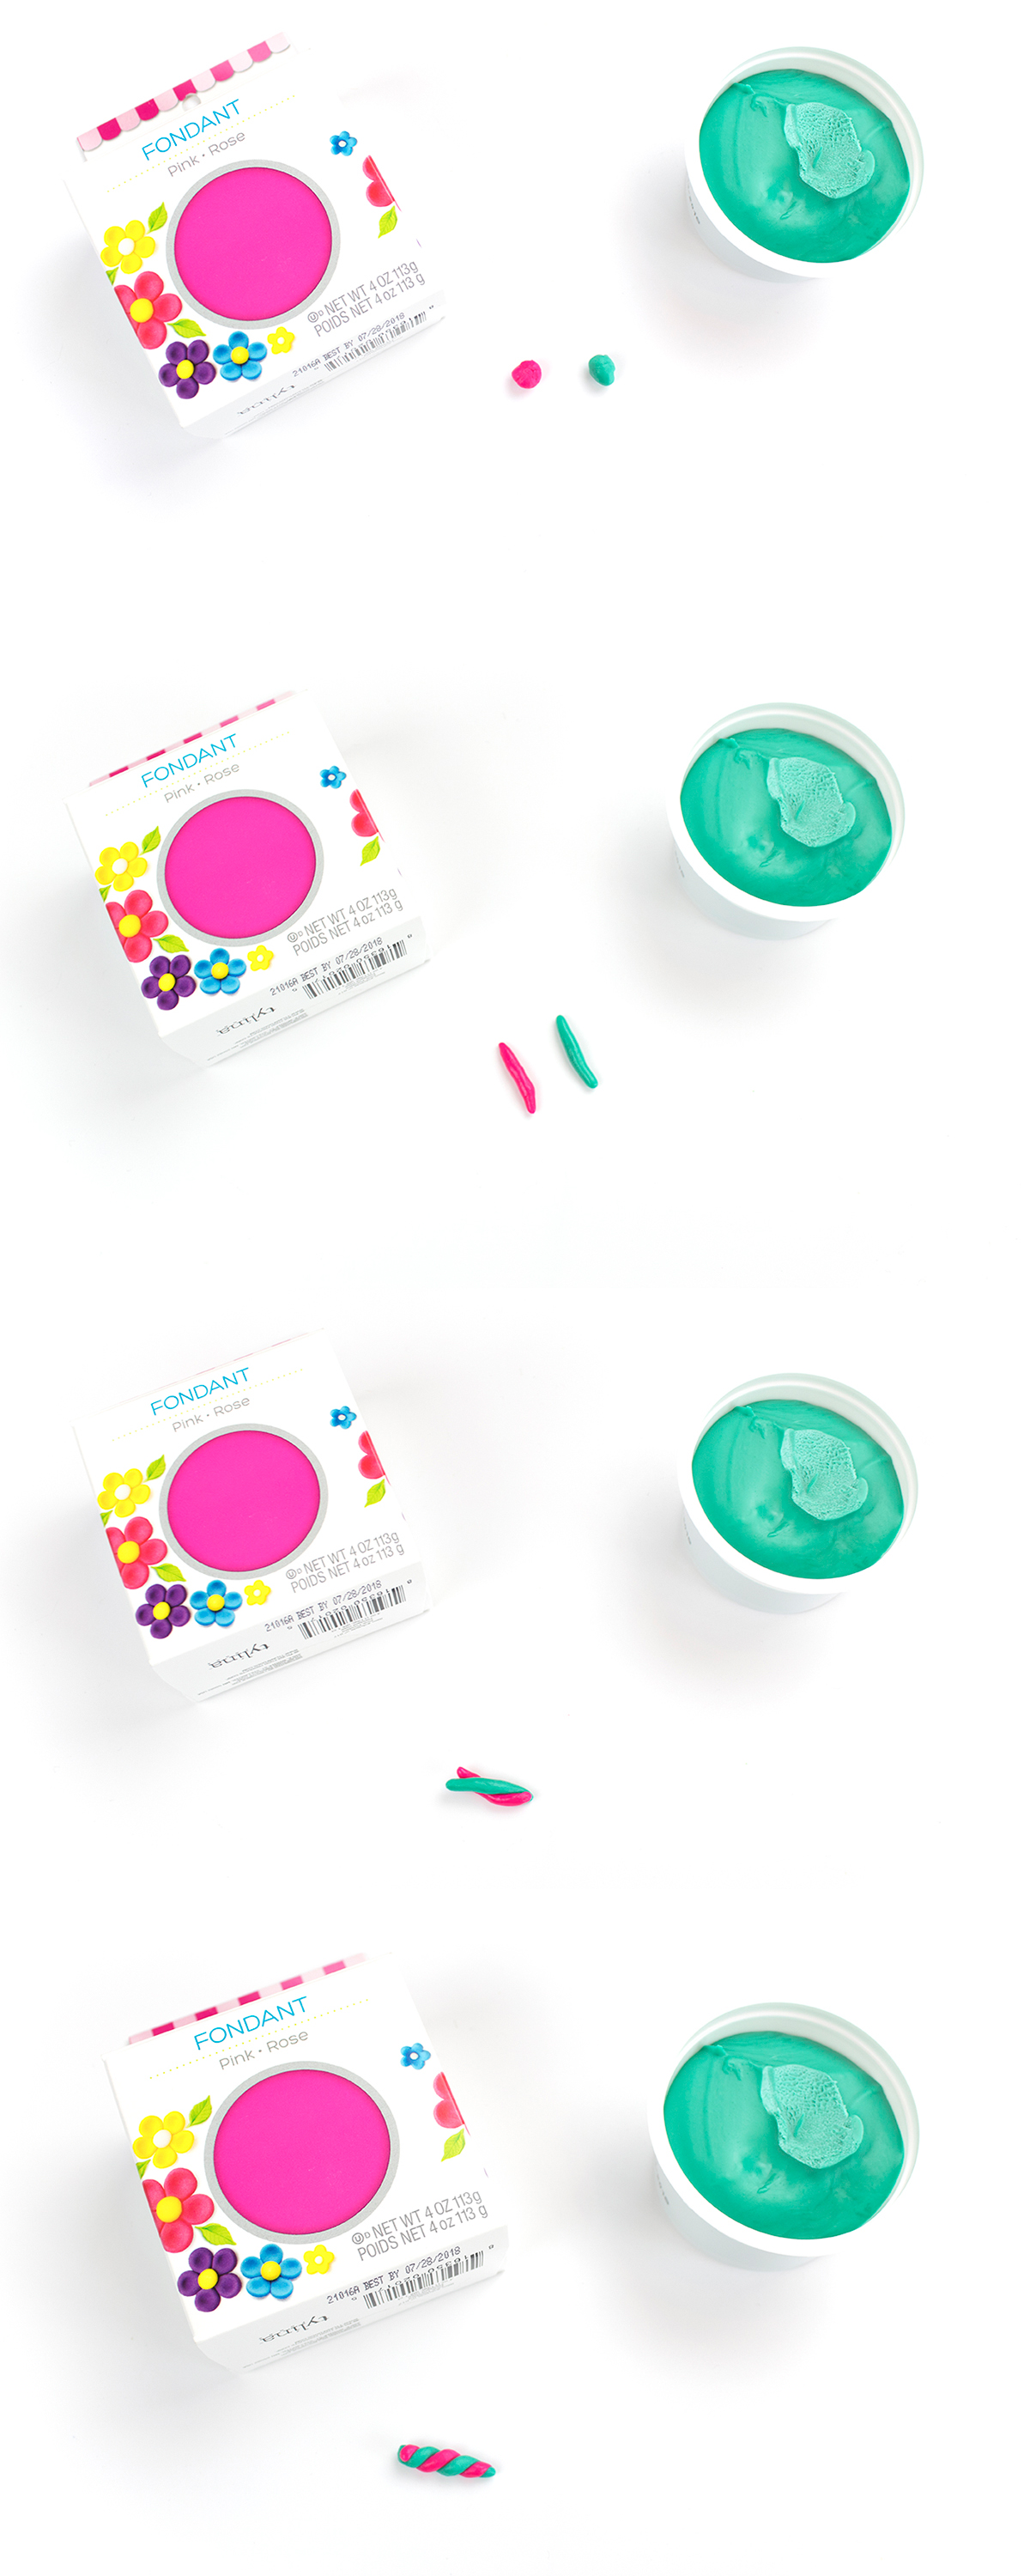
1. Take a small scoop of your fondant in a ball and knead it with your fingers.

You've got to try this recipe for a Lisa Frank Tie-Dye Waffle Sundae!

They look like tasty little Marino's ices, don't they?!

You've got to try this recipe for a Lisa Frank Tie-Dye Waffle Sundae!

2. Pinch off a small piece of fondant. Roll your fondant in a ball, then into a cylinder shape. It helps if the cylinder is tapered, so that one side is slightly thinner. Twist the 2 cylinders together, then flatten the bottom slightly to create your horn.

You've got to try this recipe for a Lisa Frank Tie-Dye Waffle Sundae!

3. For the ears, take your ball of fondant and split it in half. Make it into a triangle shape. Repeat for the other color, creating a sightly smaller triangle. Then, press them together in the center of the larger triangle. Do this carefully, otherwise it totally warps the shape into a circle. They don't need to match perfectly, either!

You've got to try this recipe for a Lisa Frank Tie-Dye Waffle Sundae!

Assembling your sundae:

You've got to try this recipe for a Lisa Frank Tie-Dye Waffle Sundae!

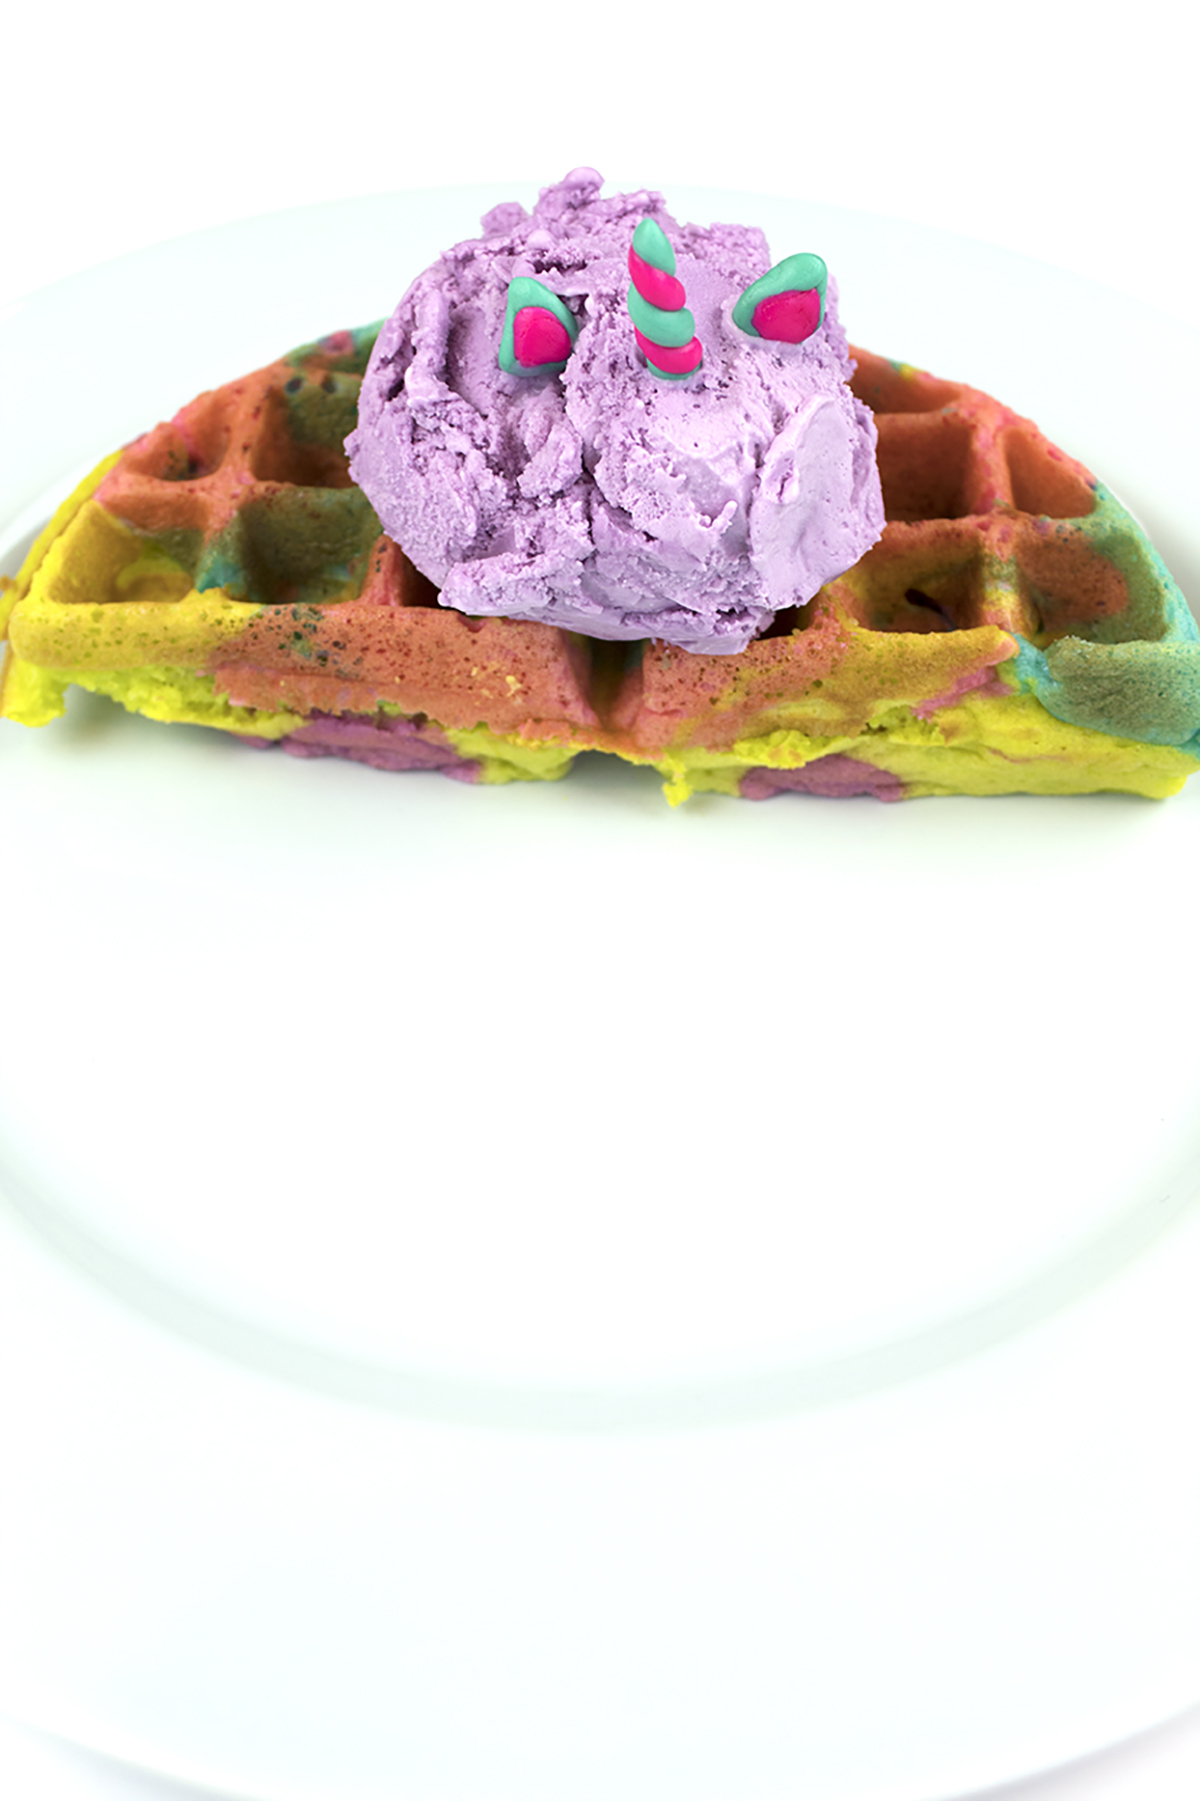
1. Once your waffles have cooled, add a scoop of ice cream on top. (Similar shell bowls here and here)

You've got to try this recipe for a Lisa Frank Tie-Dye Waffle Sundae!

2. Carefully place in your unicorn horn, then the ears.

You've got to try this recipe for a Lisa Frank Tie-Dye Waffle Sundae! Itā€™s perfect for a 90ā€™s theme slumber party or a fun breakfast for the kiddos! #tiedye #lisafrank #icecreamsundae

3. Add your choice of sprinkles and candy to the top. I used regular rainbow sprinkles, nerds, and small dot sprinkles. To make the plate more festive, I poured on the sprinkles. I can never get enough!

You've got to try this recipe for a Lisa Frank Tie-Dye Waffle Sundae! Itā€™s perfect for a 90ā€™s theme slumber party or a fun breakfast for the kiddos! #tiedye #lisafrank #icecreamsundae

YUM. Sprinkles and candy makes everything better. The fondant is actually really easy to use. Kinda like sweet and edible play-doh. Plus, I love that the round sprinkles landed perfectly to make a face on this little guy.

You've got to try this recipe for a Lisa Frank Tie-Dye Waffle Sundae! Itā€™s perfect for a 90ā€™s theme slumber party or a fun breakfast for the kiddos! #tiedye #lisafrank #icecreamsundae
You've got to try this recipe for a Lisa Frank Tie-Dye Waffle Sundae!

Now you can get your Lisa Frank fix and help that sugar craving all in one shot. I loved the Lisa Frank stickers, and still have them. I've hoarded them for like 20 years now! Jeez, that makes me feel OLD. What was your favorite Lisa Frank thing you ever owned? Let me know in the comments!