Easy Football Party Crafts

Is it football season yet? I only know the fall for pumpkin picking, apple cider everything, and the ability to totally switch up my wardrobe. However, I know there's a whoooole bunch of people that love it for football! My fiancé is one of those people, so once in a while we hang out with the gang and watch a football game. He's a "less is more" type of guy, and I'm a "what else can we add?" type of gal, so I came up with a happy medium. 

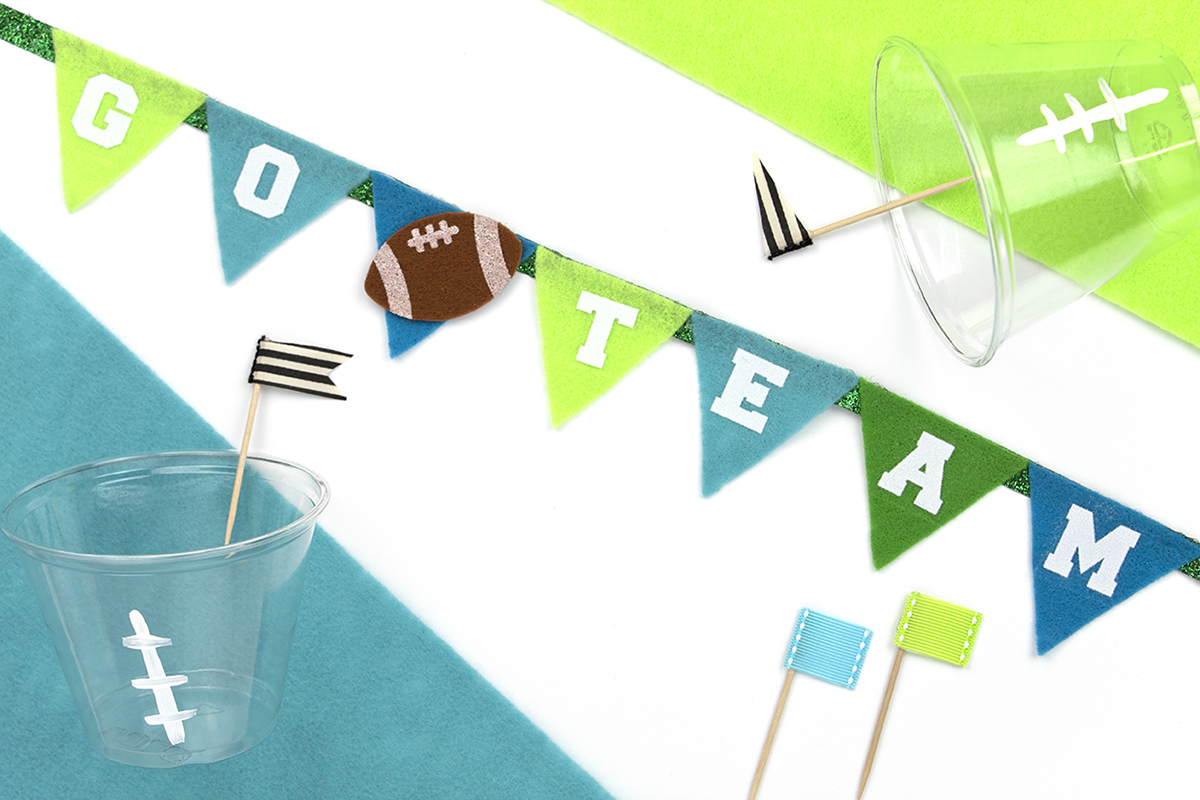
Is it football season yet? I whipped up these easy crafts for your next football gathering. They're quick to make, and feature craft supplies you probably have at home. They're perfect for a mini football party! Click for the DIY.

I whipped up these easy crafts for Mariah at Giggles Galore. They're quick to make, and feature craft supplies you probably have at home. They're perfect for a mini football party. This month, I did not one, but TWO blog posts for her! You can find them here and here.

Is it football season yet? I whipped up these easy crafts for your next football gathering. They're quick to make, and feature craft supplies you probably have at home. They're perfect for a mini football party! Click for the DIY.

So be sure to head over to Giggles Galore now to see how to make these Easy Football Party Crafts and Football Flag Stirrers and Cups.

How to Plan a Disney Themed Party

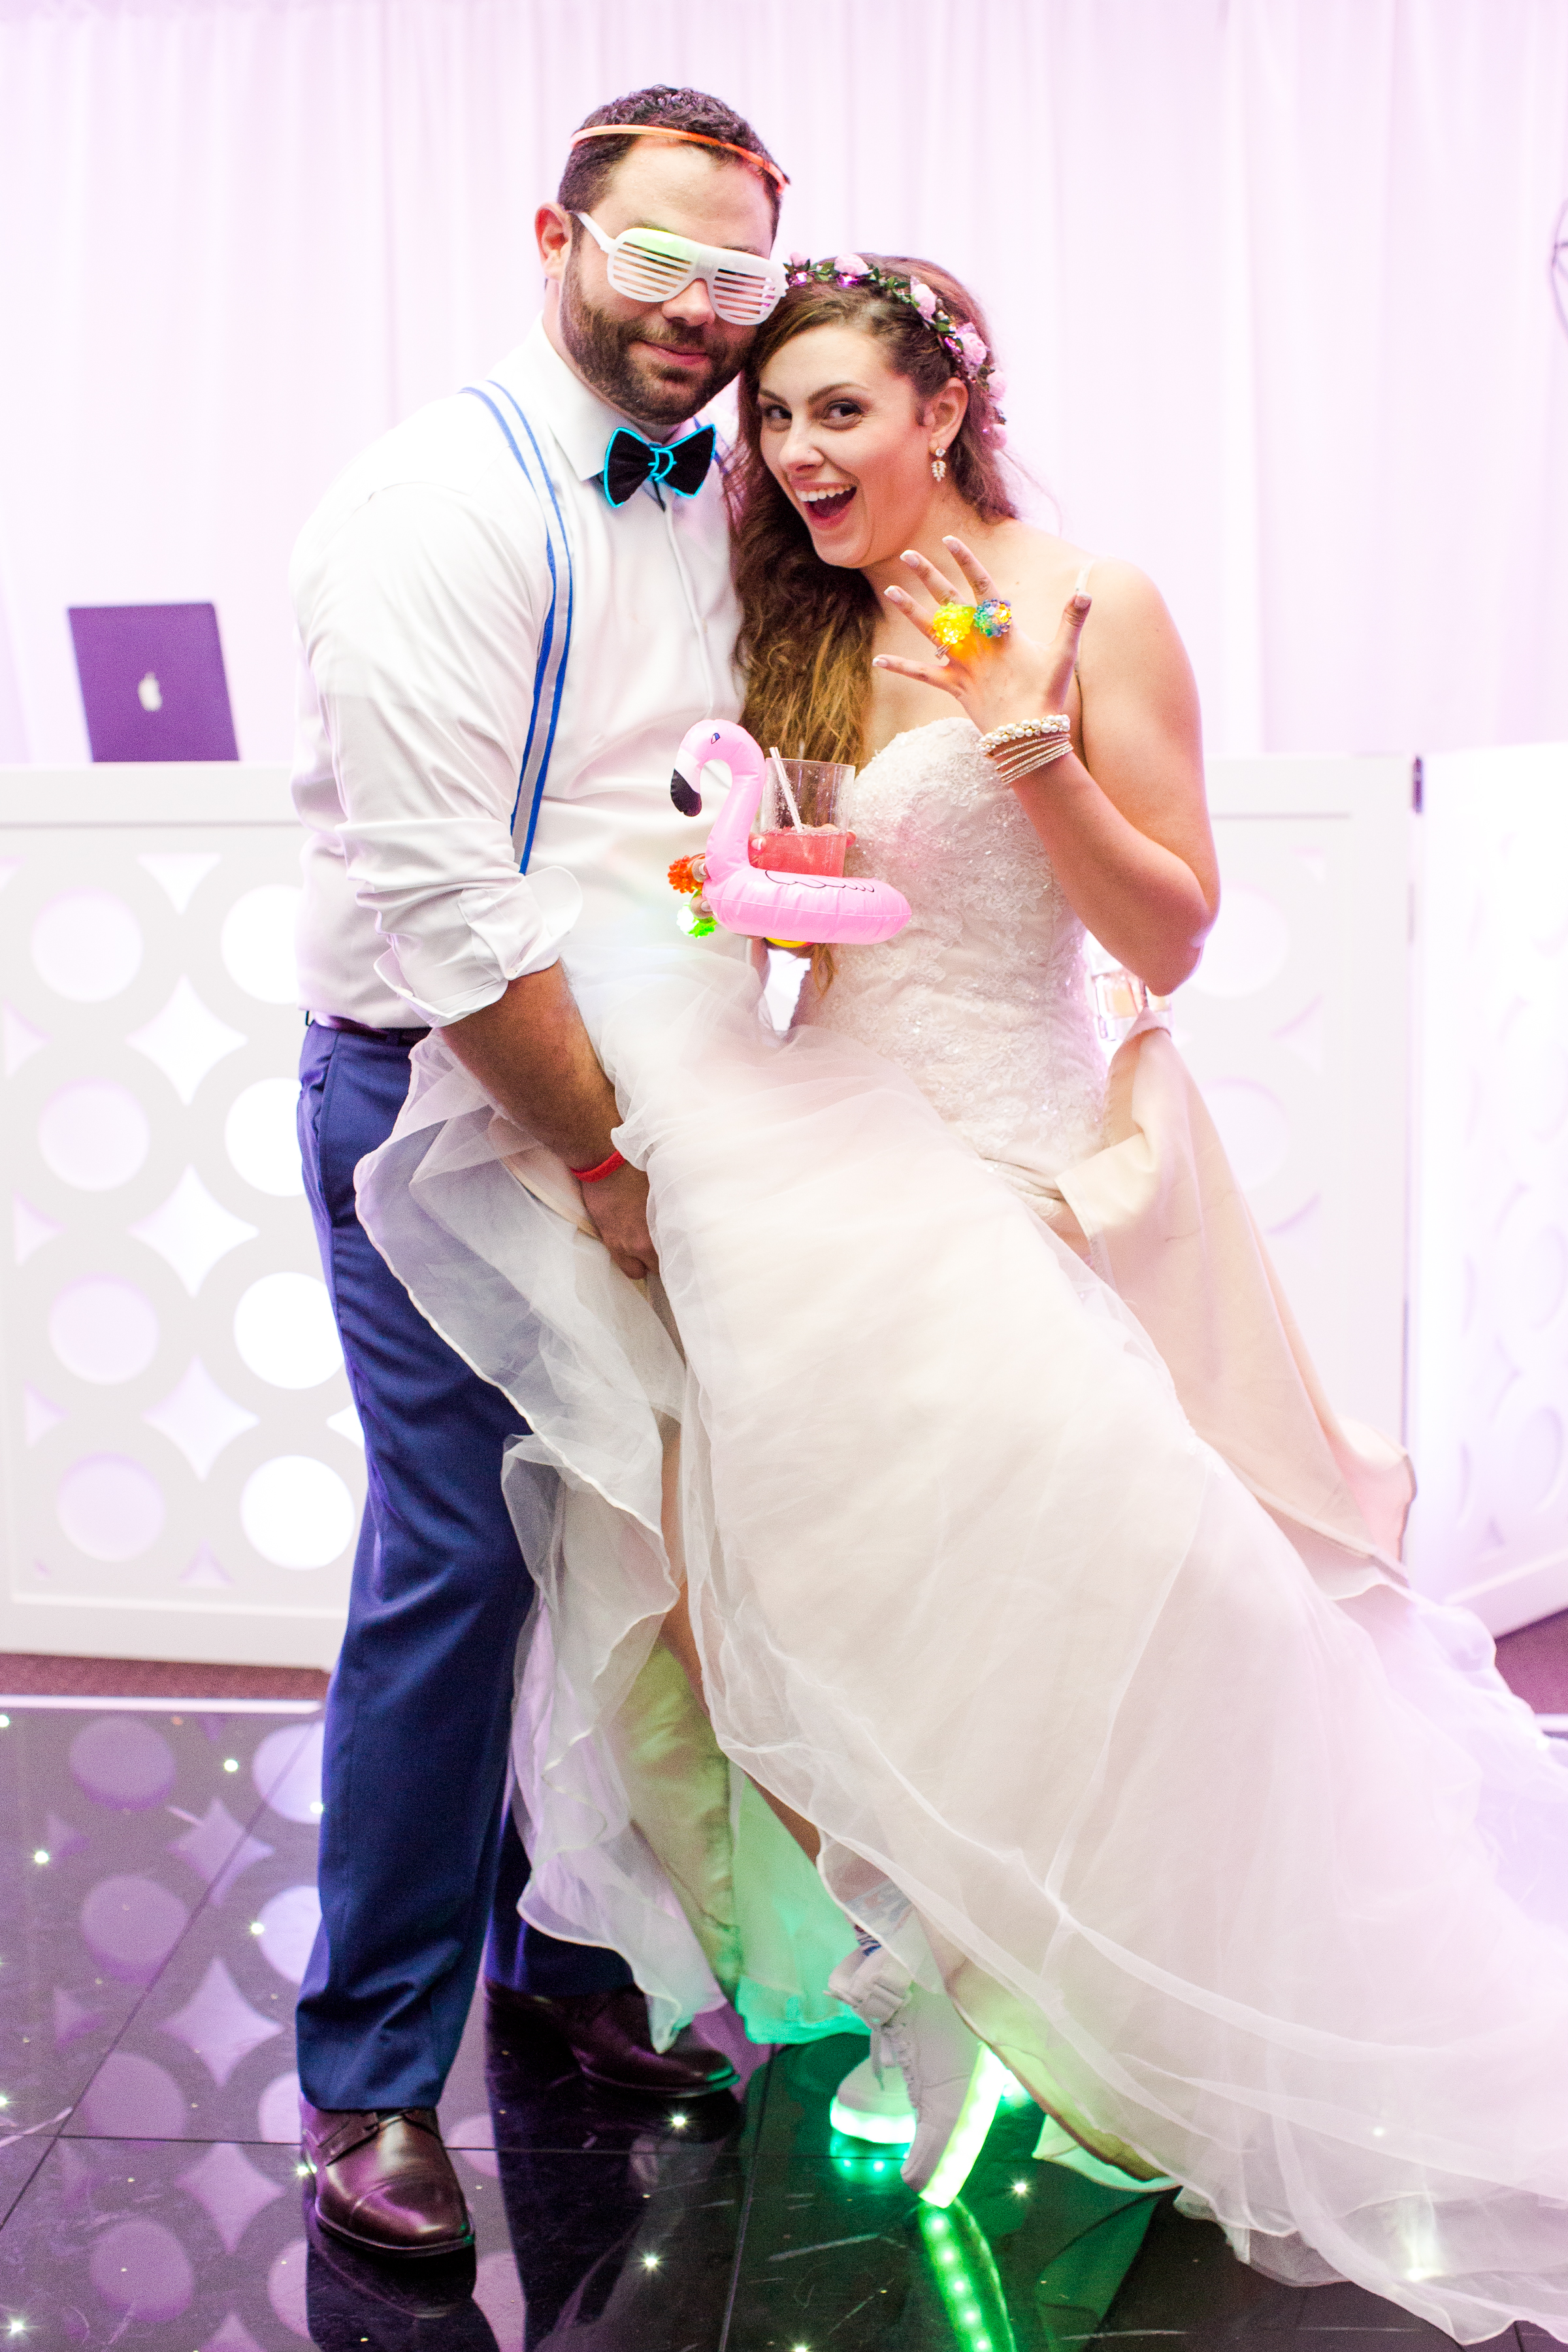
Whenever I thought about my wedding day, I imagined myself stepping out of a carriage in front of Cinderella's castle. I'd be wearing my big poofy wedding gown, and walk up to my prince charming, who waited for me in front of the castle. And then, just as he leaned in to kiss me, reality came and slapped me in the face. It costs TONS of money to get married in front of Cinderella's castle. And although it would be AH-MA-ZING, there's no way I have that kind of money for my dream Disney World wedding. So, what's a girl to do? Well, clearly, it's to regroup and plan an amazing Disney-themed engagement party.

Psst- If you want to see all the photos from the party, be sure to check out this post!

How to plan a Disney themed party, filled with craft projects, links, and decor ideas! Perfect for weddings, engagement parties, and birthdays. Click for the full post!

The Plan

To prep, I created a Pinterest board and pinned any Disney ideas I liked. I decided that since I wanted to do several different movies, I needed something to tie them all together. I decided to focus on one color scheme for all the elements and centerpieces. I picked mint and peach/coral since they are some of my favorite colors, and also because my mom had those on her wedding day, so they were important to me. I also added pink (my favorite!) and metallics to give the party a little sparkle.

The first thing I did was I sat down and listed out all the Disney movies I wanted to incorporate and noted the elements from each. At this point, you're just taking notes, so write down anything you wish. The more the better! I had things like Snow White- wishing well, jewels, birds, apples. Just a simple list of word association for each move.

The next step was to list out all the things I needed to collect to add these elements to the party. My list included things like vintage books (Beauty and the Beast), seashells (The Little Mermaid) and a globe (Up). Step 2 was to collect everything. I started by searching around my house, and then going to my parent's office. They had a globe and a few winter decorations that were perfect for Frozen. I also was able to utilize their huge collection of picture frames for the quotes! The more you can borrow for the party, the better. Any money saved on decor can be allocated to something else ;)

Once I collected all my freebies, I went shopping!

How to plan a Disney themed party, filled with craft projects, links, and decor ideas! Perfect for weddings, engagement parties, and birthdays. Click for the full post!

1. Magic Lamp 2. Clock 3. Cloche 4. Ariel’s Candelabra 5. Frog Prince 6. Glass Slipper 7. Moss 8. Pumpkin Jar 9. Coral 10. Rapunzel’s Lantern 11. Mrs. Potts 12. Flamingo Lawn Ornament 13. Enchanted Rose 14. Cinderella’s Carriage 15. Lumiere

Thrift Store

A lot of my stuff came from the thrift store. I was able to repurpose some items, like turning a mail holder into a wishing well. I spray painted a flounder kids' cup into a gold statue for the Little Mermaid table. And, all a tarnished teapot needed was a little elbow grease to become a wonderful Mrs. Potts.

Christmas Tree Shops

If you're looking for affordable decor that seems high end, look no further than Christmas Tree Shops! I purchased all my votive holders, the seashells, and the Beauty and the Beast cloche from there.

How to plan a Disney themed party, filled with craft projects, links, and decor ideas! Perfect for weddings, engagement parties, and birthdays. Click for the full post!

1. Gold Frames 2. Be Our Guest Napkins 3. Love Stirrers 4. Beverage Cups 5. Coral and Mint Dinner Plates 6. Folding Cocktail Table 7. Tablecloth Clips 8. Striped Lanterns 9. Sequin Table Runner 10. White Tent 11. Bottle Opener 12. Shell Garland 13. Pink and Aqua Best Day Ever Tags 14. Beverage Dispenser 15. Gold Dinner and Coral Dessert Plates

Oriental Trading and Party City

Almost all the tableware, decor, and barware came from Oriental Trading and Party City. Oriental trading had these great seashell garlands, and paper lanterns in any color you can imagine. Party City had these Be Our Guest napkins (perfect!), colored cups, and engagement napkins. If you mix and match all the items, you can create a unique mix that can incorporate all the elements of the party.

Amazon

Oh, Amazing Amazon. How did we ever survive without thee?! I was able to find all the obscure things I needed on Amazon- a Cinderella carriage, glass slippers, a tiny magic lamp, and a cute frog prince. I also found some of the barware, like these cute bottle openers and these cute drink stirrers. I added these sequin table runners in all sorts of colors to each table for a little extra sparkle. My favorite thing was probably these pumpkin candle holders that I spray painted gold. I'm using them in my fall decor right now, and they are just soo cute! Ditto for these cheap little pumpkins that I spray painted gold and silver. 

Dollar Store

The dollar store was great for random little items. Things like these horses that I spray painted, these cheap silver trays that looked fancy, and even a magic mirror! I also got my books for the Beauty and the Beast table from the Dollar Store. It was a pretty funny sight- me removing all the book jackets to check out the covers and make sure they were the right colors for the party. In the end, I settled on A World of Pasta, which obviously Belle reads.

Michaels

I don't think any party could be complete without a trip to Michaels. it was here that I picked up some moss for the sign-in area, the rose for my Beauty and the Beast cloche, and a stand for my signature cocktails sign. I also picked up the supplies for the Tangled Lanterns I made using the Cricut.

Misc Crafts

How to plan a Disney themed party, filled with craft projects, links, and decor ideas! Perfect for weddings, engagement parties, and birthdays. Click for the full post!

After I did the purchasing, I also had a few of my own crafts projects. First, I made these DIY balloon pins. I wanted something to distinguish the members of our immediate family, and I wanted it to have an Up vibe to it, like a cross between the balloons and the infamous grape soda pin.

The Wishing Well was made from some sort of hanging letter holder the thrift store. I had my fiance create posts and a roof out of scrap wood and paint stirrers to create a wishing well, and I painted it all white to match. A few vines and flowers from my craft hoard completed the look. 

I had my fiance make these adorable croquet mallets from Damask Love. They were the perfect Disney-themed activity and created an awesome photo op! They were one of my favorite elements of the party. My fiancé thought I was crazy when I told him to make them, but everyone loved them.

For an easy project, create a game of ring toss (aka "engagement ring" toss). All you need are some empty wine bottles. If you don't have any, this is the perfect excuse to drink lots of wine and de-stress from party planning. Soak the bottles to remove the labels, and let them dry fully. Spray paint them in fun colors, arrange them in a box, and toss on some colorful rings

How to plan a Disney themed party, filled with craft projects, links, and decor ideas! Perfect for weddings, engagement parties, and birthdays. Click for the full post!

If you want to learn more about planning a Pinterest worthy party, be sure to sign up to get your FREE Anatomy of a Pinterest Worthy Party guide! It's full of helpful hints on how to pick a theme, the little details that will make your event unique, and tips to take great photos of your event. And, there's even a checklist so you don't forget anything! So what are you waiting for? Get yours now!

If you want to see all the photos from the party, be sure to check out this post!

Are you going to try and plan your own Disney-themed party? What's something you MUST have? Let me know in the comments below!

Kate Spade Inspired Balloon Bracelet

Fun fact about me: I have a tendency to start random hobbies. For example: one time, I decided I wanted to learn how to make balloon animals. I bought a beginner's kit that came with balloons, a pump, and a book on how to make animals. I practiced making a dog, along with a few other animals. I sat there for hours trying to perfect them. Was I training to become some sort of clown on the weekends?! Who knows... Anyway, I was never too good at making balloon animals despite my best efforts. After a few days of trying, the novelty wore off and the kit got pushed into a drawer with all my other forgotten hobbies. Balloon animals were apparently something I was meant to admire, but not create. So, when I saw Kate Spade's new Whimsies collection, I was hooked! They're an absolutely perfect way to display your secret love of balloons, unicorns, and dinosaurs. I think my favorites are the ring, brooch, and bangle. If you can afford to purchase something from the new Kate Spade collection, DO. IT. For the rest of us, here is my humble attempt at the phrase "imitation is the sincerest form of flattery".

Super affordable bracelet inspired by Kate Spade's Whimsies balloon collection! Click for the full tutorial.

You will need:

Super affordable bracelet inspired by Kate Spade's Whimsies balloon collection! Click for the full tutorial.

Metallic/Pearl paint
3/4 in Wooden Letters (here)
16 gauge aluminum wire (mine is from Michael's)
Jewelry pliers and tools (here)
E6000 glue (here)
Paintbrushes
Scissors (here)
String or ribbon

Super affordable bracelet inspired by Kate Spade's Whimsies balloon collection! Click for the full tutorial.

1. Paint your letters with the metallic paint. I lined up my colors and found the best pattern before painting. I didn't want too many similar colors next to each other. Be sure to paint the front and all the sides.

Super affordable bracelet inspired by Kate Spade's Whimsies balloon collection! Click for the full tutorial.

2. Cut a piece of wire for the bracelet. There are 2 methods for figuring how long to cut your wire. 
Method 1: Using your string, measure loosely around your wrist, adding a few extra cm's to roll your wire.

Super affordable bracelet inspired by Kate Spade's Whimsies balloon collection! Click for the full tutorial.

Method 2: Grab a bracelet that fits well and measure that against your string for a similar fit.

Super affordable bracelet inspired by Kate Spade's Whimsies balloon collection! Click for the full tutorial.

3. Once you've cut your string, line it up against your wire and cut at the mark using your wire cutters. Make the cut as straight as possible.

Super affordable bracelet inspired by Kate Spade's Whimsies balloon collection! Click for the full tutorial.

4. Using the narrow tip of your rounded pliers, roll over the cut ends of your wire so that you don't have any sharp edges.

Super affordable bracelet inspired by Kate Spade's Whimsies balloon collection! Click for the full tutorial.

5. To create a bracelet shape, use something cylindrical to gently wrap the wire around. I used a party cup, since it's tapered and allows you to adjust the width of your bracelet easily.

Super affordable bracelet inspired by Kate Spade's Whimsies balloon collection! Click for the full tutorial.

6. Once I had a round shape, I made it slightly oval so that it would slip on and off my wrist more easily. My wire was very malleable, so I didn't want it losing its shape too much!

Super affordable bracelet inspired by Kate Spade's Whimsies balloon collection! Click for the full tutorial.

7. Using your E6000, glue the letters onto the bracelet. I started near the center with the letter R, then added the others closely so they would fit together well. (I used a glue gun at first, but all the letters fell off! I don't recommend the glue gun method).

Super affordable bracelet inspired by Kate Spade's Whimsies balloon collection! Click for the full tutorial.

Woop! There it is. Now you have your own KS Whimsies collection lookalike bracelet. This one is definitely more fragile, so wear with care. But, as a plus, you can write whatever you want on the bracelet- your name, an inspiring word, a reminder to party more, etc. My suggestions: CAKE, because yum, LOVE, because the world needs more of it, and GLITTER, because sparkles make everything better!

Super affordable bracelet inspired by Kate Spade's Whimsies balloon collection! Click for the full tutorial.

PS- If you love balloon animals, you gotta check out this post!

These would be so fun to make all your friends to give out as friendship bracelets, or as part of a bachelorette party gift! What are you planning to put on your bracelet? Let me know in the comments!

DIY Circus Animal Drink Stirrers

2017 is off to a wild start, huh? Call me psychic, but I see a lot of drinking in our future. It's best that we get prepared and start crafting the cutest barware, starting right here with these circus animal drink stirrers. These party animals are sure to brighten up your day, no matter what's going on. As a bonus, they're so easy to make that you can create a set for yourself, and a few additional sets to give your friends as gifts. These are easy enough to make on your own, but I had the assistance of my handy fiancé. If you've got a guy (or gal!) in your life, this could be a fun bonding experience and a cool thing to whip out at parties. You'll excitedly proclaim "we made these!" as all your friends ooh and ahh. It'll be magical. Ok, enough talk already. Let's get to crafting, shall we? ;)

*Contains affiliate links

These party animals are sure to brighten up your day, no matter what's going on. As a bonus, they're so easy to make that you can create a set for yourself, and a few additional sets to give your friends as gifts. Click for the full tutorial!

You will need: 

These party animals are sure to brighten up your day, no matter what's going on. As a bonus, they're so easy to make that you can create a set for yourself, and a few additional sets to give your friends as gifts. Click for the full tutorial!

Plastic circus animals (here)
Clear plastic stir sticks (here)
Glossy acrylic paint (similar here)
Drill (here)
11/64 inch drill bit (here)
Slip joint pliers (here)
E6000 glue (here)
Electric tape (here)
 

These party animals are sure to brighten up your day, no matter what's going on. As a bonus, they're so easy to make that you can create a set for yourself, and a few additional sets to give your friends as gifts. Click for the full tutorial!

Step 1: Take your circus animal and place the drill bit against it at desired depth. Put a small piece of tape at the stop point to make sure you don't drill too far.

These party animals are sure to brighten up your day, no matter what's going on. As a bonus, they're so easy to make that you can create a set for yourself, and a few additional sets to give your friends as gifts. Click for the full tutorial!

Step 2: Using your slip joint pliers, hold the circus animal steady.

These party animals are sure to brighten up your day, no matter what's going on. As a bonus, they're so easy to make that you can create a set for yourself, and a few additional sets to give your friends as gifts. Click for the full tutorial!

Step 3: Slowly and carefully drill a hole in the middle of your circus animal until you hit the tape marker. Repeat for all your animals.

These party animals are sure to brighten up your day, no matter what's going on. As a bonus, they're so easy to make that you can create a set for yourself, and a few additional sets to give your friends as gifts. Click for the full tutorial!

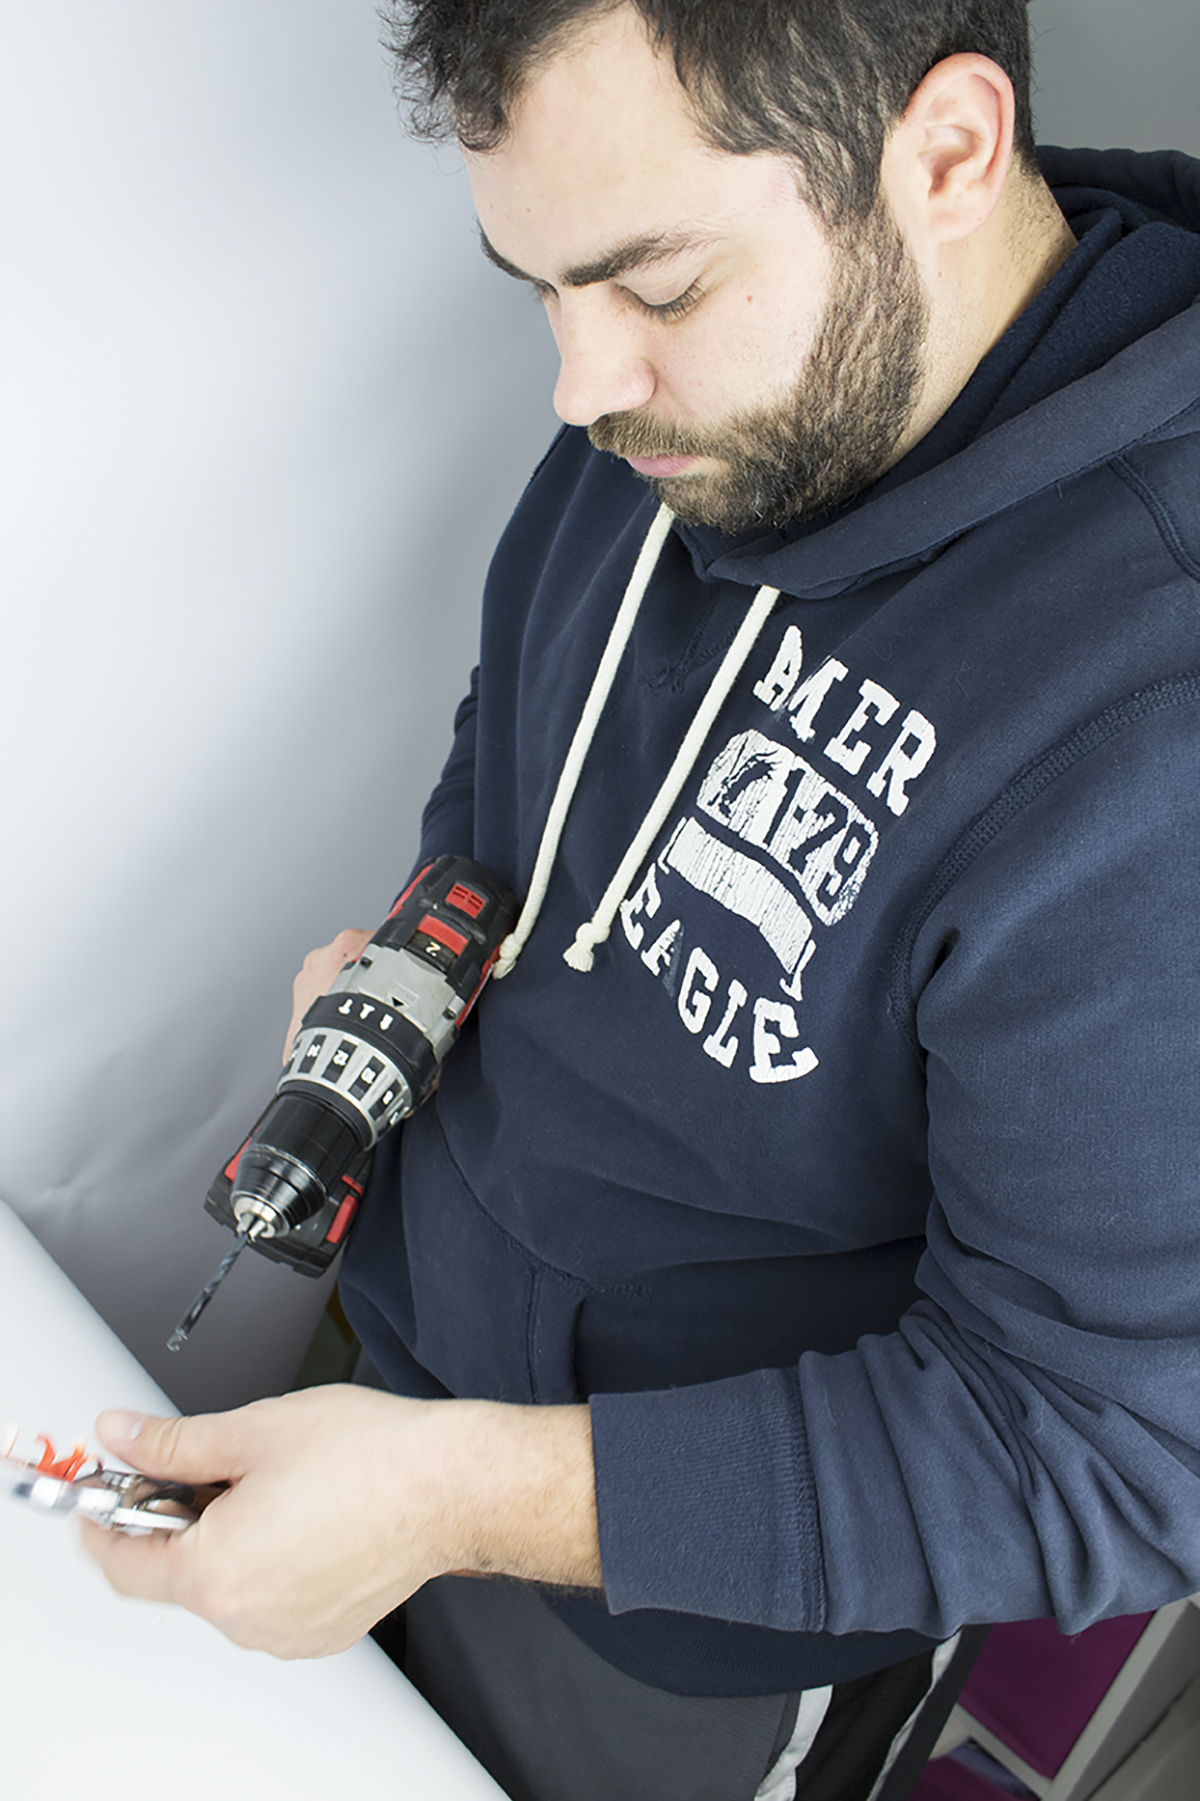
Here's a little behind the scenes sneak peek of my fiancé in action. He's so handy and I'm so lucky to have him! All I did was briefly explain what I needed. He led me to the garage (his version of my studio), searched around his workbench and collected a few supplies. Then we did one drink stirrer as a test and bam! It came out perfectly :)

These party animals are sure to brighten up your day, no matter what's going on. As a bonus, they're so easy to make that you can create a set for yourself, and a few additional sets to give your friends as gifts. Click for the full tutorial!

Step 4: Paint your circus animals using glossy acrylic paint. You can also use spray paint (which would be faster and probably better coverage), but I'm in NYC and it's freakin freezing outside haha.

These party animals are sure to brighten up your day, no matter what's going on. As a bonus, they're so easy to make that you can create a set for yourself, and a few additional sets to give your friends as gifts. Click for the full tutorial!

It took me about 2-3 coats of paint to cover them. I did one overall coat, then a thicker coat on each side. Finally, I did touch-up where I covered any missed spots, or anywhere that I accidentally touched.

These party animals are sure to brighten up your day, no matter what's going on. As a bonus, they're so easy to make that you can create a set for yourself, and a few additional sets to give your friends as gifts. Click for the full tutorial!

This reminds me of that scene in The Lion King where all the animals gather at Pride Rock to see Simba for the first time. But the much more colorful version. The circle of life.

These party animals are sure to brighten up your day, no matter what's going on. As a bonus, they're so easy to make that you can create a set for yourself, and a few additional sets to give your friends as gifts. Click for the full tutorial!

Step 5: Assemble your stir stick by putting the smaller side into the hole you drilled. It should be a fairly tight fit and not even need glue! If you prefer them to be in more permanently, put a tiny dab of E600 glue on your stir stick before assembling. Let dry according to directions. 

These party animals are sure to brighten up your day, no matter what's going on. As a bonus, they're so easy to make that you can create a set for yourself, and a few additional sets to give your friends as gifts. Click for the full tutorial!

And now you're ready for a day at the circus! I think these stirrers would make a perfect gift for friends, along with a couple of cute drinking glasses. I'm also trying to stop myself from bringing some to work so that I can have a party with my morning cup of tea ;) So what day you think of these drink stirrers? How do you plan to use them?

How to Throw a Colorful Halloween Party

Halloween is coming, and I'm just so excited! I still remember the very first Halloween party I had way back in high school. While most other teens liked alcoholic binge fests or home destruction, my party was a classy affair. I had found a magazine with all these fun recipes and Halloween themed treats at the supermarket, and I wanted to make everything! I decided then and there that I needed to have a party. This time, I decided to give the traditional Halloween party a facelift with a fresh color palette. It's fun, glam and has just the right amount of spooky. 

To throw a lavish affair on a budget, head on over to Oriental Trading. They've got everything you need to host a haunting affair without breaking the bank! P.S. This is not a sponsored post. I just happen to loooove using Oriental Trading! ;) Be sure to check out my shopping list at the bottom of this post for all the items pictured.

halloween party full table2.jpg

Let's start at the top! For my color scheme, I went with traditional orange and black, mixed in with teal and pink for a fresh and girly twist. I also accented with white and gold to keep it light and add a bit of glam. 

Halloween is coming, and I'm just so excited! I decided to give the traditional Halloween party a face-lift with a fresh color palette. It's fun, glam and has just the right amount of spooky. Click to find out all the details!

Now onto the table setup! I put some candy in my DIY dollar store candy dishes. I only bought two kinds, but Oriental Trading has TONS of different kinds of candy! I think my favorites are these heart candies, which are tasty and so addictive. 

Halloween is coming, and I'm just so excited! I decided to give the traditional Halloween party a face-lift with a fresh color palette. It's fun, glam and has just the right amount of spooky. Click to find out all the details!

Be sure to add some faux piñatas to your table as favors to your guests. They're fun and easy to make while watching tv! I recommend binge watching Friends as you make them.

Halloween is coming, and I'm just so excited! I decided to give the traditional Halloween party a face-lift with a fresh color palette. It's fun, glam and has just the right amount of spooky. Click to find out all the details!

In the center, I included a teal pumpkin. It's cute, colorful and supports a great cause!

Halloween is coming, and I'm just so excited! I decided to give the traditional Halloween party a face-lift with a fresh color palette. It's fun, glam and has just the right amount of spooky. Click to find out all the details!

So much fun!

Halloween is coming, and I'm just so excited! I decided to give the traditional Halloween party a face-lift with a fresh color palette. It's fun, glam and has just the right amount of spooky. Click to find out all the details!

I made this table runner using leftover crepe paper from my faux piñatas and some scotch tape. It was virtually free and can be tossed in the trash when the party is over! 

Halloween is coming, and I'm just so excited! I decided to give the traditional Halloween party a face-lift with a fresh color palette. It's fun, glam and has just the right amount of spooky. Click to find out all the details!

I love this cute and quirky Trick or Treat banner. It comes in two parts, so you can hang it up however works best for you!

Halloween is coming, and I'm just so excited! I decided to give the traditional Halloween party a face-lift with a fresh color palette. It's fun, glam and has just the right amount of spooky. Click to find out all the details!

For the table, I stacked the plates so that each place setting can get all the colors at once. It adds a festive and spooky touch. Ditto for the forks and straws! Finally, each person gets an orange candy stick to go with it.

Halloween is coming, and I'm just so excited! I decided to give the traditional Halloween party a face-lift with a fresh color palette. It's fun, glam and has just the right amount of spooky. Click to find out all the details!

I love it all, but I think these spiderweb paper fans are my favorite part. Look at how cute they are! They add a spooky touch that's so elegant.

Halloween is coming, and I'm just so excited! I decided to give the traditional Halloween party a face-lift with a fresh color palette. It's fun, glam and has just the right amount of spooky. Click to find out all the details!

Now raise a glass and celebrate a job well done!

Planning a party is so rewarding, especially once everyone arrives and you get to have some fun! So what do you think? Do you agree that Halloween doesn't have to be spooky? Let me know in the comments below!