Engagement Gifts for The Bride-To-Be

Great news! Your best friend just got engaged to the best guy, and you're SO excited. You've been talking about her wedding day FOR-EVER now, and that day is coming soon! You want to get her something really special as an engagement gift, something that shows how happy you are for her in this new chapter in her life, and something that'll put you in the running for the top spot to be her maid of honor. Kidding! No, but really, you want to get her an engagement gift as special as she is, without it being just another cheesy "bride" gift. I understand! I've created a list of 15 awesome items that will make perfect engagement gift and even bridal shower gifts! They are a mix of your typical bride items (something every newly engaged girl LOVES) and ordinary items with a bridal feel, this way she's not left having a second-hand sale of 3,000 bride items after the wedding. They're all so classy and gorgeous. She's gonna love them!

I've created a list of 15 awesome items that will make perfect engagement gift and even bridal shower gifts! They're all so classy and gorgeous. She's gonna love them! #engagementparty #engagementgifts #weddingplanning

I've created a list of 15 awesome items that will make perfect engagement gift and even bridal shower gifts! They're all so classy and gorgeous. She's gonna love them! #engagementparty #engagementgifts #weddingplanning

1. Wedding Planner 2. Ring Dish 3. Initial Necklace 4. Miss to Mrs. Tumbler 5. Hand Lettering 101 Book 6. Vacation Duffel Bag 7. The Getaway Luggage Tag 8. Flower Earrings 9. Bride Mug 10. Adventure Makeup Bag 11. Geometric Vase 12. Essie Blushing Bride Nail Polish 13. Bling Wipes 14. Bride Lidded Box 15. Floral Luggage Tag and Passport Cover

Engagement Gifts & Bridal Shower Gifts

1. Wedding Planner- This is the PERFECT engagement gift to start with. Since wedding planning is a whirlwind experience, every bride can use a planner! This one features tabbed sections, inspirational quotes, and 3 storage pockets, so that it can hold all her receipts and contracts to keep her organized. Plus it has a really cute cover!

2. Ring Dish- Now that she's got some bling on her ring fing[er,] the bride-to-be will need a place to keep it! This ring dish will keep it safe while she washes the dishes, takes a shower, or just needs to give her hands a rest. 

3. Initial Necklace- Whether you get one with her new last name or her fiance's initial, your future bride will love this necklace! It's simple but stands out, so it can be paired with anything. 

4. Miss to Mrs. Tumbler- This tumbler will be perfect for all that iced coffee she'll be drinking as she rushes around trying to get that wedding planned! Bonus- she can use it after the wedding too, since she'll now be a Mrs!

5. Hand Lettering 101 Book- If your bride is crafty, she'll probably enjoy this hand lettering book! Give it to her along with some pens and she can practice her penmanship to address her own invitations, write cute chalkboard signs, or write it the escort cards. Because doing it yourself = saving money!

6. Vacation Duffel Bag- This duffel is perfect for all those overnight trips to the venue, a bachelorette party weekend, or her honeymoon! It's roomy enough for all her travel stuff, plus a bunch of outfit choices. Girls gotta have options, right? 

7. The Getaway Luggage Tag- this is like an ode to the days when people used to leave their reception early to head off to their honeymoon. Did people really do that, or was it only a thing in movies? Anyway, we all know she's dying to get out of town, and this luggage tag says exactly what's on her mind! 

8. Flower Earrings- These will add a little extra sparkle for her engagement party, bridal shower, or rehearsal dinner. Plus, they're simple enough to wear on an ordinary day to dress up your outfit! I wore them at my engagement party and they really complimented my dress.

9. Bride Mug- It's so exciting to be the bride when you're first engaged, so this mug will capture that feeling and show it off to the world. It'll look SO cute in her ring selfies!

10. Adventure Makeup Bag- This makeup bag will keep her looking pretty while reminding her of the end goal. It's not just about the wedding, but about creating a beautiful life together! 

11. Geometric Vase- Everyone loves fresh flowers! This geometric vase is really unique and will be an interesting addition to her home. It comes in 2 sizes, perfect for a small bouquet for her desk and a larger one for her table. 

12. Essie Blushing Bride Nail Polish- The bride-to-be needs to keep her nails looking good as she shows off that ring. This nail polish is a gorgeous, subtle color that will enhance the beauty of her ring, not compete with it. Bonus: add a manicure kit to get her nails looking perfect!

13. Bling Wipes- She's gotta protect the bling on that ring! These wipes will keep the ring as shiny as can be, and since they're individually wrapped, they'll be sure to stay fresh. She can keep them in her purse and whip them out whenever she needs to shine up that diamond. Everyone wants to see it! 

14. Bride Lidded Box- This little box is perfect for holding her rings and small jewelry. If she's got pets, this is great for keeping her ring safe and secure. Because I know that my 3 cats LOVE to knock things on the ground and play with them! 

15. Floral Luggage Tag and Passport Cover- Help the bride-to-be travel in style with this matching luggage tag and passport cover. The floral design is girly and elegant, plus since it's not super bride-ish, she can use it for years to come!

Tips for Buying Engagement Gifts

  1. Avoid anything too trendy. She may hate the trend, and you also want something that she can use for years to come to remind her of your friendship, and how it felt when she first got engaged!

  2. Don’t tell her she has to wear it or use it at the wedding. This could lead to an uncomfortable conversation. It’s her day, so you can suggest it, but never make her feel obligated to use anything. You never know what her plans are for her wedding day.

  3. This is a good time to get something just for her, something she wouldn't necessarily indulge in herself, but that she can't put on her registry either. If it's too expensive to get alone, you can all pitch in with the bridesmaids or some friends. Nearly all the gifts she receives will be for her home, her wedding, or her life with her husband, so something just for her will be really special!

  4. In general, the idea of straying from the registry is scary. If you do, make sure it's something you know the bride will love, and that it's something that will match the rest of the items she's registered for. No one likes having to store that ugly serving platter that they use once a year when the person who gave it to them comes over!

What engagement gifts do you like to purchase for the bride-to-be, or what did you get when you got engaged that you loved? Are you a stick-to-the-registry type of person, or do you like to get a surprise gift the couple will love? Let me know in the comments below!

DIY Flower Bridesmaid Proposal Box

It's pretty crazy that I'm getting married in less than 5 months. It feels like just yesterday it was the 90's and I was with my little sister, trying on our mom's wedding dress. We would sneak it out of the closet and take turns wearing it. We'd talk about our wedding day and how of course we would be each other's maid of honor. And now that day is almost here and I just can't believe it. Yesterday in my wedding planning update, I mentioned that I had (finally) asked my sister to be my maid of honor with a pretty box I made for her. I decided to document the steps I took to create it, plus I added some links to the products I used (and similar ones) so that you can make them for your bridesmaids too! These boxes are pretty easy to make, and don't require too many supplies. All you really need is a box, a glue gun, some flowers and some decorative tape. Let's get started!

Need a gift box or bridesmaid box that'll put a spring in her step? Look no further! This box is easy and affordable, plus it's a great conversation piece! Click for the full how-to, plus some tips on what to put inside.
Looking for a unique take on the bridesmaid box? Look no further! This flower box is gorgeous on the outside, and filled with all the things she needs on the inside. Click for the full how-to!

You Will Need:

White Photo Box (similar here)
Glue Gun (similar here)
Fake Flowers (similar here and here)
Pink Duct Tape (similar here)
Scissors (here)
 

Filled With:

Fashion Emergency Kit (here)
Cute Card (similar here)
Maid of Honor Tank (similar here)
Mini Hairspray (here)
Monogram Wood Gift Tag (here)
Cupcake Vineyards Prosecco (here)
Color Swatches (here)

Need a gift box or bridesmaid box that'll put a spring in her step? Look no further! This box is easy and affordable, plus it's a great conversation piece! Click for the full how-to, plus some tips on what to put inside.

1. Take your flowers off the stems, and save a few of the leaves for later. I picked the brightest leaves to save.

Need a gift box or bridesmaid box that'll put a spring in her step? Look no further! This box is easy and affordable, plus it's a great conversation piece! Click for the full how-to, plus some tips on what to put inside.

2. Using your scissors, cut the little stems off your flowers to make them as flat as you can. This will make them easier to glue onto your box.

Need a gift box or bridesmaid box that'll put a spring in her step? Look no further! This box is easy and affordable, plus it's a great conversation piece! Click for the full how-to, plus some tips on what to put inside.

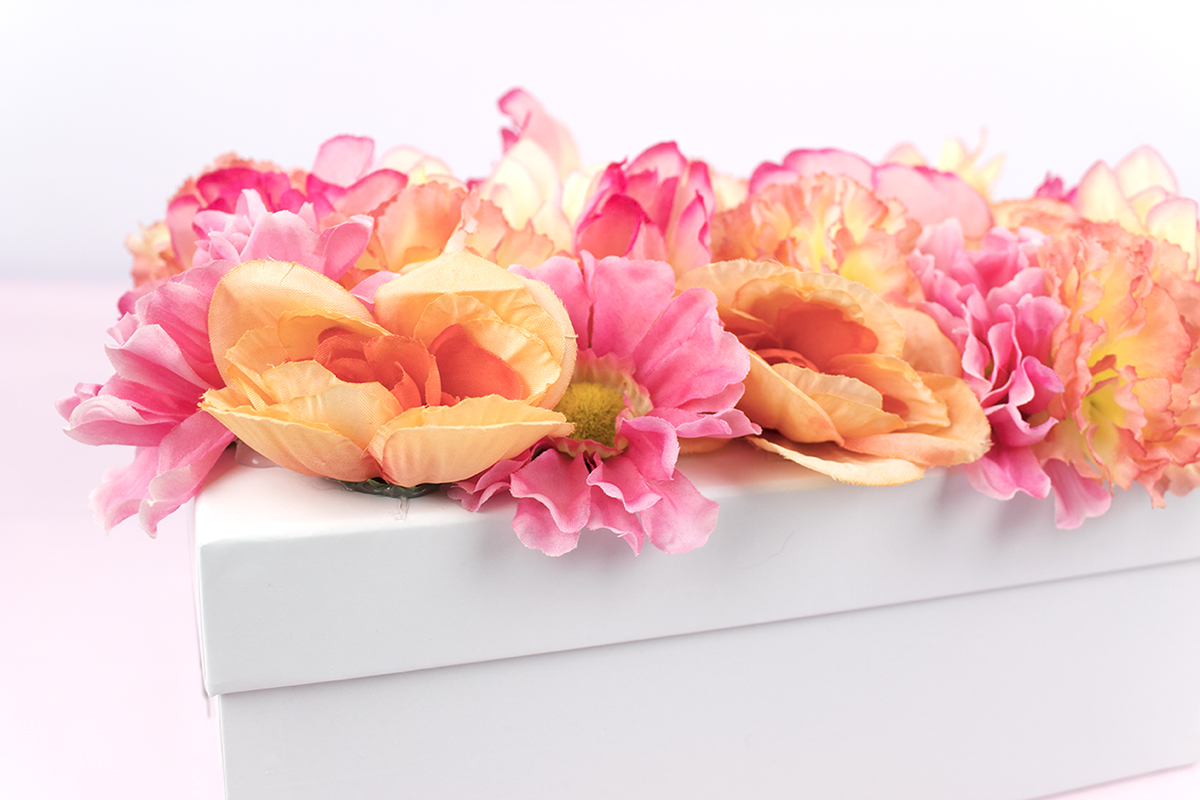
3. Using your glue gun, glue the flowers onto the lid. I mixed the smaller and larger flowers, as well as the different shades of pink. Try to fit them together as well as you can, like some sort of floral tetris.

Need a gift box or bridesmaid box that'll put a spring in her step? Look no further! This box is easy and affordable, plus it's a great conversation piece! Click for the full how-to, plus some tips on what to put inside.

4. Using the leaves, fill in any gaps. I wanted my box to be mostly flowers so I didn't use too many leaves, but you can put as many as you want. I recommend placing all the leaves in, taking a look to see if you like the look, then gluing them in.

Need a gift box or bridesmaid box that'll put a spring in her step? Look no further! This box is easy and affordable, plus it's a great conversation piece! Click for the full how-to, plus some tips on what to put inside.

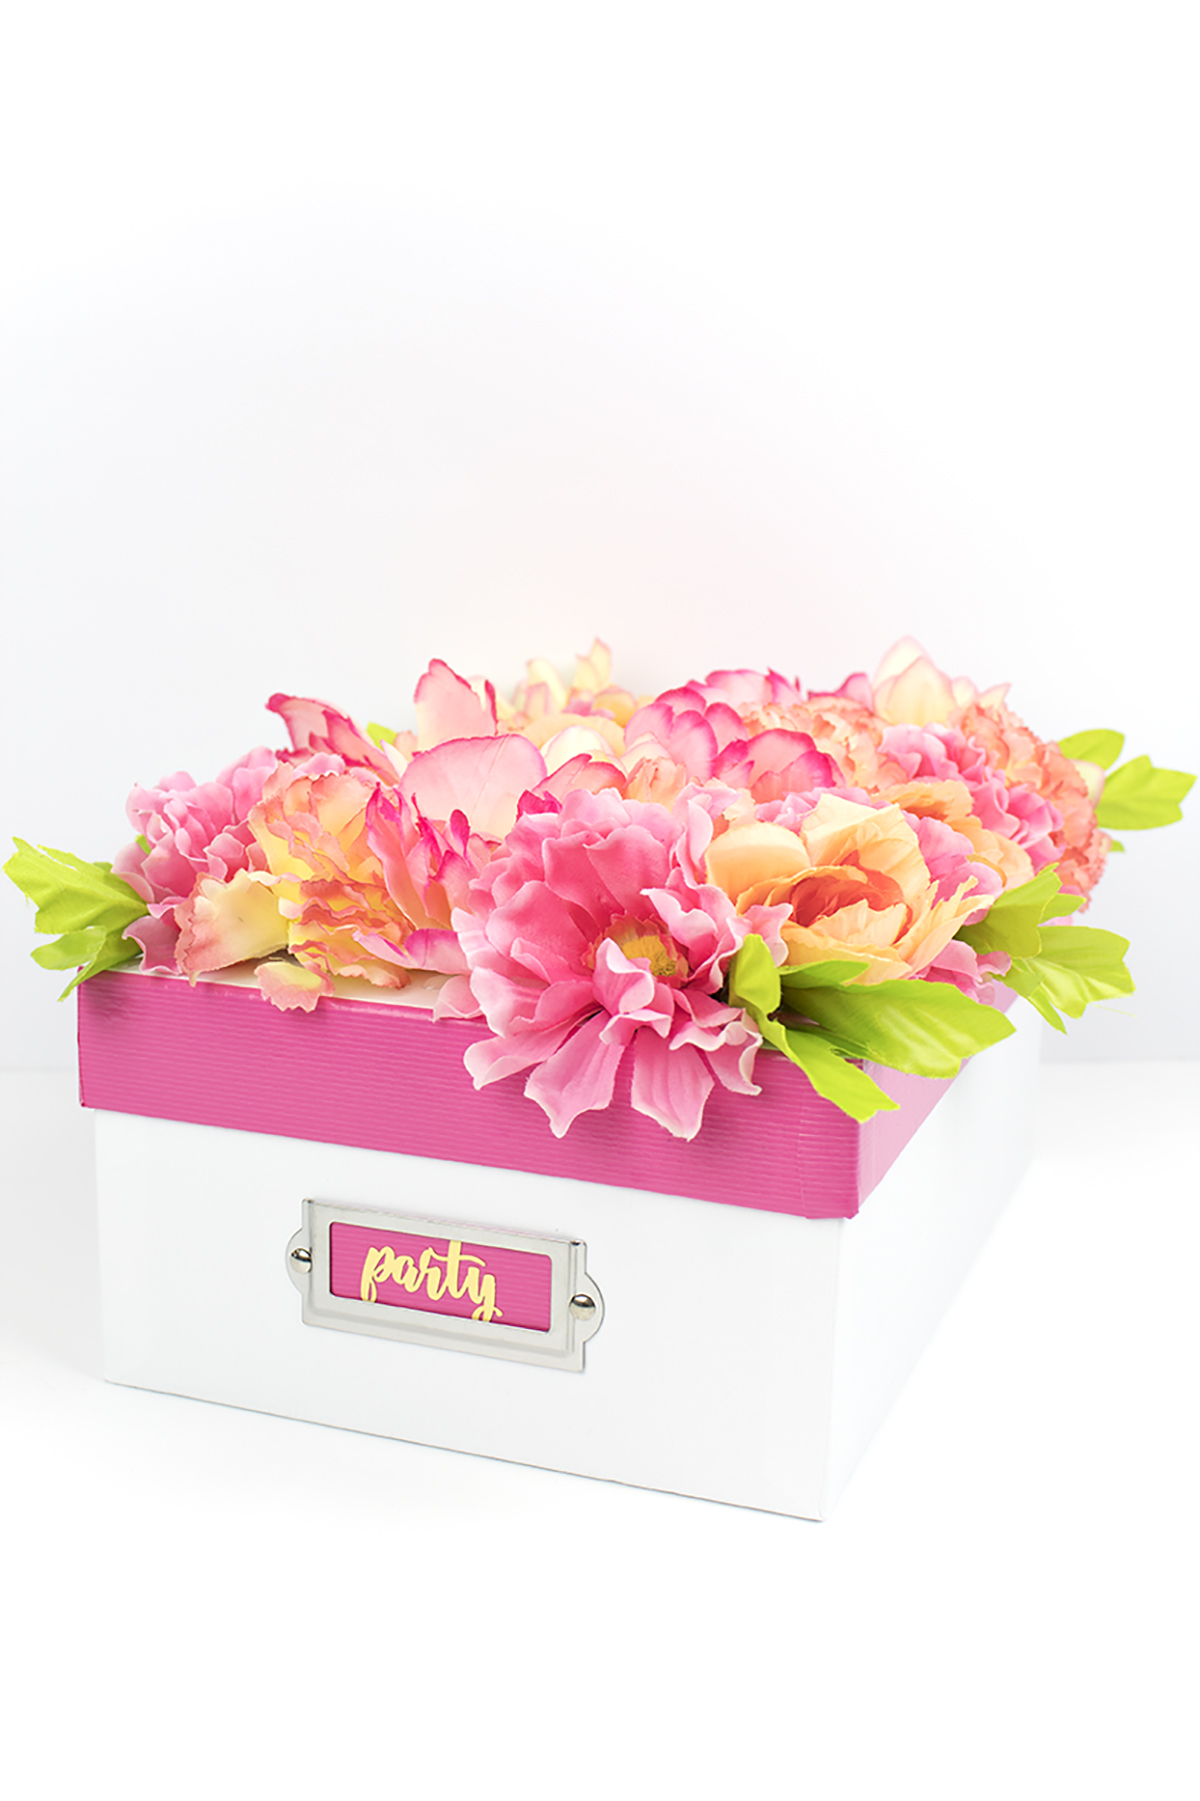
5. Using your tape, wrap the perimeter of the lid to create a nice, neat edge with a pop of color. I used 4 smaller pieces of tape, one for each side, to ensure it would be nice and smooth. Then, take some tape and fold it over itself to fill the label. I used a sticker that said "party" that I found at Michael's.

Filling the box:

Looking for a unique take on the bridesmaid box? Look no further! This flower box is gorgeous on the outside, and filled with all the things she needs on the inside. Click for the full how-to!

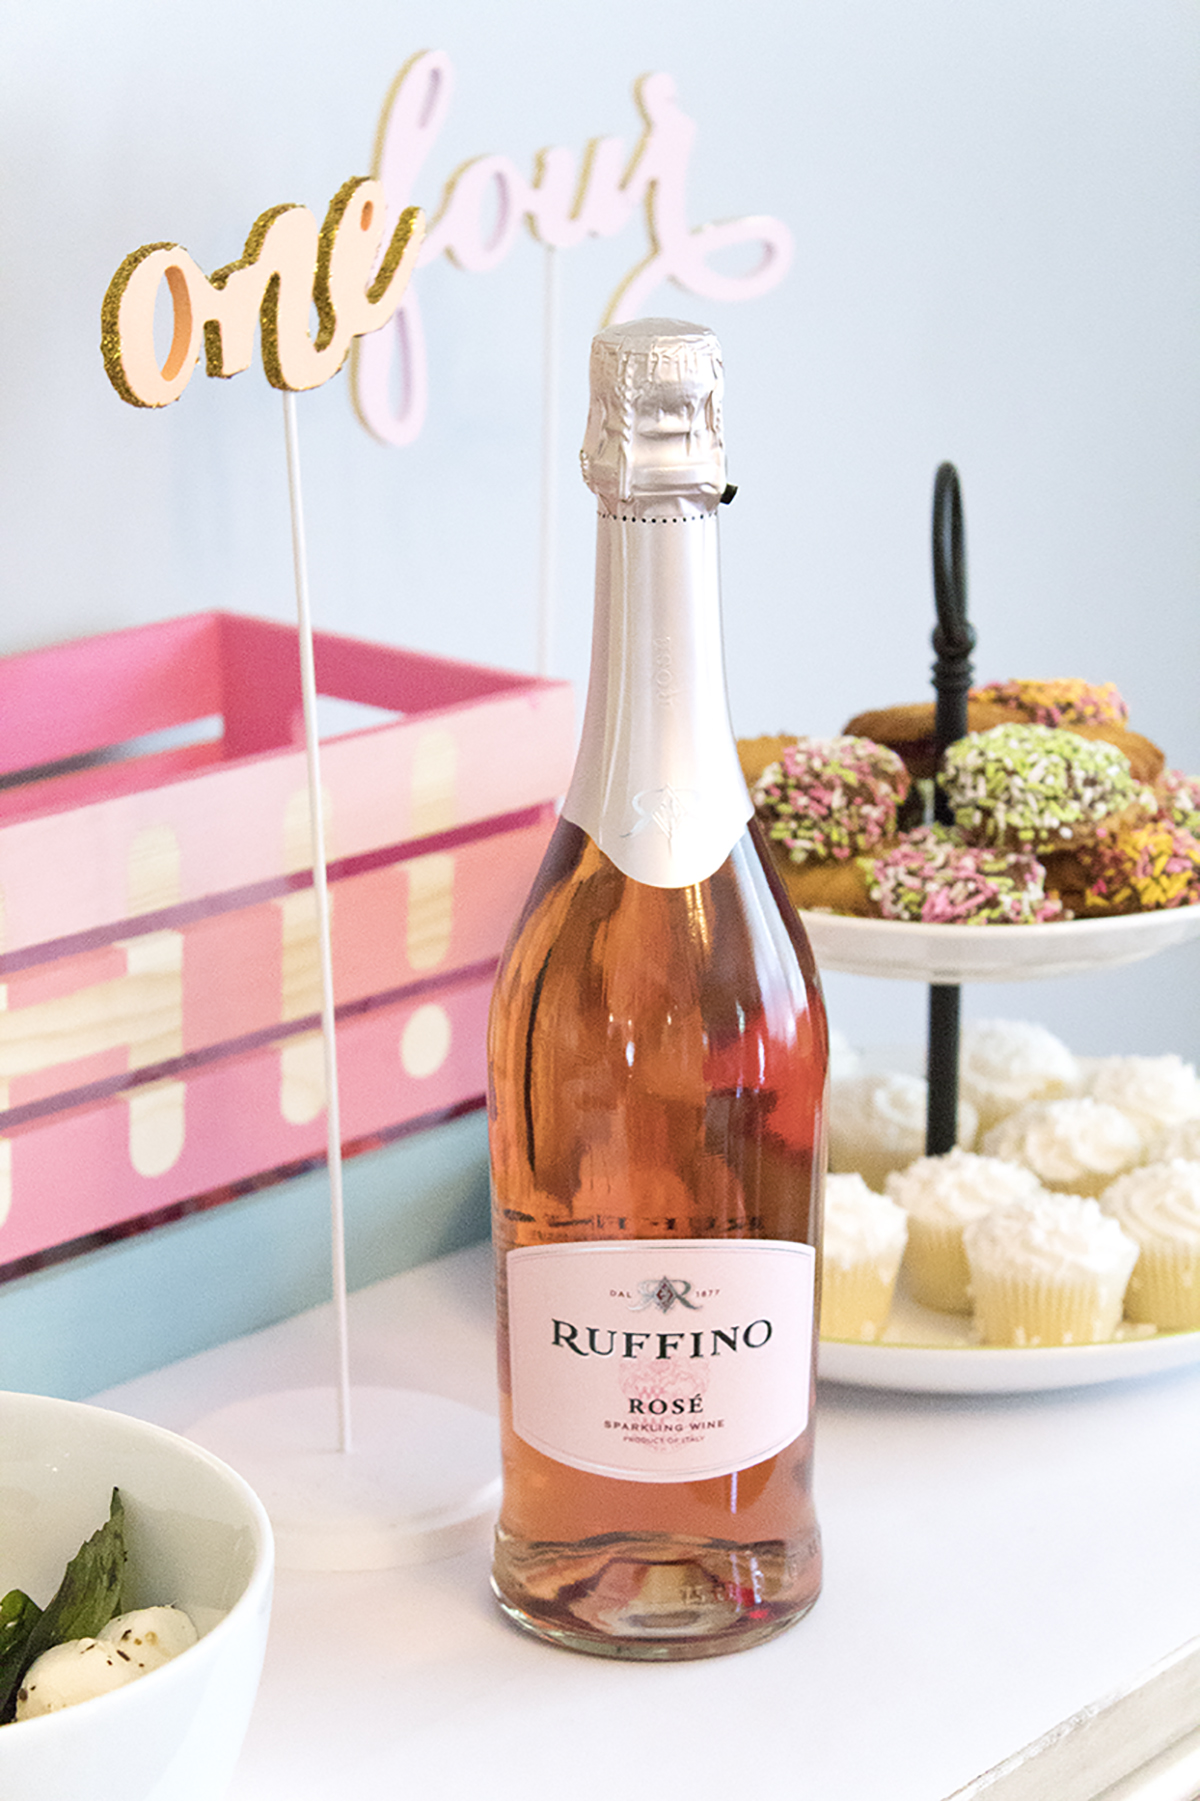
To dress up your Prosecco, take a piece of ribbon and wrap it around the neck of the bottle. Glue a flower onto it for decor. Sign your card with a loving and heartfelt note, and place your items inside the box.

Looking for a unique take on the bridesmaid box? Look no further! This flower box is gorgeous on the outside, and filled with all the things she needs on the inside. Click for the full how-to!
Need a gift box or bridesmaid box that'll put a spring in her step? Look no further! This box is easy and affordable, plus it's a great conversation piece! Click for the full how-to, plus some tips on what to put inside.

Then, give it to your bridesmaids and maid of honor! My sister was pretty happy, since she didn't think I would be officially asking her in a cutesy way. It made me so happy to watch her open the box and see all her reactions as she pulled each item out.

Looking for a unique take on the bridesmaid box? Look no further! This flower box is gorgeous on the outside, and filled with all the things she needs on the inside. Click for the full how-to!

WOOHOO! I now officially have a maid of honor. Now, onto the other 35687 things on my to-do list.

How would you use this box? For a bridesmaid proposal, to hold a birthday gift, maybe for your mom on mother's day?! There are so many possible uses! Are you doing a bridesmaid proposal box? What will you put inside? Let me know in the comments below!

Wedding Planning Update- Just 5 More Months!

Ok guys, it's happening... the wedding is less than FIVE months away! I can't wrap my head around how crazy that is, which is probably a good thing, because if I do I'll probably start to panic about my never-ending to do list. Last we spoke, I was getting ready to head to my wedding venue to wrap up a few things. Here's what we did so far.

Wedding Update- 5 More Months! This month we're chatting about cake tasting, choosing flowers, and more! Click for the full post.

Maid of Honor- Chosen!

Ok ok, my sister knew she was the maid of honor, but we sealed the deal by officially asking her. I wanted to do something special for her, so I made her a box and filled it with some fun goodies. A blog post about that is right here so you can make your own!

Wedding Update- 5 More Months! This month we're chatting about cake tasting, choosing flowers, and more! Click for the full post.

Food Tasting- Done!

That's right guys, we did our food tasting! This was actually really fun, even tough we did it at 10am haha. The food at our venue is SO GOOD, which is a relief for me. I was really afraid that maybe it would only be meh, since I've never eaten there before! However, I'm pleased to say that everything was tasty and attractive. We tried about 6 appetizers, and 3-4 main courses. We are doing a cocktail hour at the wedding (which we'll miss because we are taking photos), hot and cold appetizers, and a buffet dinner. I really hope I get to eat that day, because I'm really excited for the food haha. 

Wedding Update- 5 More Months! This month we're chatting about cake tasting, choosing flowers, and more! Click for the full post.

Cake Tasting- Done!

Right after our food tasting, we did the cake tasting. I was really excited for the cake tasting, but it was actually really difficult to do. First off, it was hard to decide on the combinations, since we had 4 cake flavors and 5 fillings to try. But, worst of all, it was nauseating! The cake and fillings were really sweet, and it could have been the fact that it was about 10:30am, but I started to get sick of it after a while. Since my fiance had strong feelings about what he wanted as the filling, I let him decide. I really couldn't eat anymore cake to come up with an alternative. We picked a raspberry jam filling, with one tier of chocolate cake and one tier of vanilla cake. Mmmm. For anyone wondering, we tried cake flavors in chocolate, vanilla, strawberry swirl, and raspberry swirl. For the fillings, we tried raspberry jam, raspberry mousse, Bavarian creme, custard with fresh strawberries, and white chocolate mousse.

Flowers/Wedding Colors- Done!

We met with our florist to go over the flowers for the wedding, and in doing so we finally narrowed down the color scheme for the wedding. I was super unsure about what to pick for colors, but in the end I'm excited with the ones I chose, because they feel very "me". I think it'll look gorgeous in the flowers as well! I'm a little nervous about the flowers, since I'm the rare girl that hates roses, but we are doing a mix of flowers and should only be having garden roses in our arrangements, which are very large and open. They barely look like roses! Otherwise, I'll have to learn to love roses and hopefully associate them with my wedding day.

Wedding Rentals- Done!

At the Bridal show, we met someone that did wedding rentals, so we set up a meeting with him. He came armed with lots of amazing goodies to dress up our tables, like sequin tablecloths, charger plates, napkins, utensils, etc. We decided to add some draping to the reception, as well as some nice napkin rings as well. Then it came to the debate- should we upgrade to nicer utensils, napkins and charger plates? We began to wonder if our family would notice, and in the end we decided it wasn’t worth the added cost. Everything adds up, and we decided to instead go with other stuff that would make the reception more fun, instead of just prettier. My biggest debate was with the charger plates. The glass ones were SO PRETTY but they cost about 5x more than the ones from Dollar Tree. I asked on a wedding Facebook group what they thought about charger plates. Nearly everyone said they went with the Dollar Tree ones and didn’t regret it.

Wedding Update- 5 More months! This month we're chatting about cake tasting, choosing flowers, and more! Click for the full post.

Needs to get done:

Dresses for my mom and sister- These ladies helped me pick my dress, so now I need to help them pick theirs! Anyone know of any good places to go? We tried David's Bridal and Macy's, but there wasn't anything too wow-worthy there.

Wedding Invitations- Yea, we need to pick or create these, and get them mailed out soon! Our wedding is on a holiday weekend, so we want people to know all the deets ASAP. My sister is a graphic designer, so she may work on creating some for us. Depends on timing!

Hair & Makeup Trial- I have to go to my venue (3 hrs away!) for my hair and makeup trial. I have a good idea of what I want to do for my hair, so that's fine. Now I need to decide on makeup. I rarely wear makeup, so I'm hoping I can just look like a glam version of myself, instead of looking like a stranger!

Misc Decor- My FAVORITE part of party planning is coming up, and that's purchasing the decor!! I'm so so excited for this! I have a good idea of what I want, so I just need to go shopping. Any excuse, right? ;)

Overall I think we're making good headway, but I think we really need to start acting fast to get thing done, and avoid scrambling at the last minute! I'm going to take it one day at a time, but I think I need to get my to-do list in order ;) So, what are your tips for getting wedding planning tasks in order? Should I make lists, add tasks to my calendar, don't sweat the small stuff?! Let me know in the comments below!

How to Rock Your DIY Party Projects

You know how it goes. You're planning a party and have spent hours scouring the internet for the best ideas. You've got a whole list of projects and you're determined to throw the very best party anyone has ever seen. Ever! But, by the time party day comes around, you are scrambling. What happened between that day you were planning and had "so much time!" and today? Probably all the DIY projects you didn't leave yourself enough time for! Although these DIY projects may seem easy, they can be very time consuming, especially when you're doing several of them. Here are some tips to ensure you have the DIY party of your dreams!

Planning a DIY party? Read my top tips to avoid last minute speedbumps, plus my favorite craft items- and how to save money on them! Click to learn more. #diyparty #partyplanning #diyprojects

Divide them up.

Pick 1-2 must-do projects, 2-3 like-to-do projects and 1-2 if-I-have-time projects. This way, you can do as many projects as you have time for without sacrificing the projects you want to do most. 

Have a crafting party.

If you want to make a lot of projects and have crafty friends, invite them over! Be sure you have all the supplies on hand, then get some snacks, a bottle of wine, and start crafting. You can make more projects in a fraction of the time. Plus, it's a fun bonding experience! 

Learn to delegate.

Ok, maybe you're not the best cake decorator. Instead of trying to do it yourself (and possibly failing), how about having a friend assist? Ask around and see if anyone can come take on some tasks. They'll probably enjoy it! Just be sure to give them a deadline and follow up to make sure it gets done. The last thing you need is to be left scrambling on party day!

Don't leave it until the last minute.

The best thing you can have when it comes to DIY projects is time. Leave a few weeks to work on your projects to ensure they come out nicely and get done in time. Believe me when I tell you that things can take longer than you think!

Maximize your time.

To get the most out of your time spent crafting, try to make as many of each project as you can per session. This way you won't end up taking supplies in and out or wasting paint, etc. You'll also get into the rhythm of it, and be able to make them much faster than if you start and stop, making 2 projects at a time.

Slow and steady wins the race.

On that same note, don't wait until you have a large block of time to start on projects. If all you have are short periods of downtime, use them! It's better to work on 1-2 items per day than trying to rush everything into one day, right? I always love to pop on my favorite movie or TV show, grab a TV table, and whip up some crafts projects while I watch TV.

Create an assembly line.

Sometimes it's easier to batch your projects- aka doing "like" projects at the same time. What does this mean? Painting all your beads at once, cutting out all your shapes in one sitting, or gluing everything together. This will help you to find the most efficient way to do each step through repetition. 

Don't be a perfectionist.

Yes, you want this project to come out perfectly. But does it have to? If you spend too much time perfecting each project, you'll be missing out on valuable time you could be spending on other projects! This is especially important when you have others helping. Allow yourself to delegate and don't spend time micromanaging everyone. It's supposed to be fun! 

Reduce shopping time.

Create a shopping checklist so that you can avoid multiple trips to the store. A quick way to derail your productivity is to stop midway because you forgot something you needed. Been there... done that!

Free printable craft-2.png

Have you ever attempted a DIY party project at the last minute, and then realized you were in WAY over your head? Let me know in the comments below!

How to Plan a Disney Themed Party

Whenever I thought about my wedding day, I imagined myself stepping out of a carriage in front of Cinderella's castle. I'd be wearing my big poofy wedding gown, and walk up to my prince charming, who waited for me in front of the castle. And then, just as he leaned in to kiss me, reality came and slapped me in the face. It costs TONS of money to get married in front of Cinderella's castle. And although it would be AH-MA-ZING, there's no way I have that kind of money for my dream Disney World wedding. So, what's a girl to do? Well, clearly, it's to regroup and plan an amazing Disney-themed engagement party.

Psst- If you want to see all the photos from the party, be sure to check out this post!

How to plan a Disney themed party, filled with craft projects, links, and decor ideas! Perfect for weddings, engagement parties, and birthdays. Click for the full post!

The Plan

To prep, I created a Pinterest board and pinned any Disney ideas I liked. I decided that since I wanted to do several different movies, I needed something to tie them all together. I decided to focus on one color scheme for all the elements and centerpieces. I picked mint and peach/coral since they are some of my favorite colors, and also because my mom had those on her wedding day, so they were important to me. I also added pink (my favorite!) and metallics to give the party a little sparkle.

The first thing I did was I sat down and listed out all the Disney movies I wanted to incorporate and noted the elements from each. At this point, you're just taking notes, so write down anything you wish. The more the better! I had things like Snow White- wishing well, jewels, birds, apples. Just a simple list of word association for each move.

The next step was to list out all the things I needed to collect to add these elements to the party. My list included things like vintage books (Beauty and the Beast), seashells (The Little Mermaid) and a globe (Up). Step 2 was to collect everything. I started by searching around my house, and then going to my parent's office. They had a globe and a few winter decorations that were perfect for Frozen. I also was able to utilize their huge collection of picture frames for the quotes! The more you can borrow for the party, the better. Any money saved on decor can be allocated to something else ;)

Once I collected all my freebies, I went shopping!

How to plan a Disney themed party, filled with craft projects, links, and decor ideas! Perfect for weddings, engagement parties, and birthdays. Click for the full post!

1. Magic Lamp 2. Clock 3. Cloche 4. Ariel’s Candelabra 5. Frog Prince 6. Glass Slipper 7. Moss 8. Pumpkin Jar 9. Coral 10. Rapunzel’s Lantern 11. Mrs. Potts 12. Flamingo Lawn Ornament 13. Enchanted Rose 14. Cinderella’s Carriage 15. Lumiere

Thrift Store

A lot of my stuff came from the thrift store. I was able to repurpose some items, like turning a mail holder into a wishing well. I spray painted a flounder kids' cup into a gold statue for the Little Mermaid table. And, all a tarnished teapot needed was a little elbow grease to become a wonderful Mrs. Potts.

Christmas Tree Shops

If you're looking for affordable decor that seems high end, look no further than Christmas Tree Shops! I purchased all my votive holders, the seashells, and the Beauty and the Beast cloche from there.

How to plan a Disney themed party, filled with craft projects, links, and decor ideas! Perfect for weddings, engagement parties, and birthdays. Click for the full post!

1. Gold Frames 2. Be Our Guest Napkins 3. Love Stirrers 4. Beverage Cups 5. Coral and Mint Dinner Plates 6. Folding Cocktail Table 7. Tablecloth Clips 8. Striped Lanterns 9. Sequin Table Runner 10. White Tent 11. Bottle Opener 12. Shell Garland 13. Pink and Aqua Best Day Ever Tags 14. Beverage Dispenser 15. Gold Dinner and Coral Dessert Plates

Oriental Trading and Party City

Almost all the tableware, decor, and barware came from Oriental Trading and Party City. Oriental trading had these great seashell garlands, and paper lanterns in any color you can imagine. Party City had these Be Our Guest napkins (perfect!), colored cups, and engagement napkins. If you mix and match all the items, you can create a unique mix that can incorporate all the elements of the party.

Amazon

Oh, Amazing Amazon. How did we ever survive without thee?! I was able to find all the obscure things I needed on Amazon- a Cinderella carriage, glass slippers, a tiny magic lamp, and a cute frog prince. I also found some of the barware, like these cute bottle openers and these cute drink stirrers. I added these sequin table runners in all sorts of colors to each table for a little extra sparkle. My favorite thing was probably these pumpkin candle holders that I spray painted gold. I'm using them in my fall decor right now, and they are just soo cute! Ditto for these cheap little pumpkins that I spray painted gold and silver. 

Dollar Store

The dollar store was great for random little items. Things like these horses that I spray painted, these cheap silver trays that looked fancy, and even a magic mirror! I also got my books for the Beauty and the Beast table from the Dollar Store. It was a pretty funny sight- me removing all the book jackets to check out the covers and make sure they were the right colors for the party. In the end, I settled on A World of Pasta, which obviously Belle reads.

Michaels

I don't think any party could be complete without a trip to Michaels. it was here that I picked up some moss for the sign-in area, the rose for my Beauty and the Beast cloche, and a stand for my signature cocktails sign. I also picked up the supplies for the Tangled Lanterns I made using the Cricut.

Misc Crafts

How to plan a Disney themed party, filled with craft projects, links, and decor ideas! Perfect for weddings, engagement parties, and birthdays. Click for the full post!

After I did the purchasing, I also had a few of my own crafts projects. First, I made these DIY balloon pins. I wanted something to distinguish the members of our immediate family, and I wanted it to have an Up vibe to it, like a cross between the balloons and the infamous grape soda pin.

The Wishing Well was made from some sort of hanging letter holder the thrift store. I had my fiance create posts and a roof out of scrap wood and paint stirrers to create a wishing well, and I painted it all white to match. A few vines and flowers from my craft hoard completed the look. 

I had my fiance make these adorable croquet mallets from Damask Love. They were the perfect Disney-themed activity and created an awesome photo op! They were one of my favorite elements of the party. My fiancé thought I was crazy when I told him to make them, but everyone loved them.

For an easy project, create a game of ring toss (aka "engagement ring" toss). All you need are some empty wine bottles. If you don't have any, this is the perfect excuse to drink lots of wine and de-stress from party planning. Soak the bottles to remove the labels, and let them dry fully. Spray paint them in fun colors, arrange them in a box, and toss on some colorful rings

How to plan a Disney themed party, filled with craft projects, links, and decor ideas! Perfect for weddings, engagement parties, and birthdays. Click for the full post!

If you want to learn more about planning a Pinterest worthy party, be sure to sign up to get your FREE Anatomy of a Pinterest Worthy Party guide! It's full of helpful hints on how to pick a theme, the little details that will make your event unique, and tips to take great photos of your event. And, there's even a checklist so you don't forget anything! So what are you waiting for? Get yours now!

If you want to see all the photos from the party, be sure to check out this post!

Are you going to try and plan your own Disney-themed party? What's something you MUST have? Let me know in the comments below!